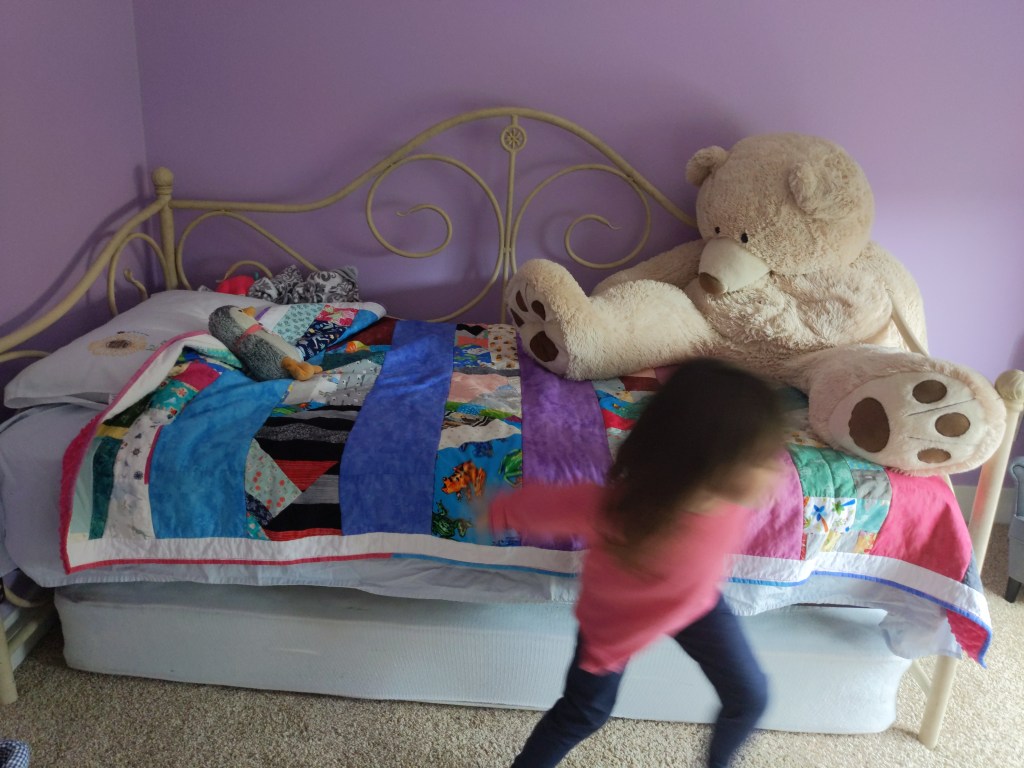
My sister called and said the quilt that our Great Grandmother made her was falling apart because she is now mid thirties, has been using it since she was basically a baby, and her two kids have been using it for several years now. She asked when her kids were getting quilts…the answer is RIGHT NOW! and double sided too.
Admittedly, I made these quilts way too quickly. I had a different idea in my head about how they should be but then I decided to make them both with a combined deadline of two weeks because I really wanted to hand deliver them. Plans changed and I wasn’t able to come home between trips the way I wanted too, so I ended up having to mail them anyway. Oh well, they can have more intricate quilts when they are older.
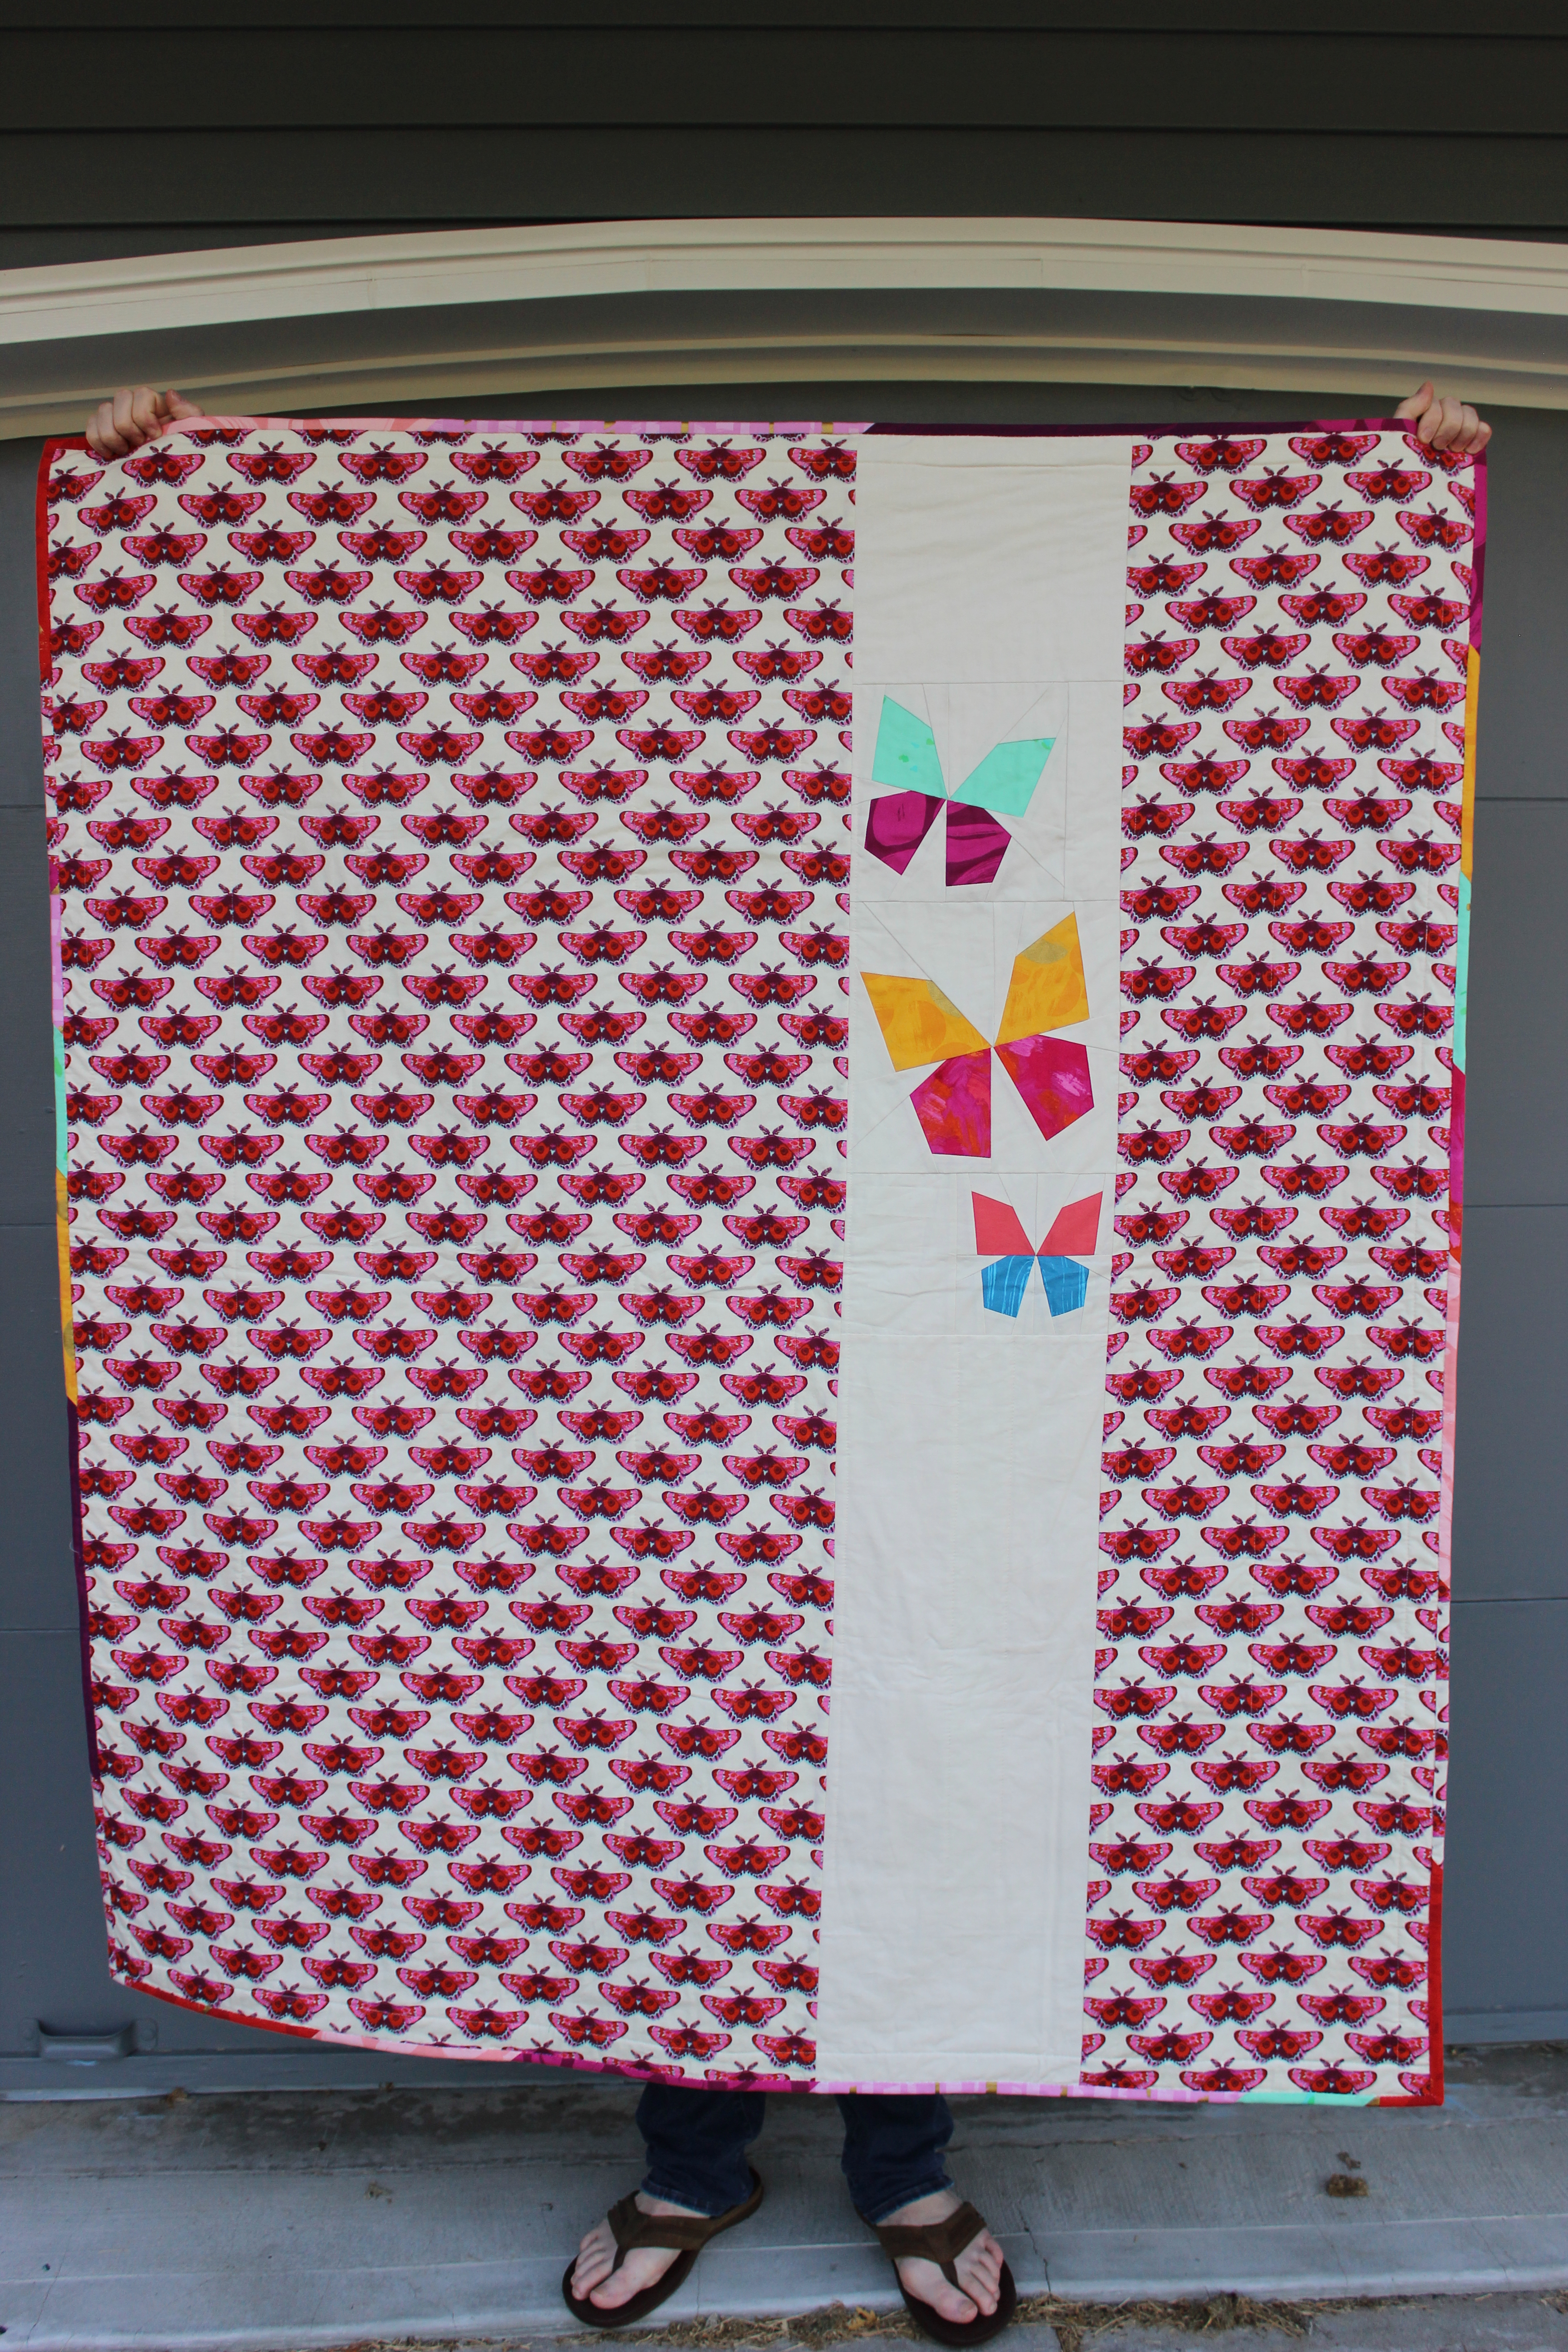
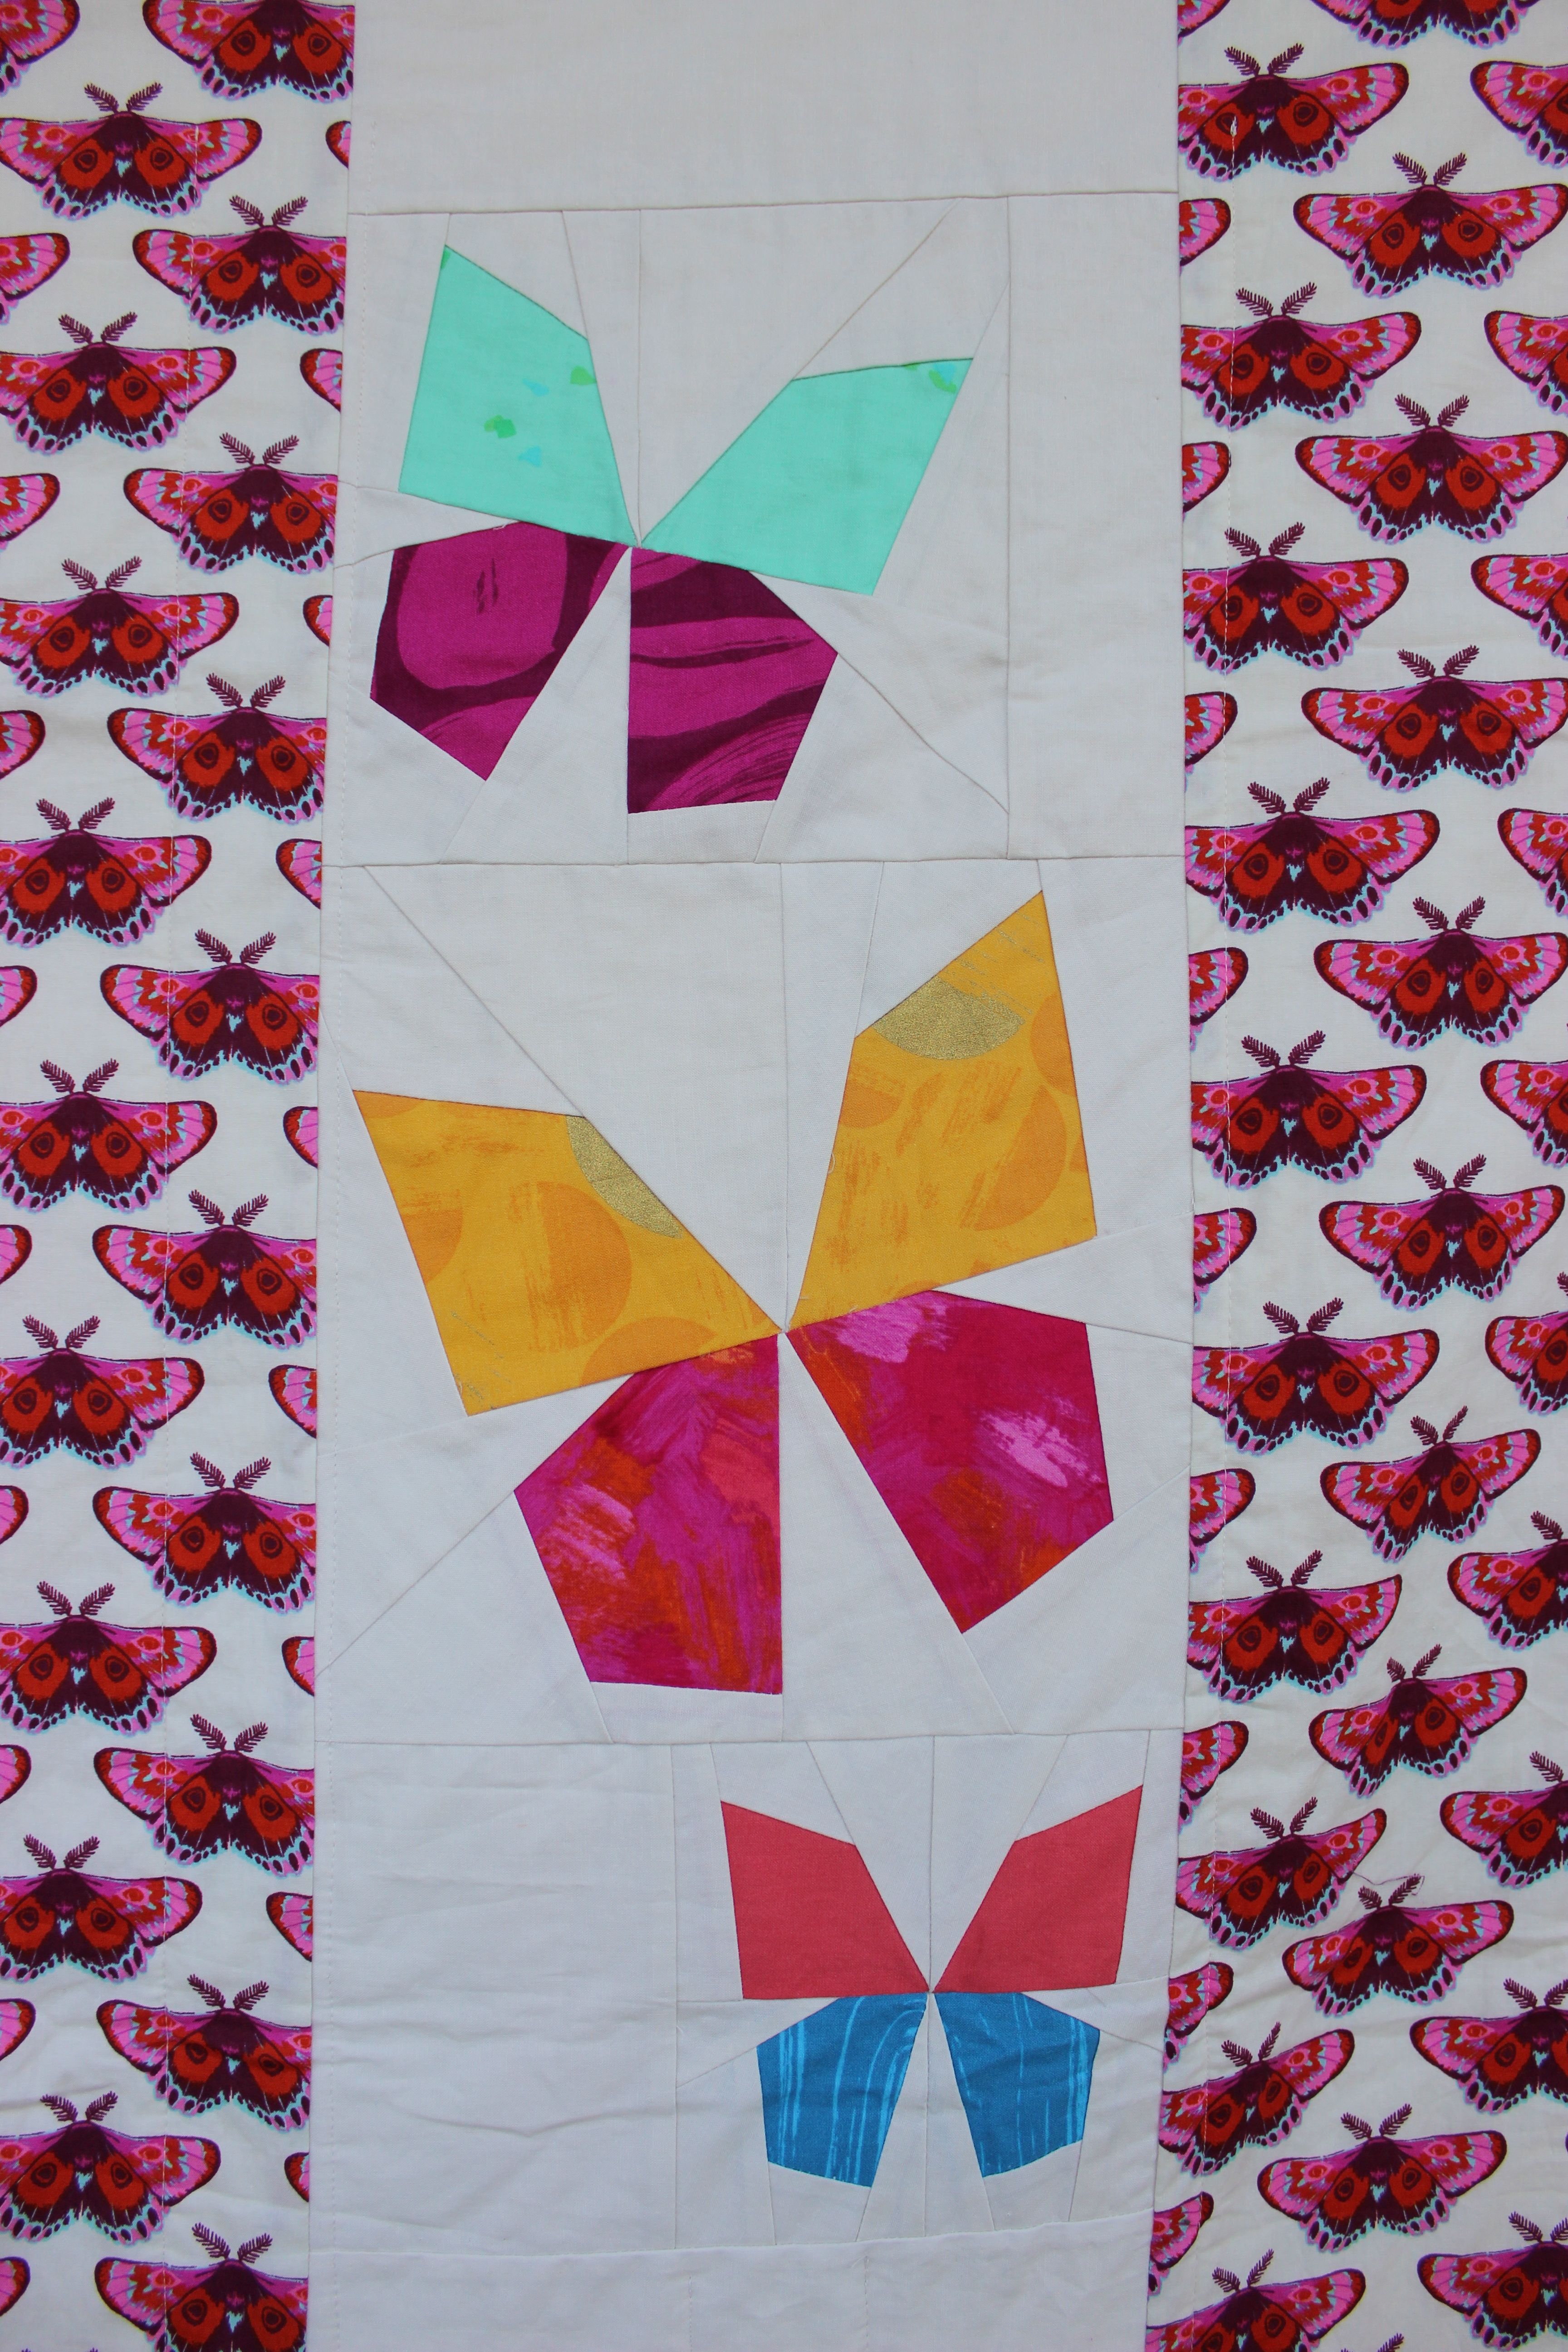
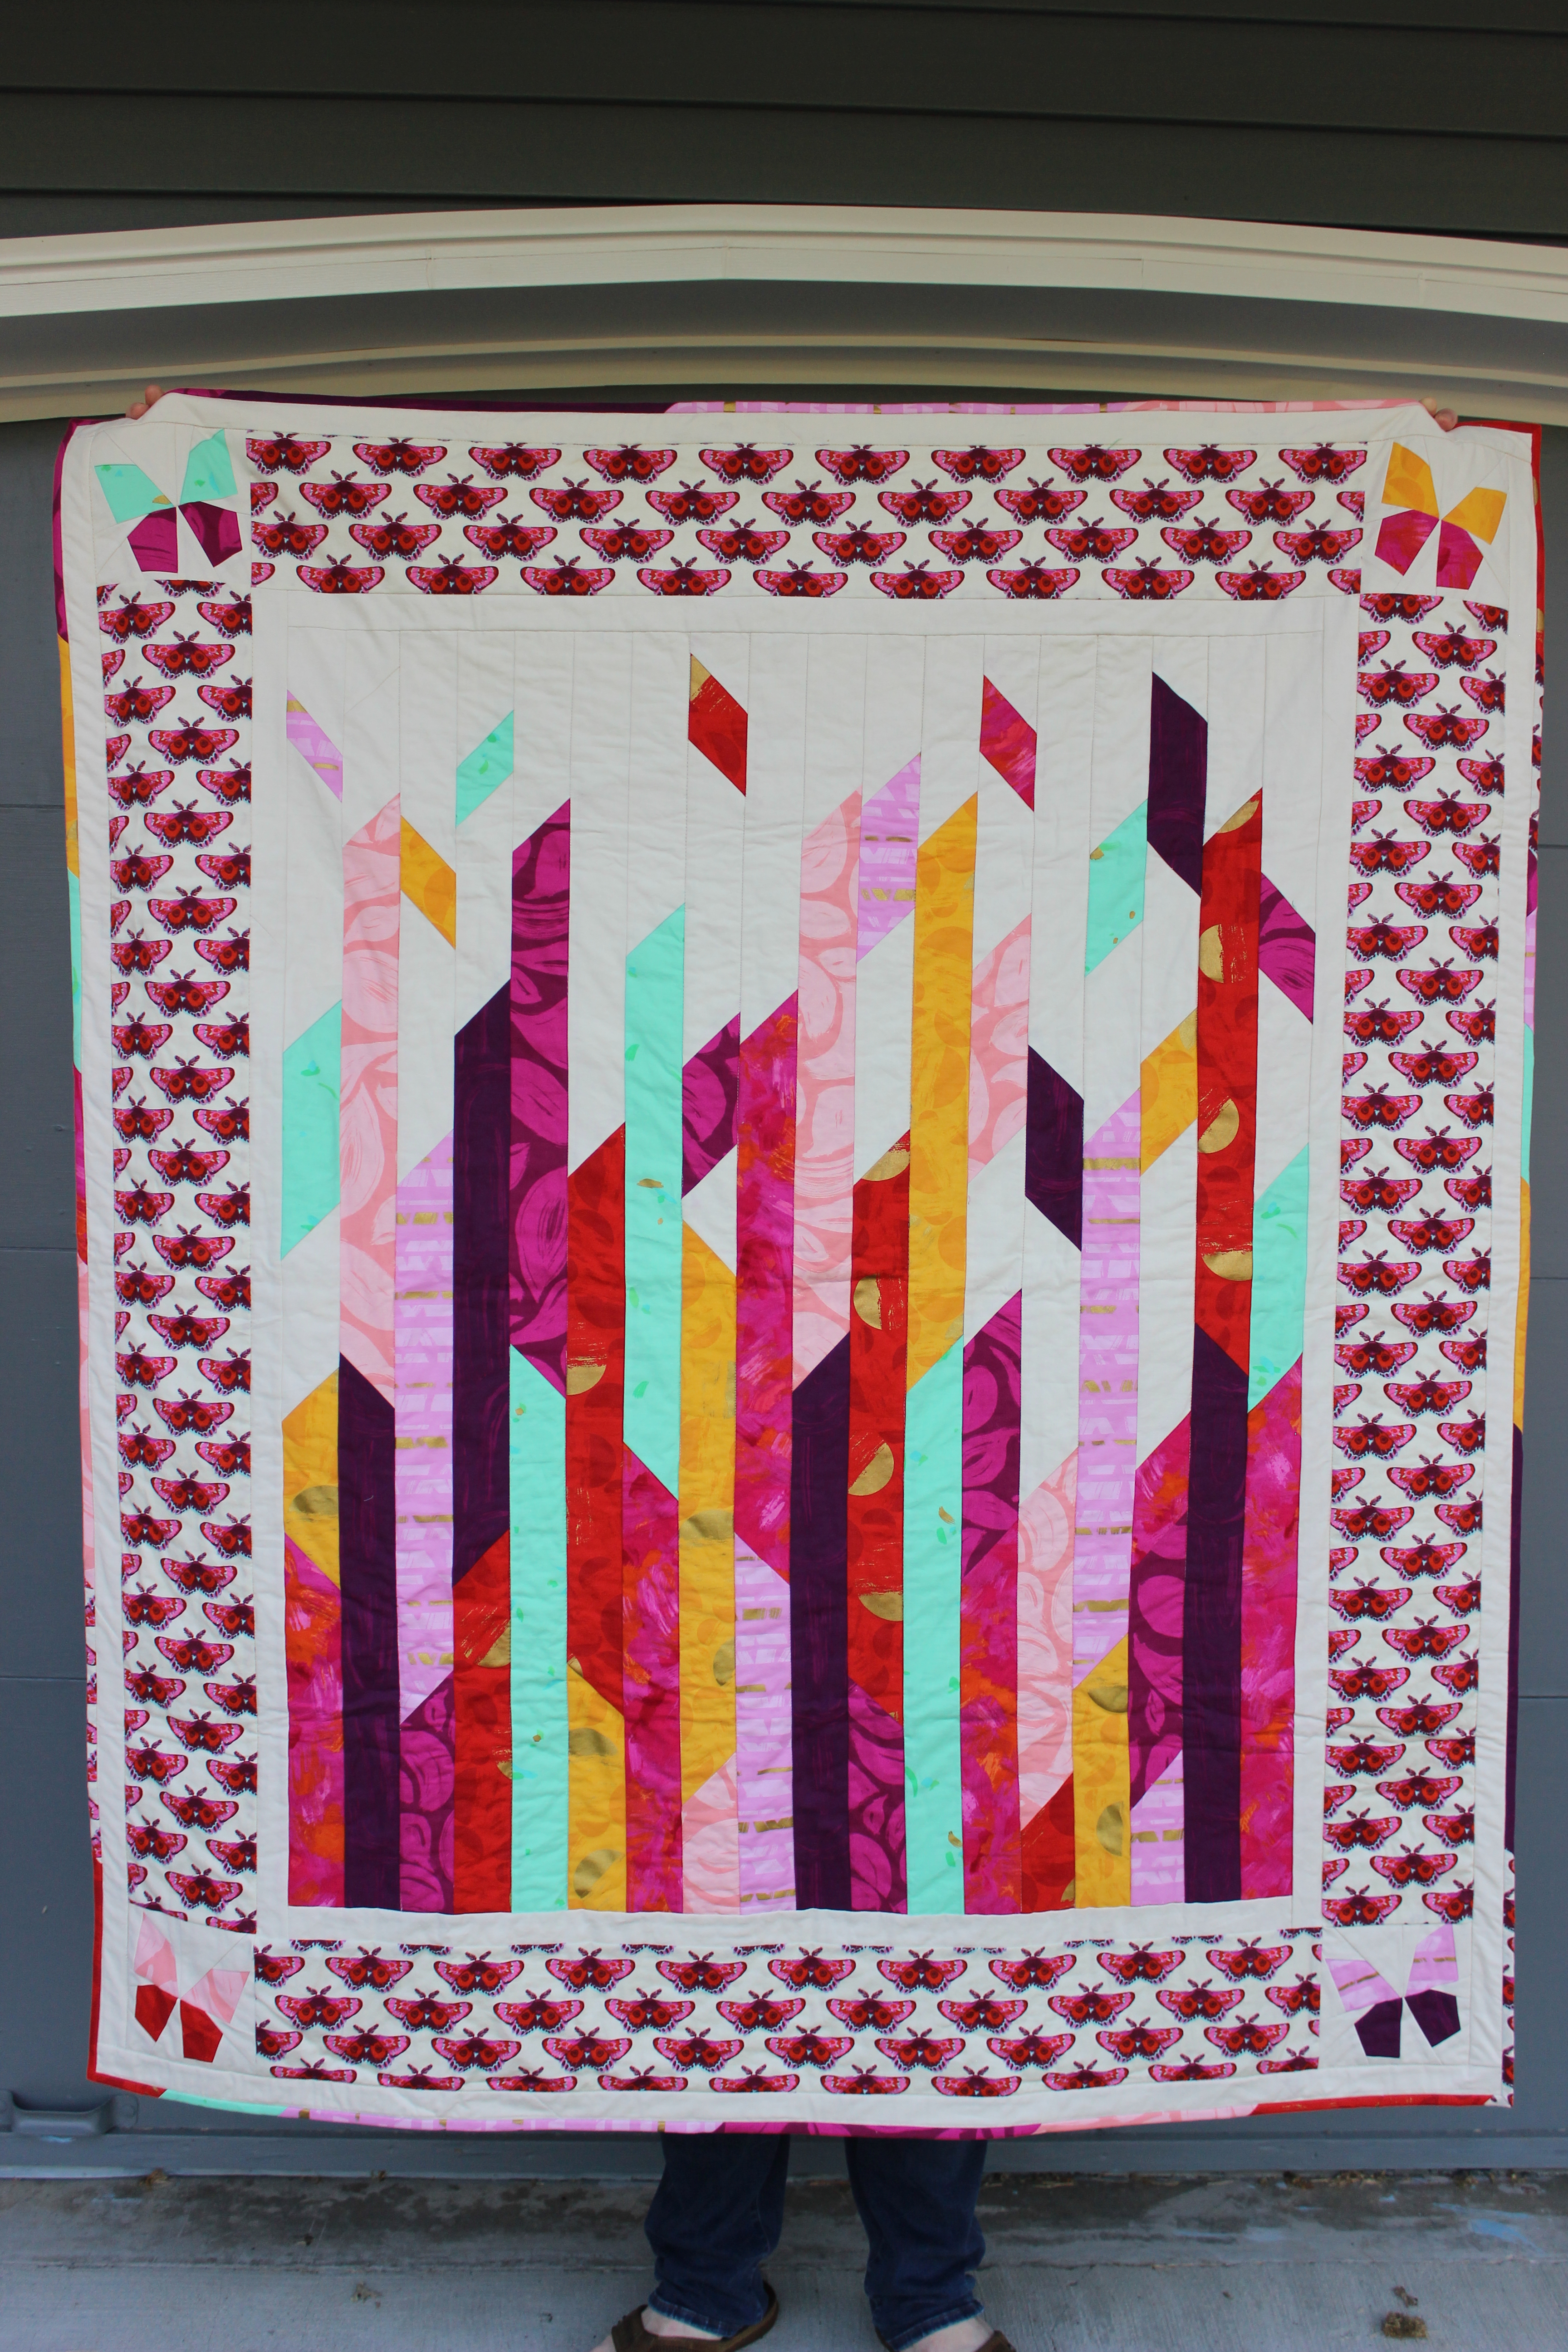
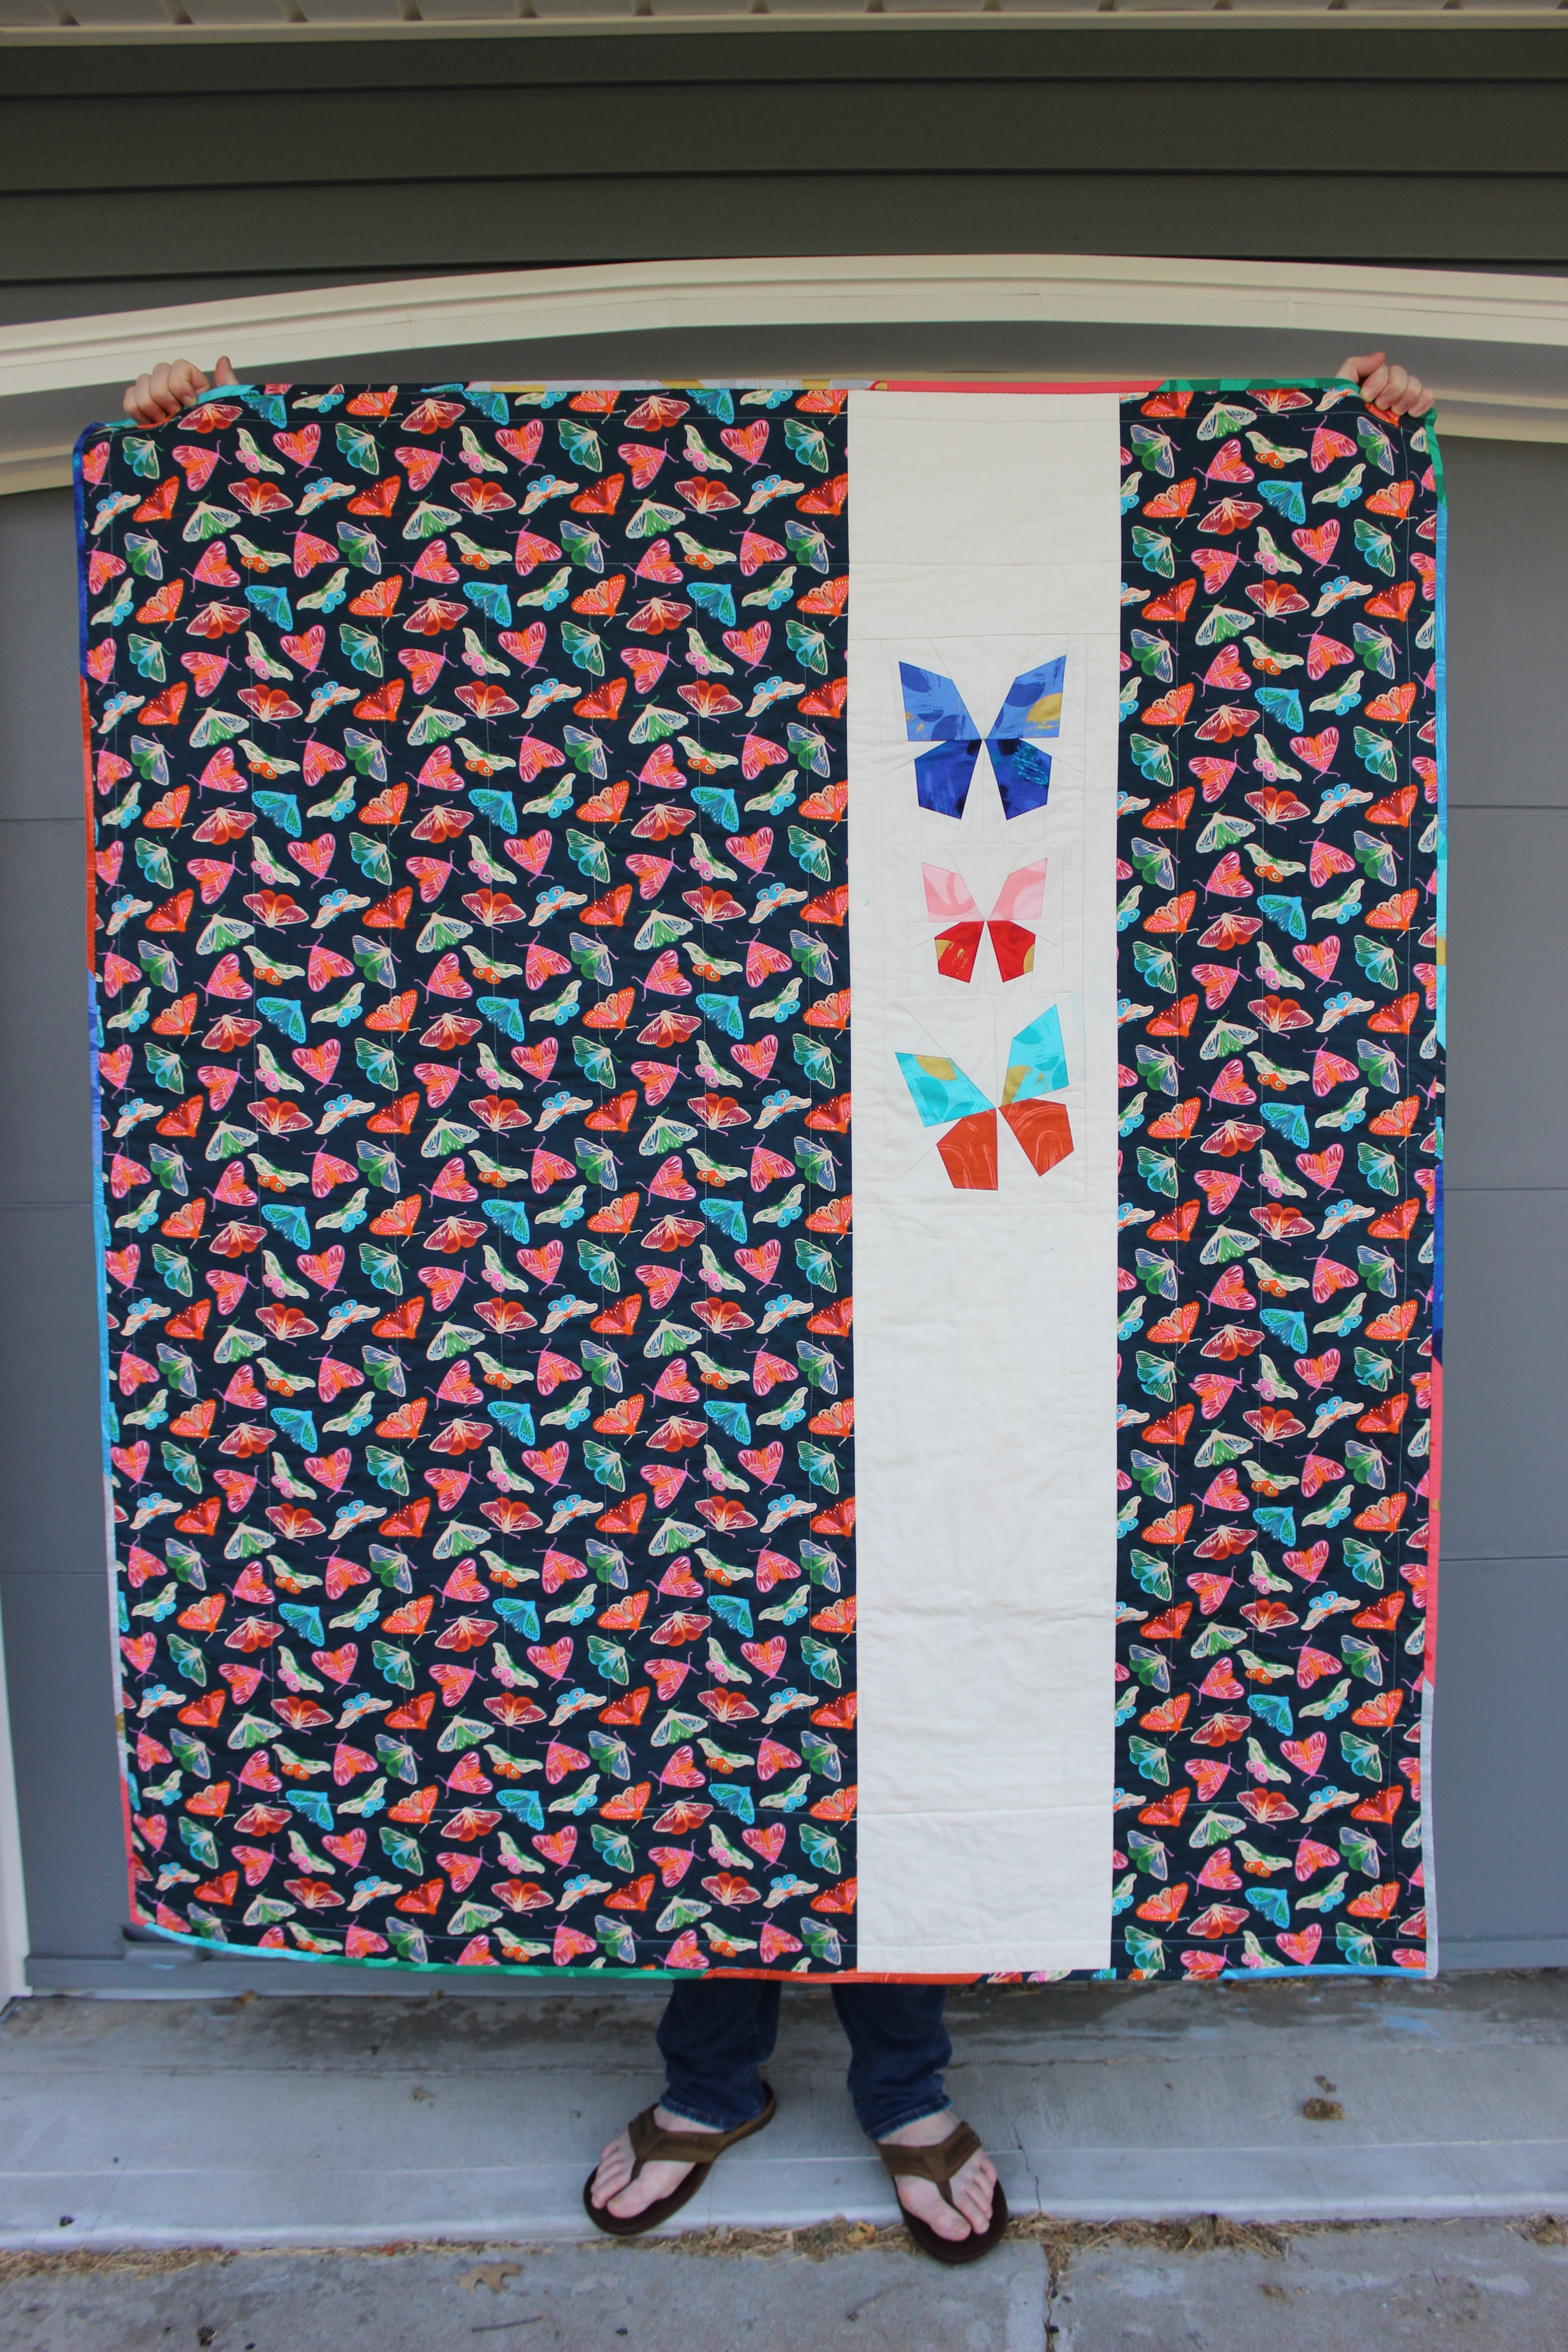
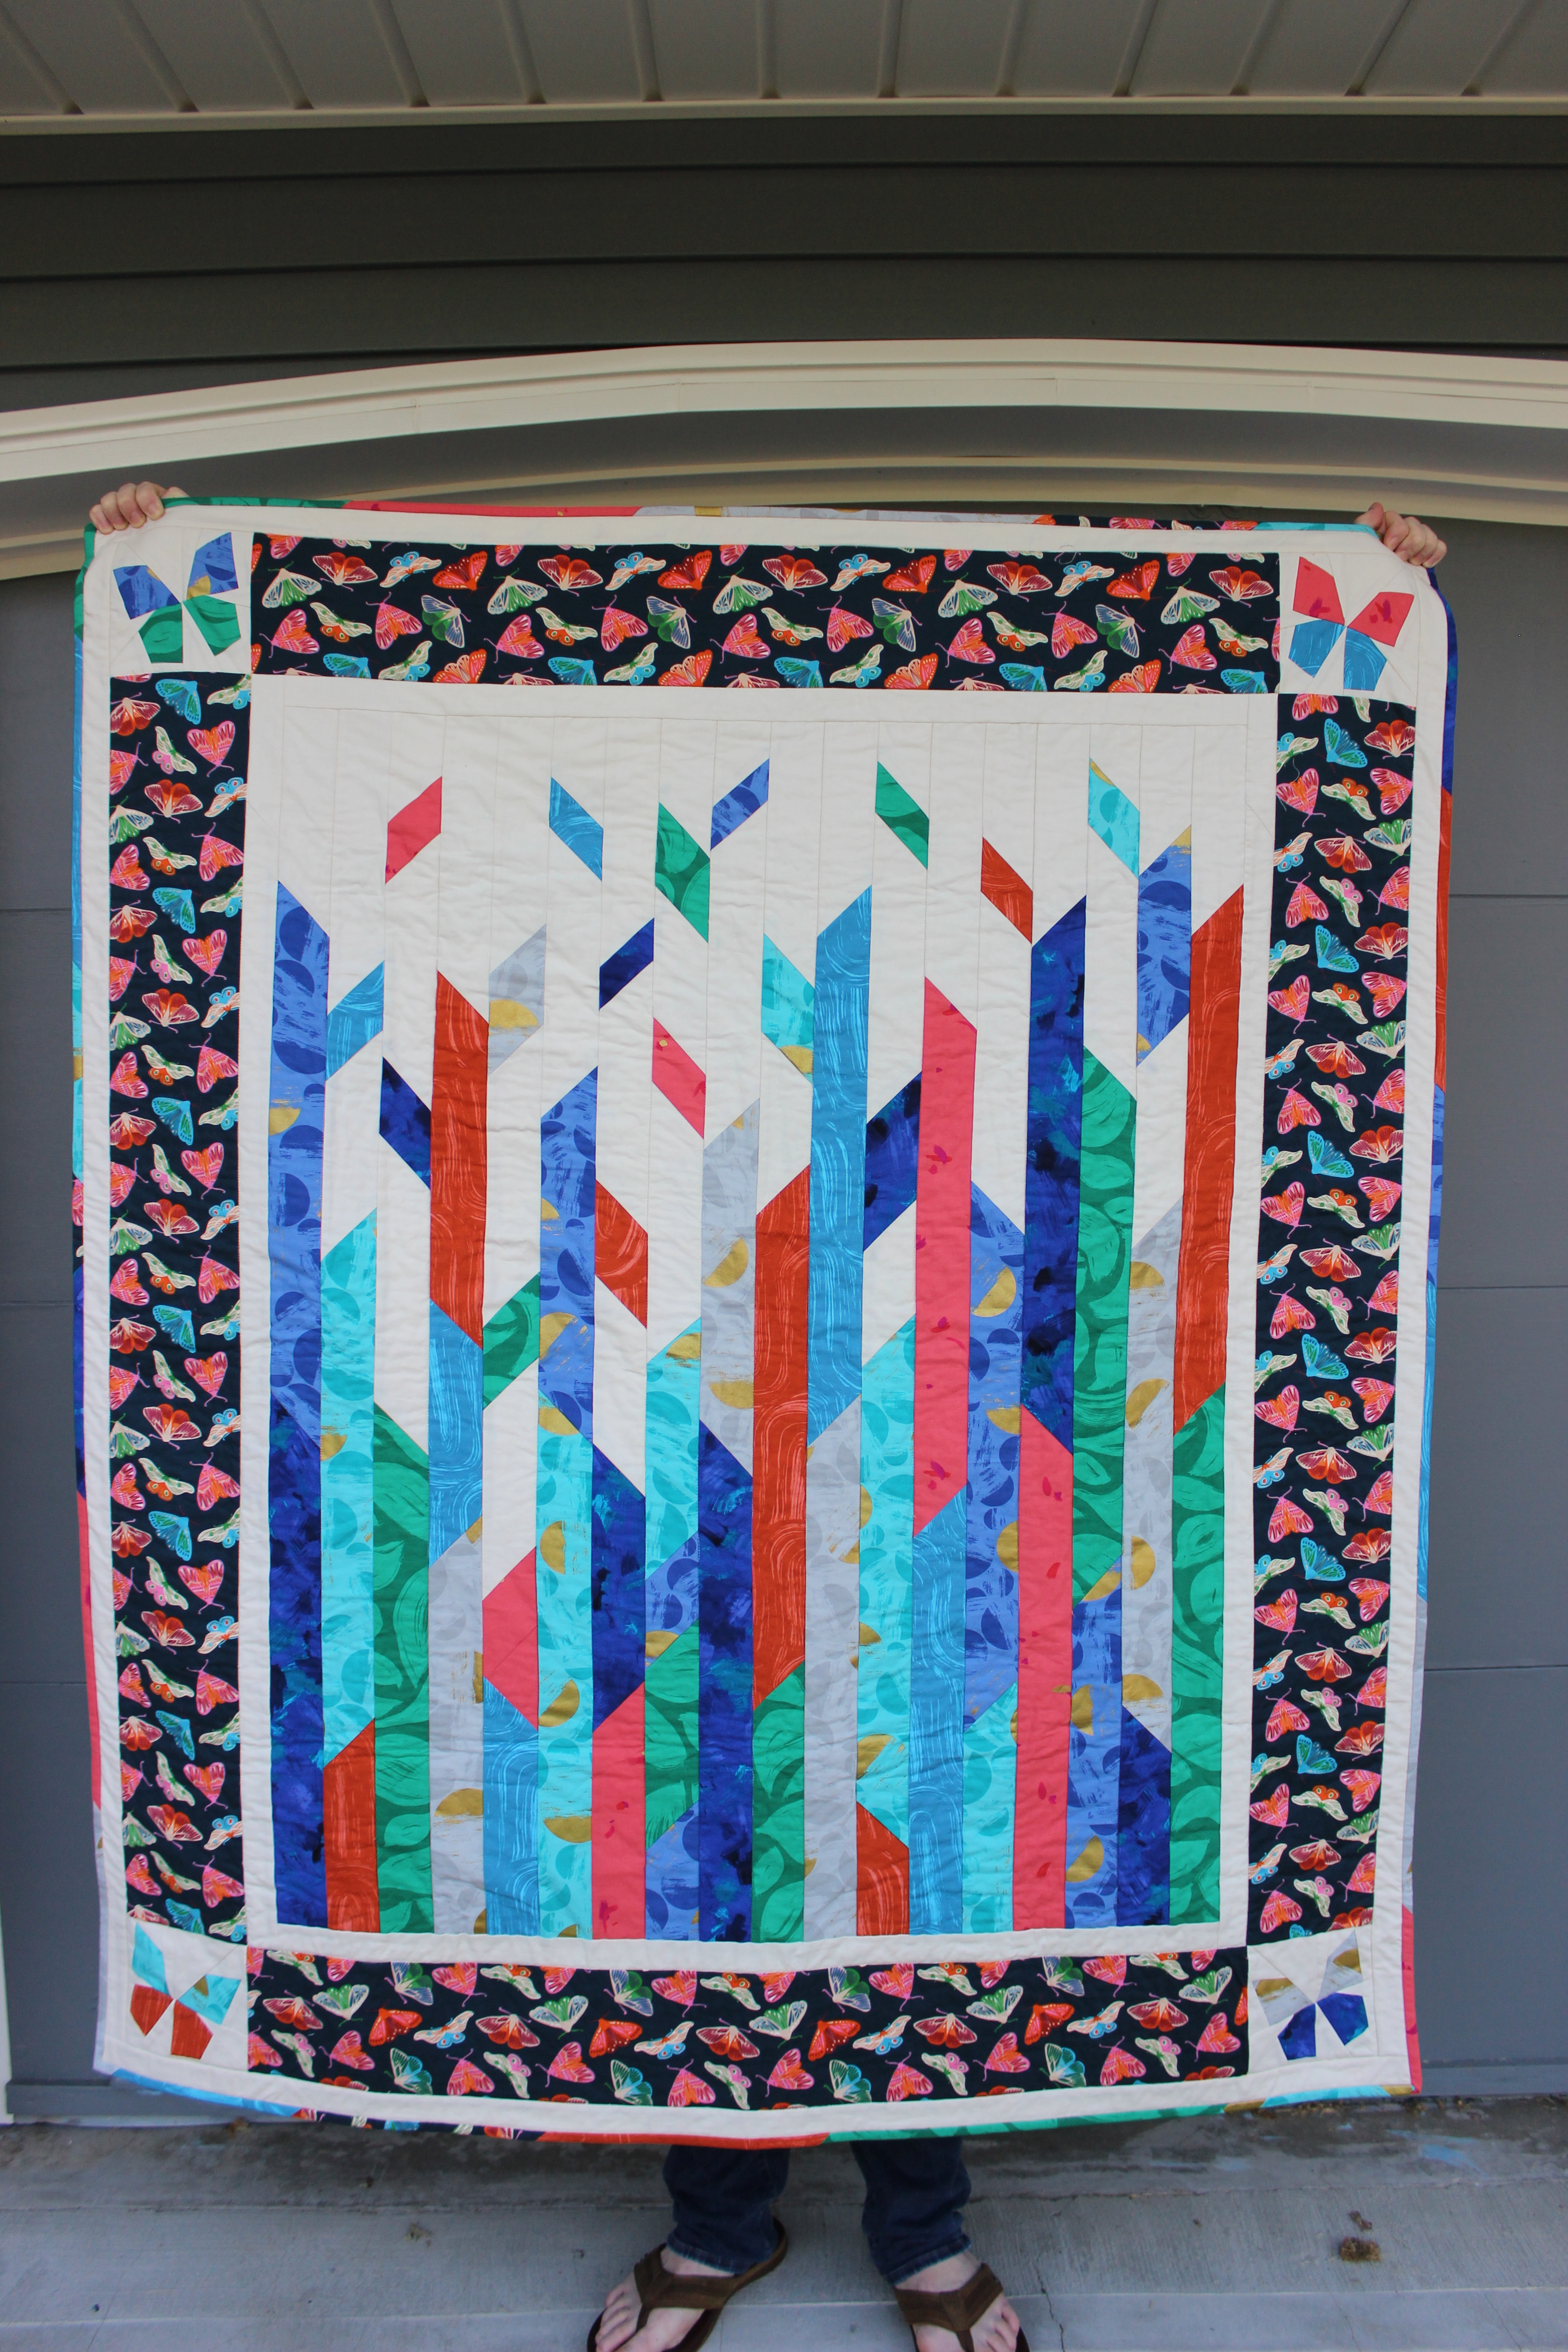
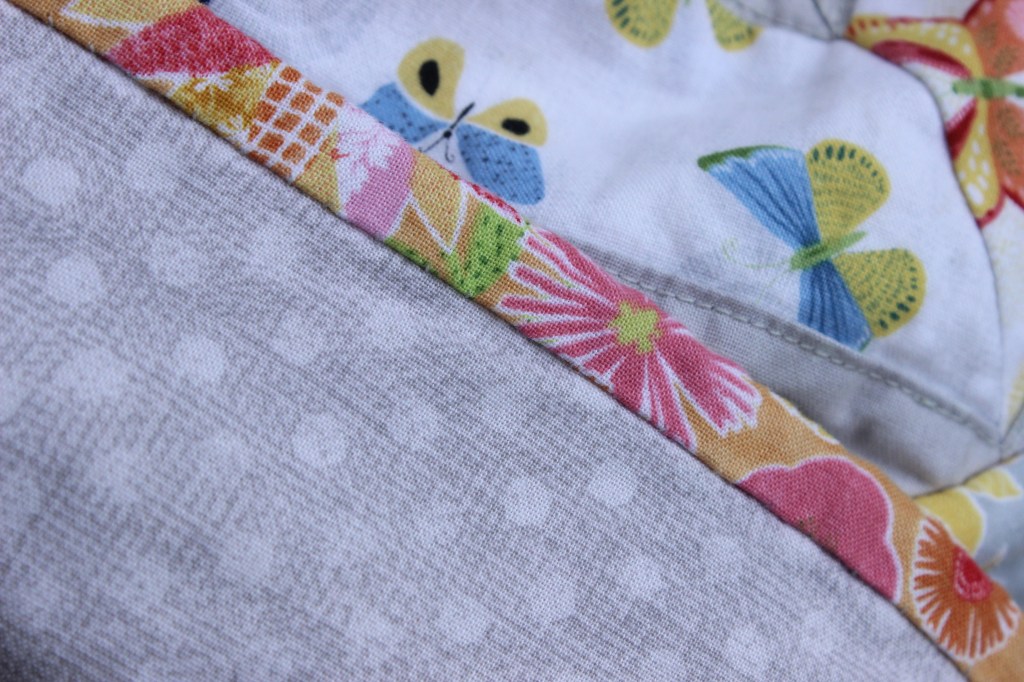
Since the kiddos share a room I thought it would be fun to do twin quilts. Both essentially the same, but with different color schemes. I bought fabric that was from the same collection so the colors would all work together well. Then I piled the fabric into different color categories, one brighter with pinks and reds, and one darker with blues and greens. Then I took one or two from each pile and switched them so they would have each others themes in their quilts.
The butterflies were from a paper piecing set I bought off of etsy.
Where do I even start with this one…first off, it is wrinkly and I’m not sorry. It was the hottest day of the year and I literally took two photos and we went back inside.
I didn’t finish a quilt in almost a year and a half because of this quilt. Several changes in my schedule left me with little time for crafts. I had so many other projects ‘in the works’ during this time that it was difficult to actively dedicate time to this specific one…not to mention that I had to start over several times which left me with little desire to work on it at all.
I made the mistake of mixing low quality fabric from a craft store with high quality fabric from a quilting store. All I have to say to that is NEVER AGAIN! I never cared much before, but it made such a difference. I finished a fourth of the quilt and had to start over. Not only that, I had to toss all the fabric because it was so wonky, there was no saving it. Then I bought more new high quality fabric (which for me meant driving an hour and fifteen minutes one way). Then I had to take it apart again because I needed more stabilization.
By the time I started over the third time, I was over it. I believe I began this in the November of 2022. It is now summer 2024 and it is finally done.
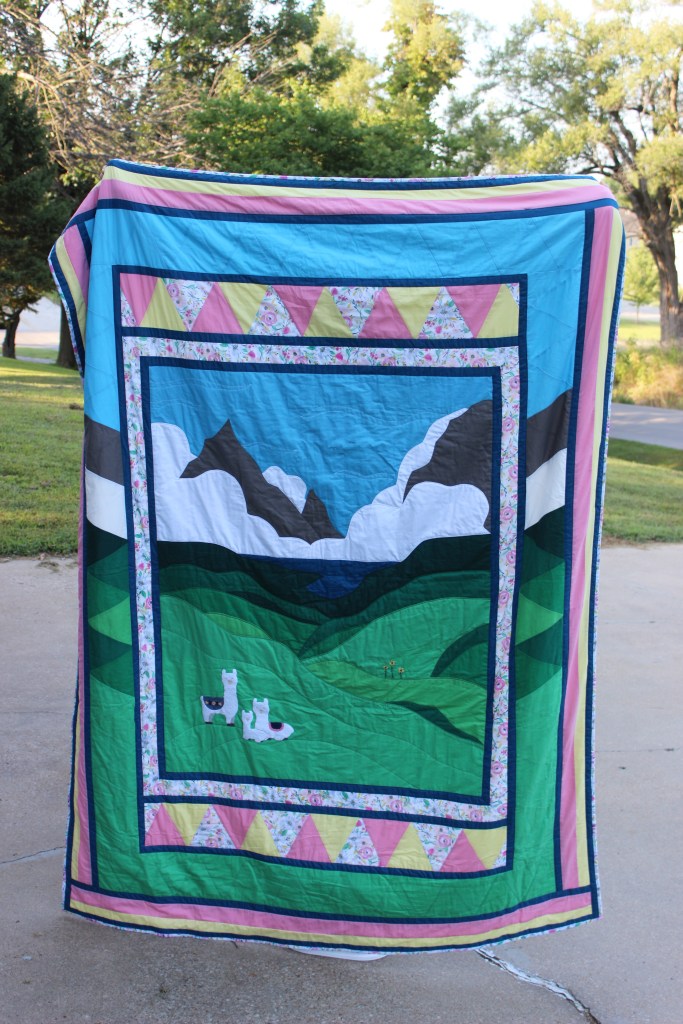
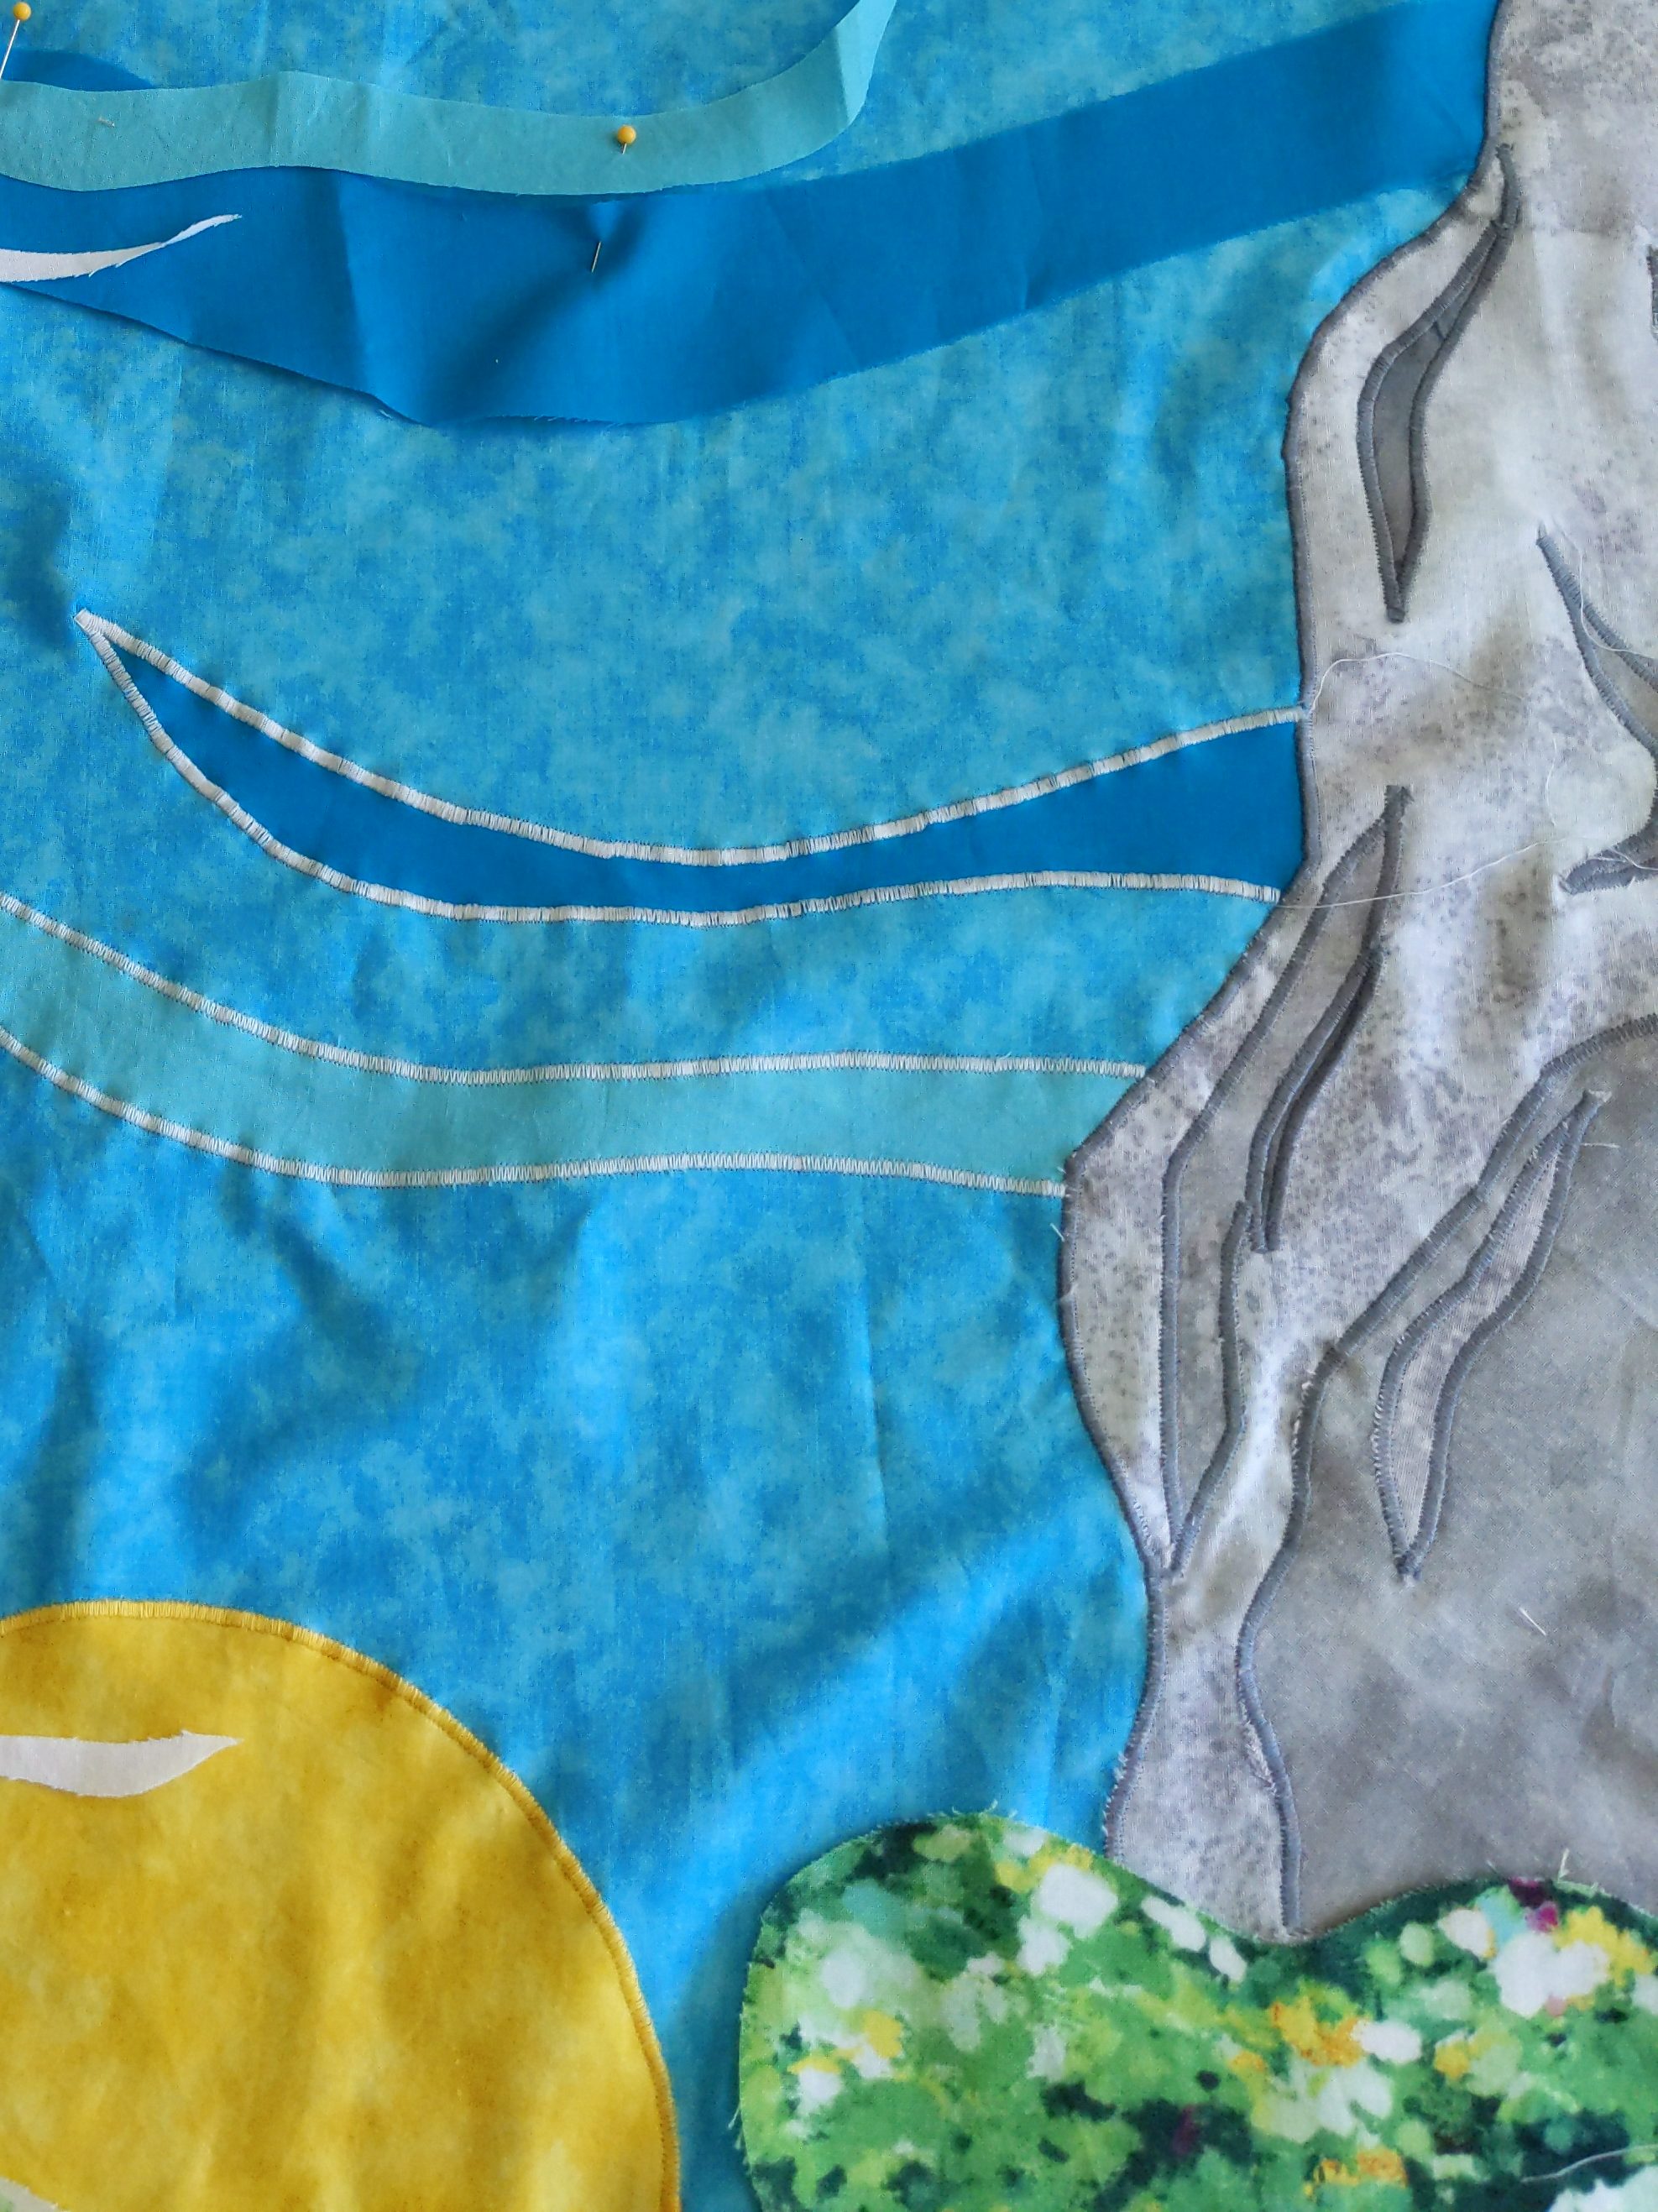
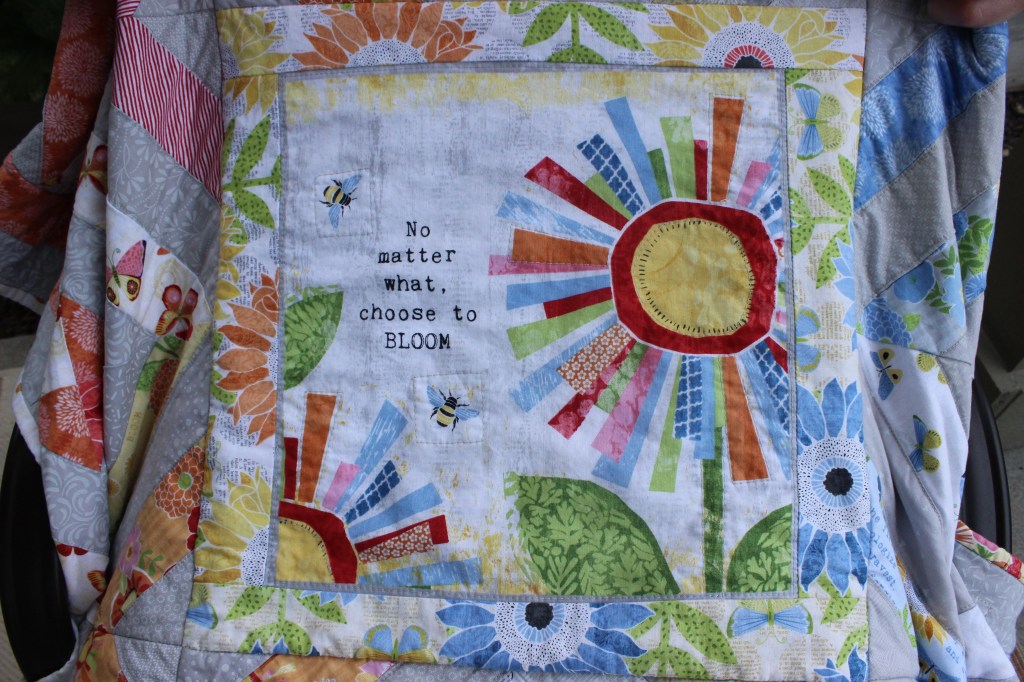
THE POSITIVE PART: For this quilt I was given the following requirements: Twin sized, llamas and mountains, you can do whatever you want with that.
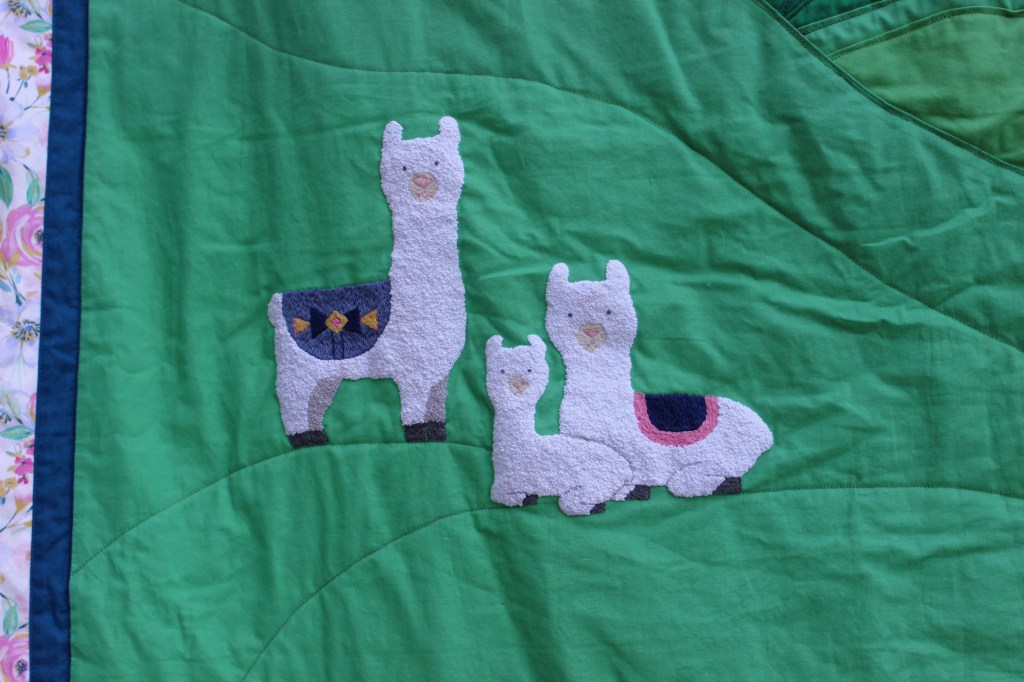
Instead of paper piecing my llamas together (because I honestly forgot I could do that), I decided a year in that I should embroider them on. I decided to french knot them because of course they had to be fluffy! It took over 30 hours per llama. I was sick during every break I had between Christmas and Spring this year so I spent a lot of time sitting on the floor, tying knots. I am very happy with how they turned out and I think it the little bits of embroidery here and there (sunflowers, water and cloud movement, birds) add to the texture of the quilt.
After spending so long on this quilt and being so burnt out, mostly due to lack of time and annoyance at bad fabric, I began to think that perhaps I was done with making quilts. Not because I wanted to be done with quilts, but because I was feeling defeated by not having finished one in so long. Making quilts felt unobtainable…BUT THEN…I was asked to make a t-shirt quilt for a sweet and wonderful senior girl that we know. I put the llamas on hold and began to work on that. Graduation was in a few months so I had a project with a deadline. Putting that together so quickly inspired me to work on several other projects I had laying around. After being in a rut for almost two years, I finished 6 quilts in the span of 5 months.
This quilt took me forever and was difficult for me but I am glad I finished it. I think I looked at it for far too long because what I see is over 100 hours of french knots next to a relatively plain background, but I know the little girl who receives this quilt will see a portal to a tranquil world. I know looking back on it I will forget everything else about it and see what she sees.
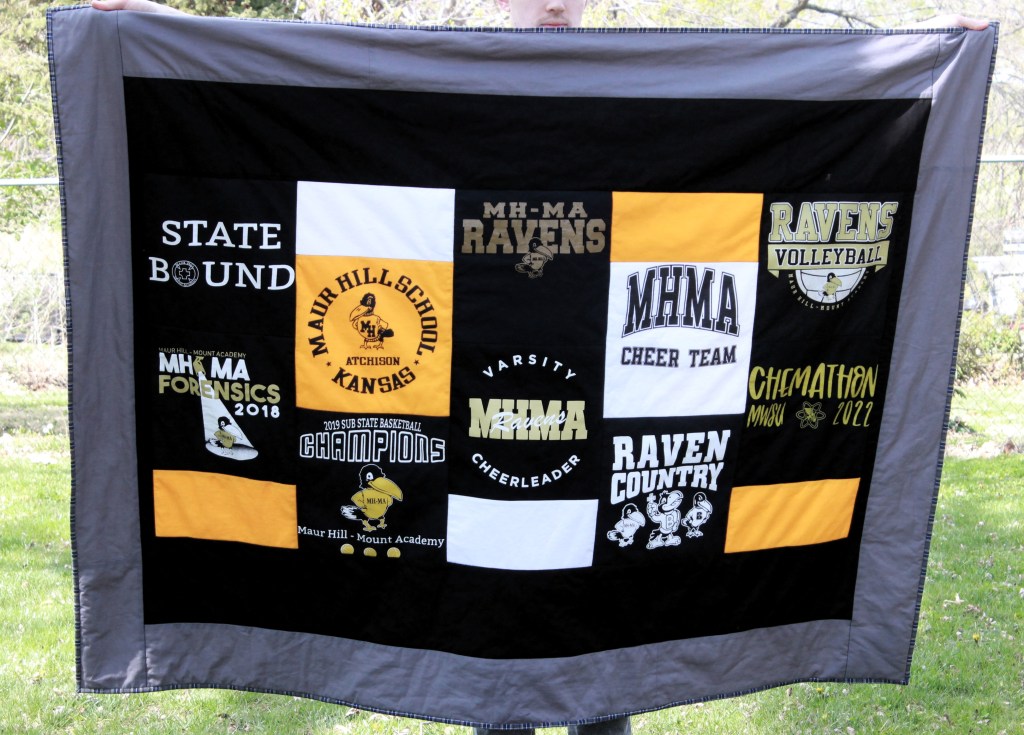
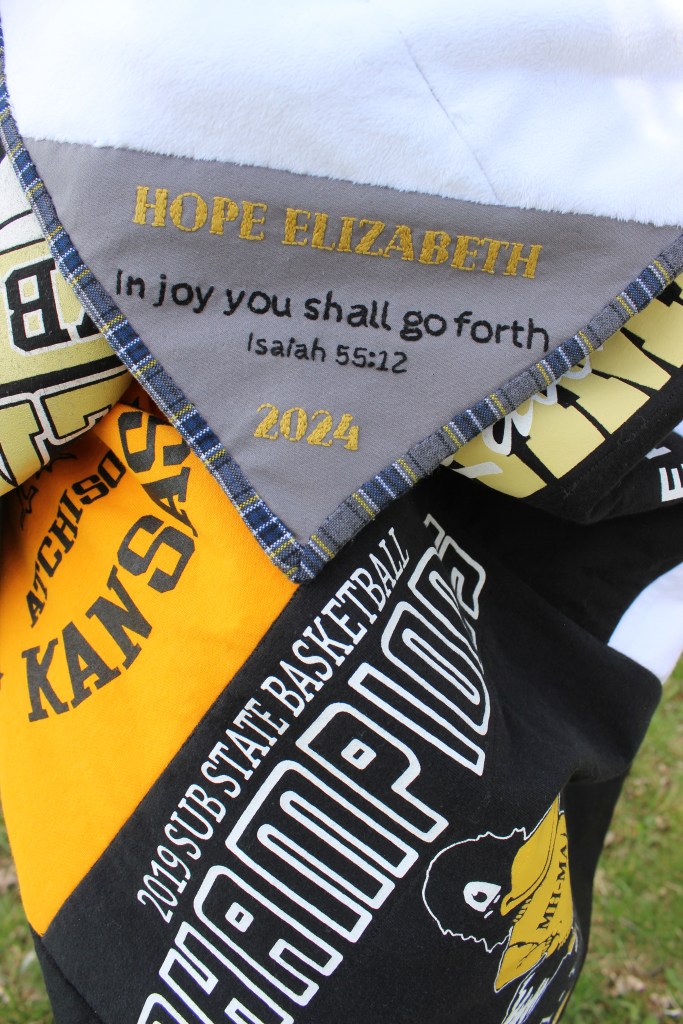
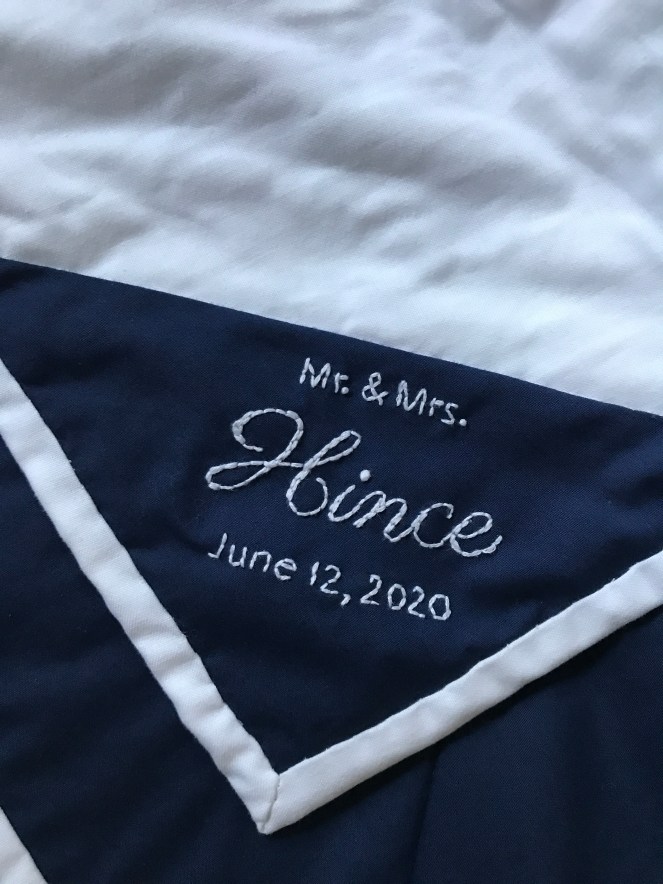
This was a t-shirt quilt I did for a senior. My favorite detail on this quilt is the binding. I was able to get my hands on some old uniform skirts (the same uniform she wore from Kindergarten to Senior year) and it worked exceptionally well as a binding. I was worried that it would be too thick, but it worked out just fine. I think it will hold up well since I’m sure this one will get a lot of use.
I was also very pleased with her embroidered name. I think I will use that larger font as a guide on some future projects.
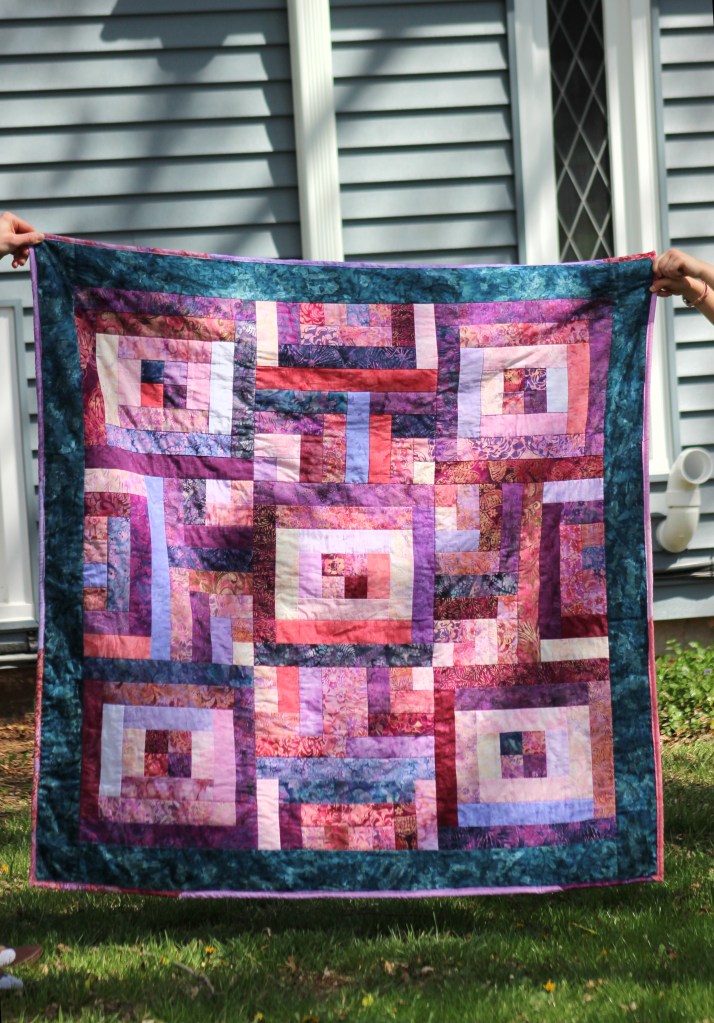
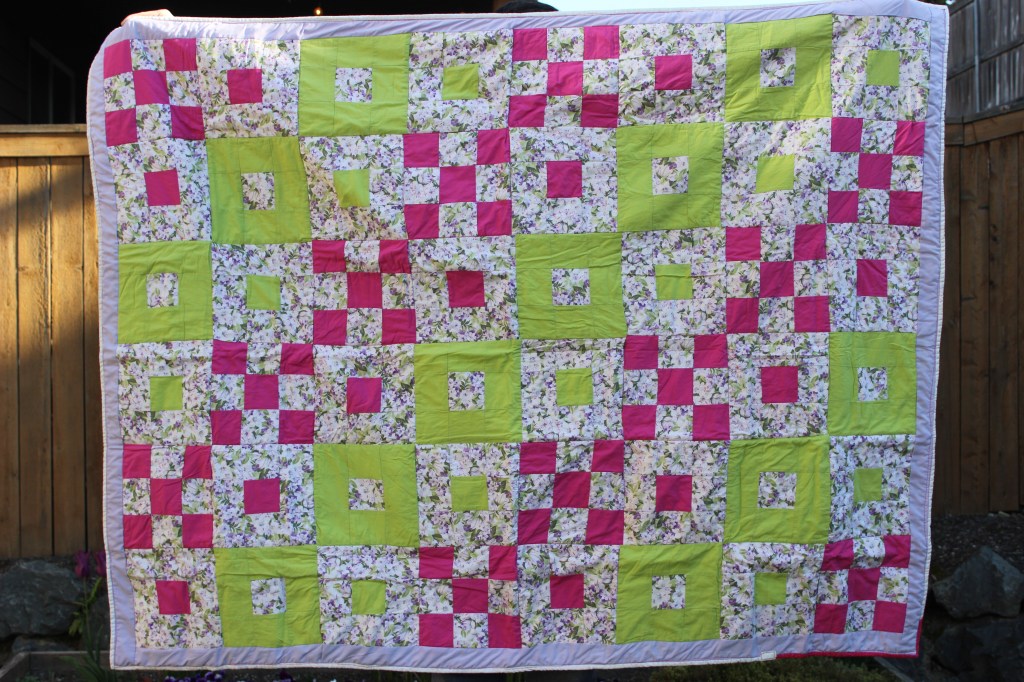
A friend sent us some fabric she had laying around. From the box we chose fun pink jelly roll and a quilt book. My daughter and I decided to try out a pattern. Since I rarely follow patterns, this was a good excuse to try one. We began this project in the fall/winter of 2021, but in the spring of 2022 we moved and this project was shoved in a bag and stayed there until spring 2024. I had some leftover backing fabric from a t-shirt quilt I had made so we decided to finish it up. This is now the go-to lap quilt. It is the perfect size and the pattern is fun too.
I tend to have a hard time with the concept of a scrappy quilt. What I mean is, I like the concept, (use up some fabric, make more closet space) but in practice, a truly scrappy quilt would be difficult with my current fabric stash. I rarely buy solid colors. I usually buy novelty fabric sets that work in their set, but the sets don’t work together at all.
I also don’t like muddy looking quilts and often times scrappy quilts start to be a bit overwhelming in the muddeling colors department. This is just a preference I have and constraints that my stash puts on me, as well as constraints I put on myself (stick around and you will see that I put a lot of constraints on myself). As far as quilts go: make what you like. I certainly do.
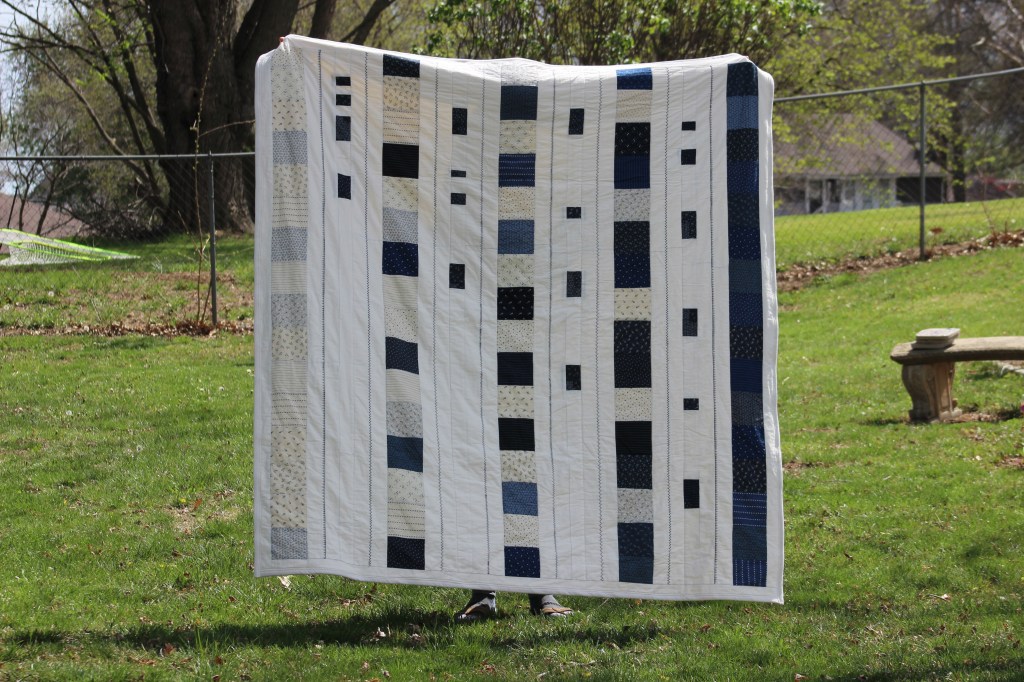
Which brings me to my next point, which is that I wanted a free project. I stitched together scraps of batting I had saved in order to make one big sheet of it. I used fabric left over from one or two projects. For the backing I used a white blanket that was laying around that we never used and don’t even know where it came from. I even used dark blue thread (gasp!) to sew all of my piecing together, most of which is white. It shows in places, but it’s on the inside so I didn’t care.
When it came time to quilt it, I struggled between keeping it a free quilt, or buying white thread. The fancy stitches used up more thread than I anticipated on the top layer. I didn’t have enough blue thread to do the binding and quilting. My options were to use another contrasting color, or buy white. If on the final stretch of my quilt I did things that would make me dislike the quilt, then being stubborn about it being free wasn’t going to be worth it. It pays to be honest with yourself and I knew if I used any color other than white for the quilting, then I wouldn’t like the quilt, and I would never use it. Back in the closet it would go, taking up closet space, and it would defeat the main purpose of the quilt in the first place.
I don’t think I can technically call this a scrappy quilt, and it’s not 100% a stash buster if I made a trip to the store, but overall, I’m happy with it. It lives on my couch and I use it several times a week.
Please excuse the wrinkles. I didn’t have a chance to iron before taking pictures.
I have always wanted to make my Grandmother a quilt and after years of practice, this year I finally felt ready to tackle the challenge.
My Grandmother has made quilts for everyone in the family. As far as I know, she was the one who taught quilting and piecing to others in the family who currently sew. My Great Grandmother was a quilter (I used my Dad’s tumbling block quilt that she made for him on my bed in high school), but I never knew Great Grandma, so to me, Grandma has always felt like the corner stone quilter in the family.
Grandma has probably made a million quilts. She hands them out like Candy Canes at Christmas time. I have a lovely stack of them (and by stack, I mean they can usually be found stacked on top of one another, on my bed, with me laying beneath them because I’m cold).
Because Grandma has made every quilt known to man and has an abundance of quilt knowledge, I knew the quilt had to be something creative, special, and accurately produced. It had to be something that no one else would be able to make from a pattern. It had to be something she could pour over and find new details every time she looked. It had to be something difficult to make. It had to be something she wouldn’t have done or come up with herself. And finally, it had to be done quickly….Grandma is almost 92 years old!
I have been putting this quilt off for a few years because I wasn’t sure I could make it good enough, but I started getting itchy when she turned 91 and I knew it was either now or never.
Sorry for the continuing intro, but I really want you to understand that Grandma is a tough cookie. I knew everything would be scrutinized. I wanted to do a good job and make her proud. That being said, I know that perfect is the enemy of good, and I could have spend 10 years on this quilt and still felt like it was not good enough for me to send to her. So, I did what I could with the time that I had and tried to make her something
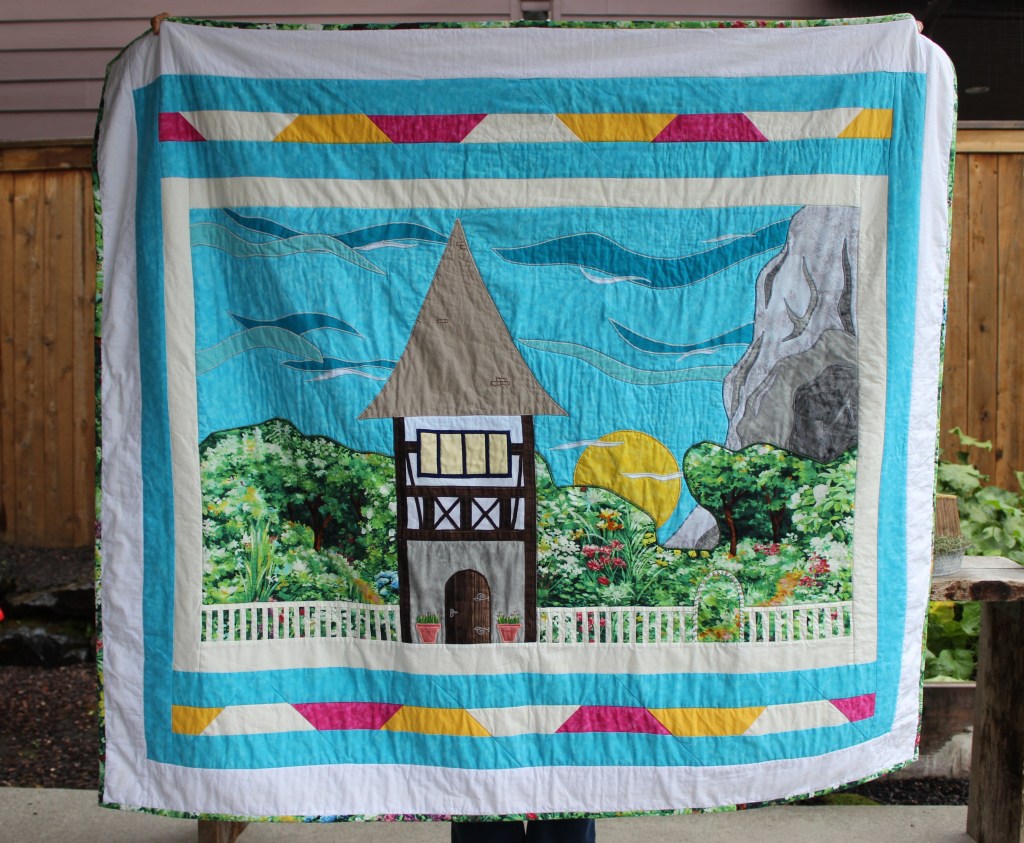
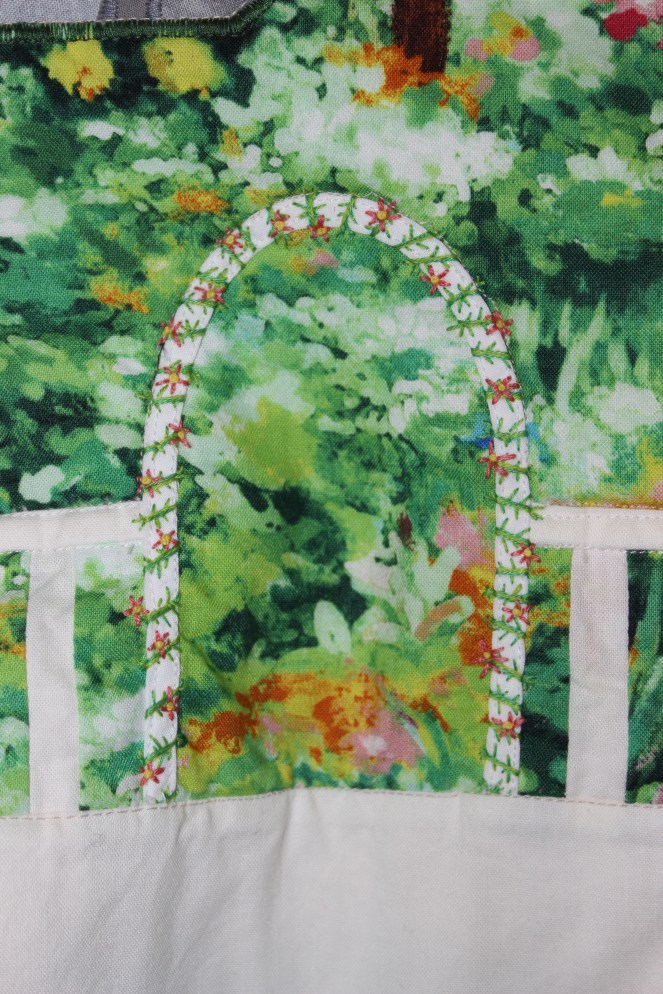
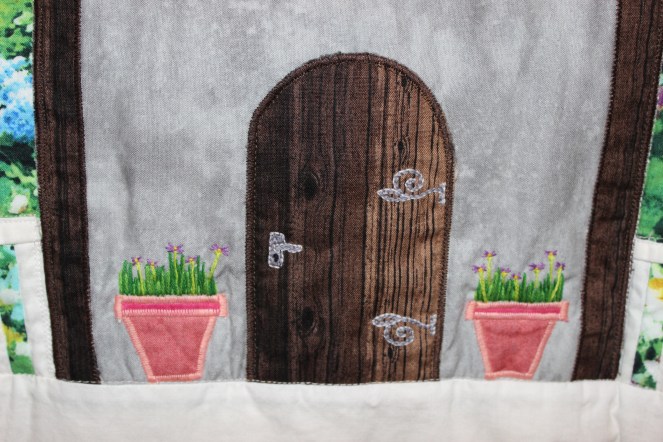
Grandma made us Busy Books when we were babies and she used a satin stitch around cut out pieces of fabric to make various designs. This is where I got the idea to use the satin stitch to lay all my pieces down. Then I could cut out any design and stick it right where I wanted it. It felt more like cutting out pieces of card stock and gluing them to paper than fabric piecing.
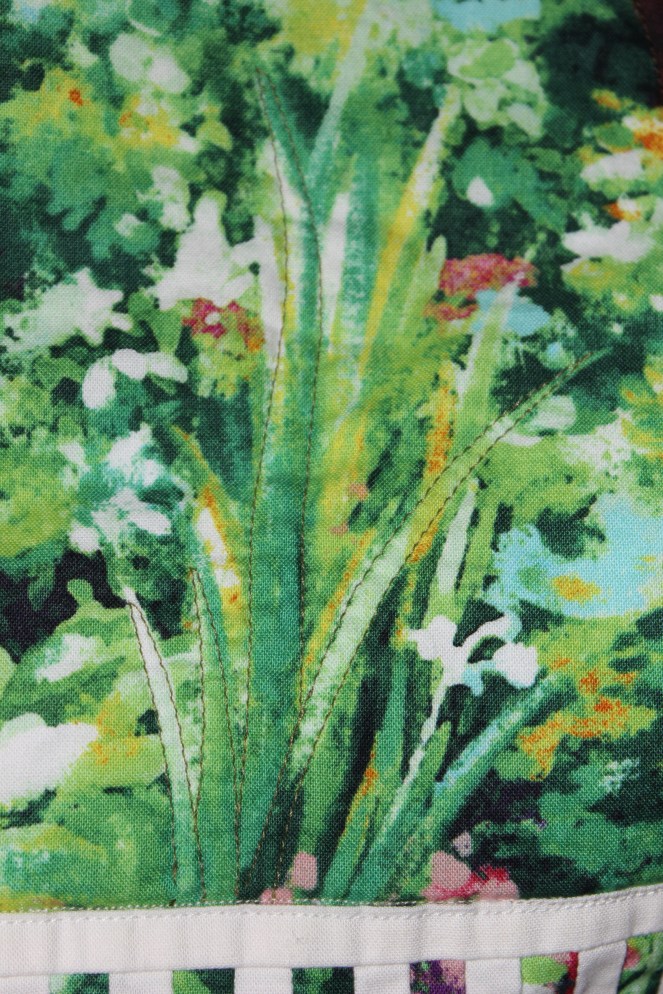
The only place I didn’t use the satin stitch was on the fence. I wanted it to look seamless, as though you could look straight through to the garden behind it, and I thought a satin stitch would take away from it. Also, I didn’t want to risk the fabric warping since the pieces were so small.
I added some texture by embroidering little bits here and there. I also went ahead and put little bits of free motion quilting in spots to give more subtle texture, but only when attaching the front to the batting. I started using this technique because quilting the 3 pieces together (front, batting, and backing) all at once has been challenging on my small machine that is not meant to be used for quilts.
This quilt was fun to make and I definitely would like to make something like this again, but a lot more detailed because I think it would be a great challenge.
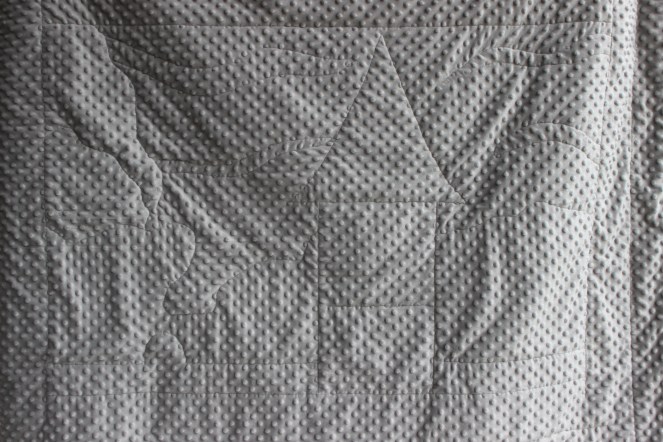
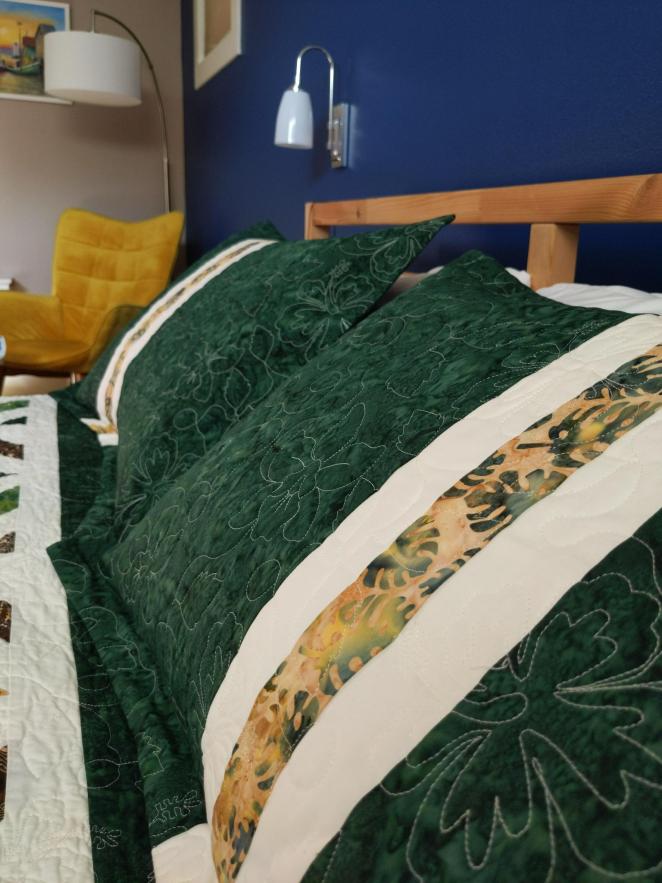
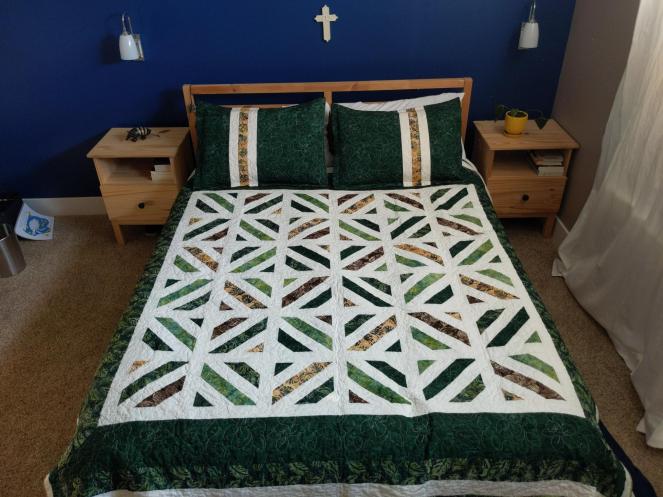
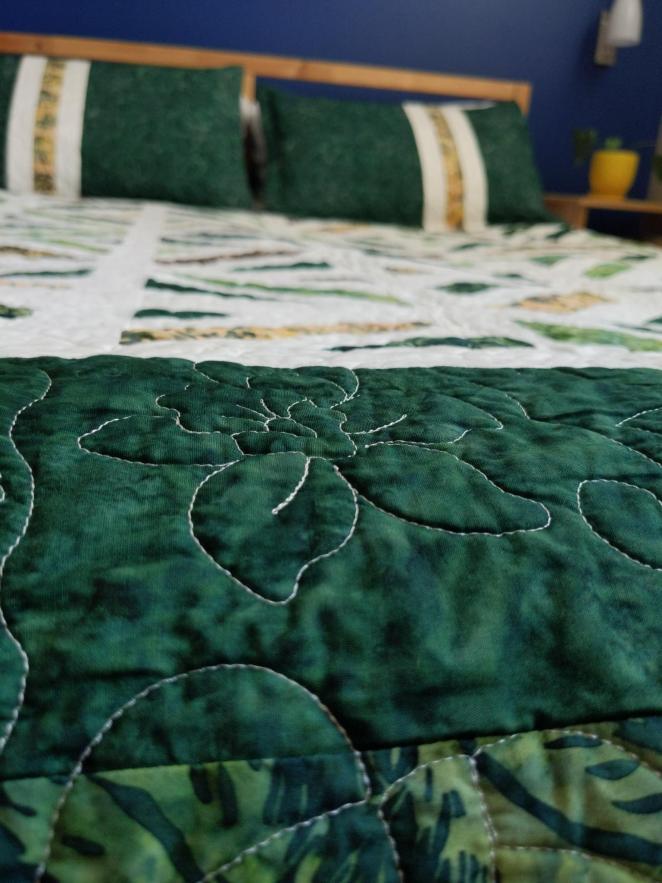
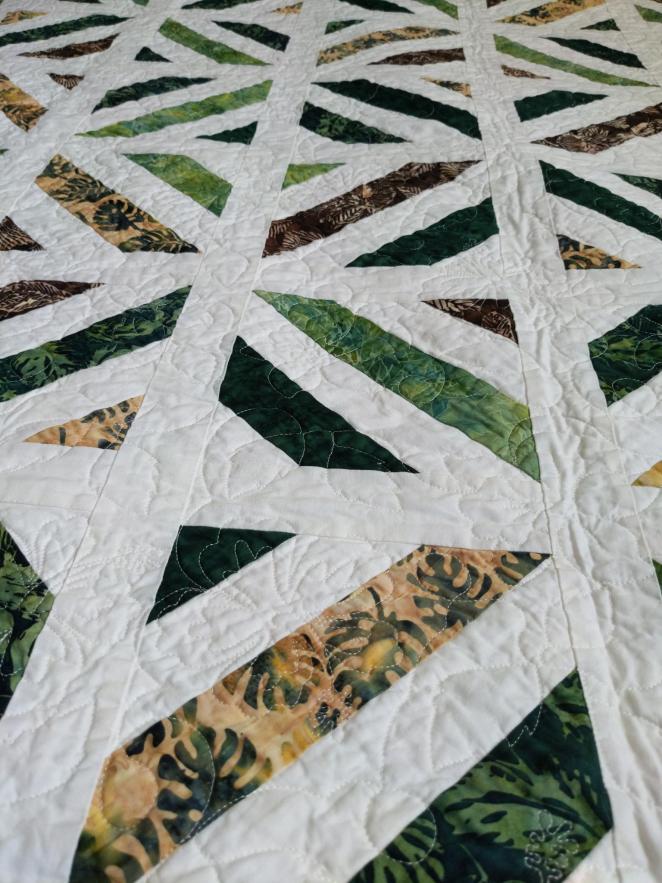
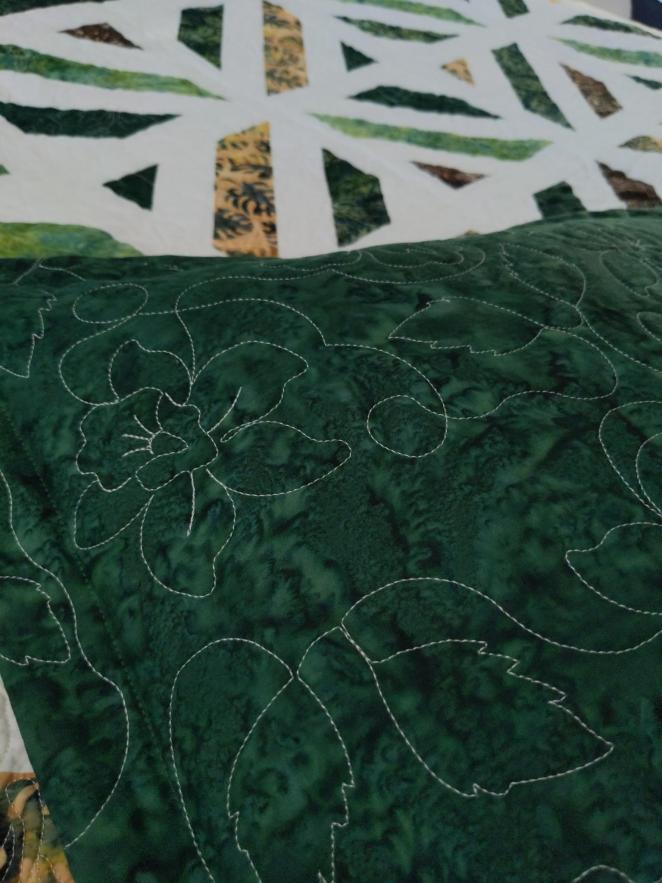
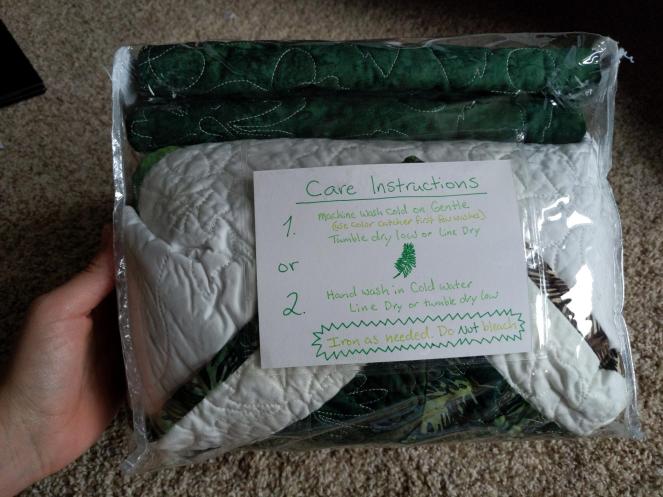
One of my mom’s guest rooms is Panama themed and she wanted a quilt that was going to match all of the Panamanian/tropical items she already had in the room. When she came to visit, we went to pick out fabric and she chose a wonderful set of batiks that were a beautiful greens, browns, and tans.
I was worried to set the batiks next to so much white fabric, but with a little hand-pre-washing and some washing machine experimenting, I think we’ve came to a place where there shouldn’t be any color running.
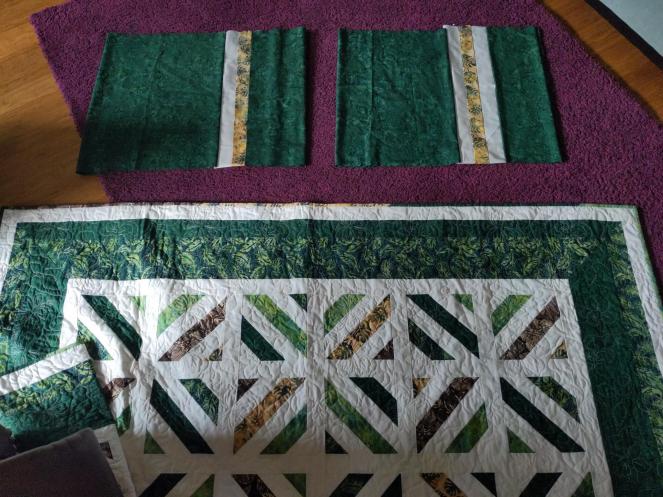
The pattern we decided on was a pattern I had done before a few times, but laid out in a different way to give the appearance of X’s instead of squares. Super easy to work with, especially since I bought the white fabric in pre-cut jellyrolls.
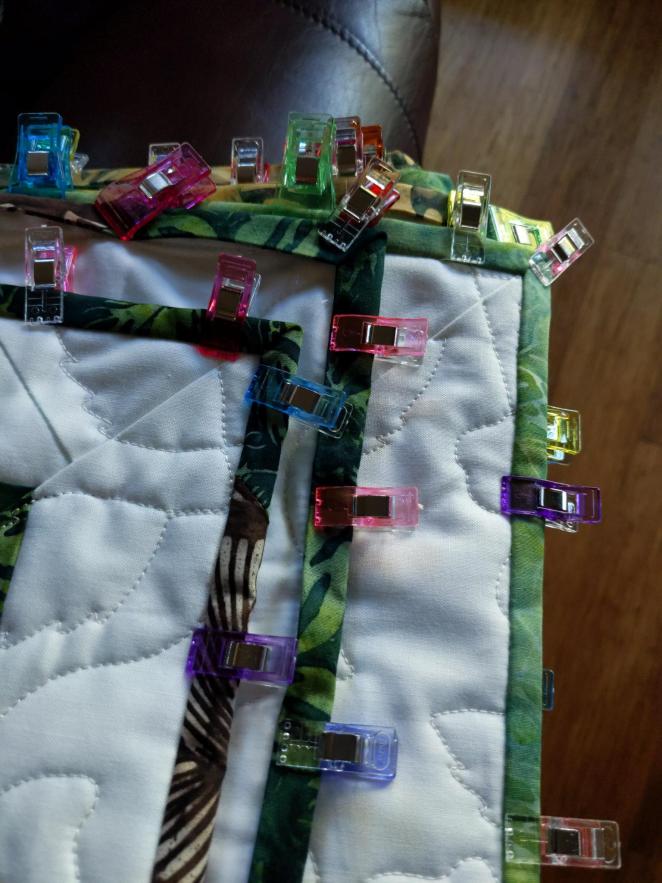
The pillow shams gave me a bit of a hard time, but thanks to one of my sisters, it was decided that they looked weird because the green was too intense next to the quilt now that the quilt had been quilted with white thread.
Took a risk by taking the pillow shams to the quilters to get the same design put on, and I am pleased with the results. They match the quilt better than I expected, and they feel more high quality (and less, “I made this on my baby machine on my dining room floor) because of the added structure.
10/10 would have pillow shams quilted every time in the future.
I’m pleased with the way it turned out and even more pleased that mom likes it so much.
This quilt is a mess, but I’m finally O.K. with that.
The saga began over a decade ago. Having made my first real quilt at my Grandma’s house in the summer, I was itching to make another one all on my own, the only problem was that fabric was hard to come by in my area. My best option was a local market. I was still in school and didn’t have the time, patience, or transportation to go fabric hunting so I got whatever I could find the one time I went out. Naturally, I found colors and fabrics I disliked. Over time, they’ve grown on me, but I was originally very against these fabrics and colors.
These poor fabric squares were put through trial by fire. I cut every square out individually because I didn’t know any better. I didn’t have the right fabric cutting tools, I ironed instead of pressing, and I was constantly pulling on them because my mom’s old machine was essentially broken. I would sew one or two blocks and proceed to fight the machine for twenty minutes until I got it working again. Needless to say, I didn’t get very far.
The project ended up in a box and I worked on it periodically but never got far. Five years later, I acquired my own machine and began other projects. Fast forward a few more years and the project finally got moved from it’s original home to my new house where it promptly sat in a closet because I didn’t know what to do with it and I knew I wasn’t going to be able to quilt it well at all.
I know it looks fine from a distance, but truly, the quilt is so warped and stretched that there was no way to properly quilt it. I ended up doing a stitch in the ditch and I was constantly adding pleats or tucking the top fabric layer under itself. Oh well.
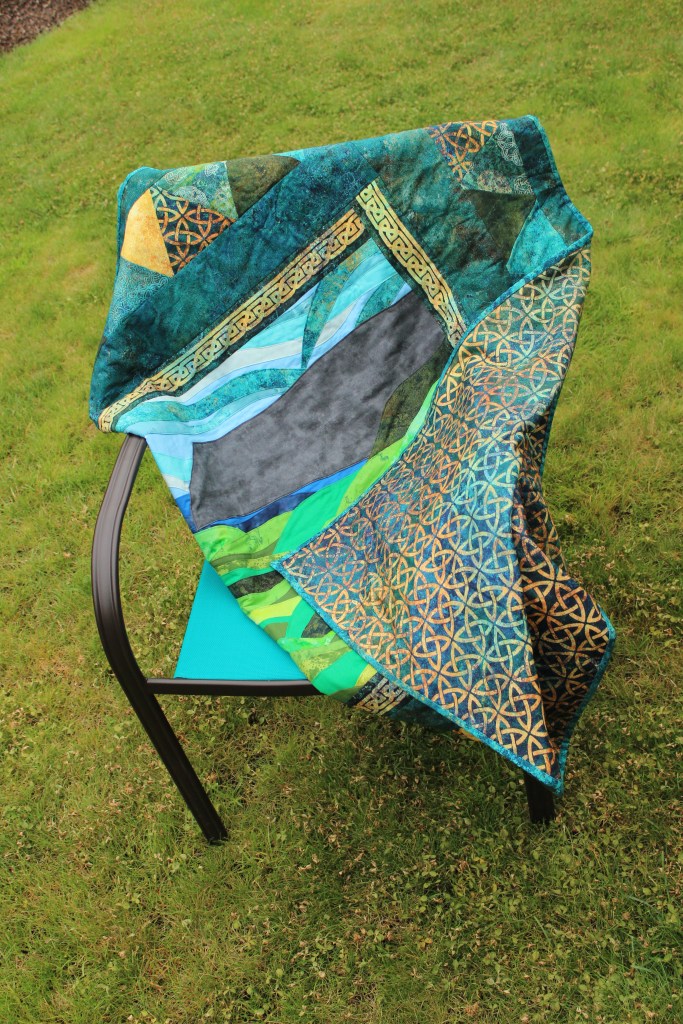
So what do you do with a project you know is bad and will never be good, even if you take it all apart and start over? You turn it into an “I don’t care what happens to this” quilt. This is now the quilt that gets thrown in the car for trips to the beach or laid on the grass in the yard.
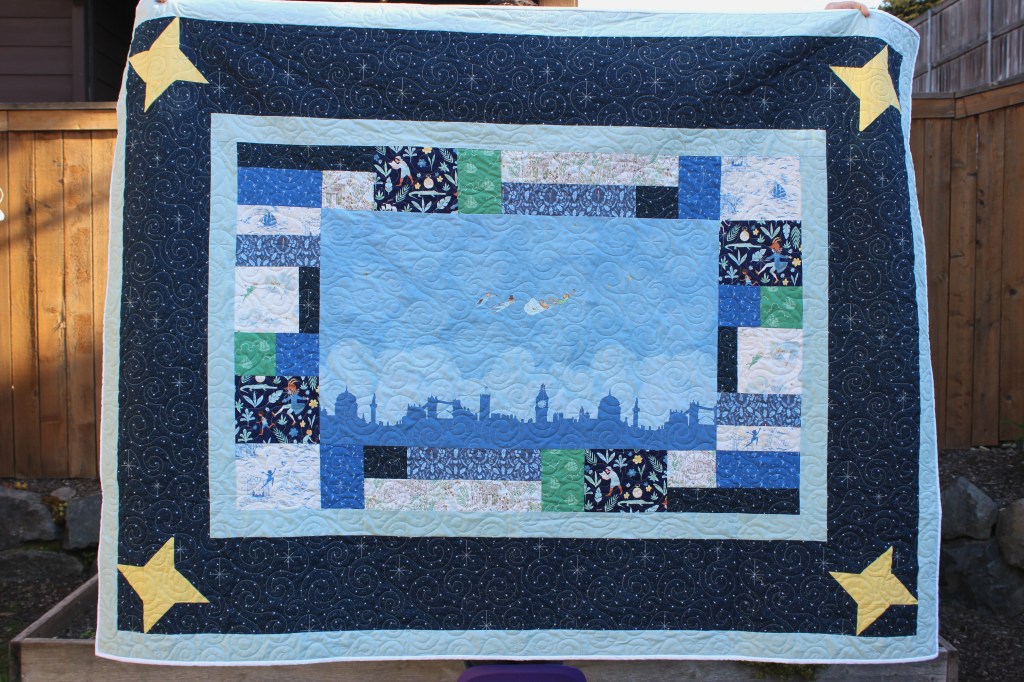
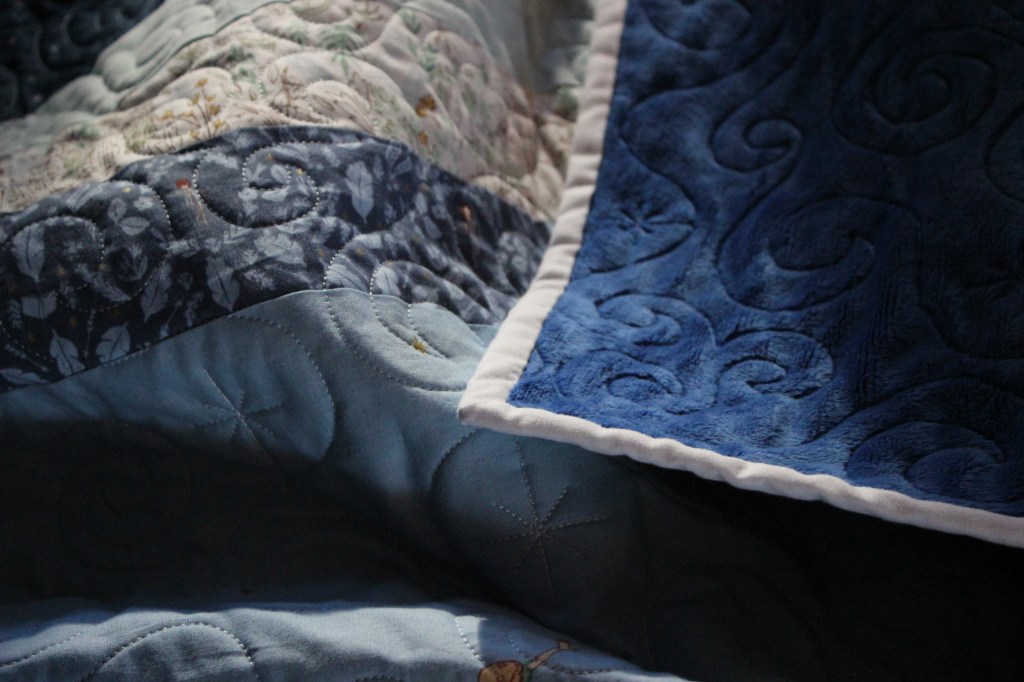
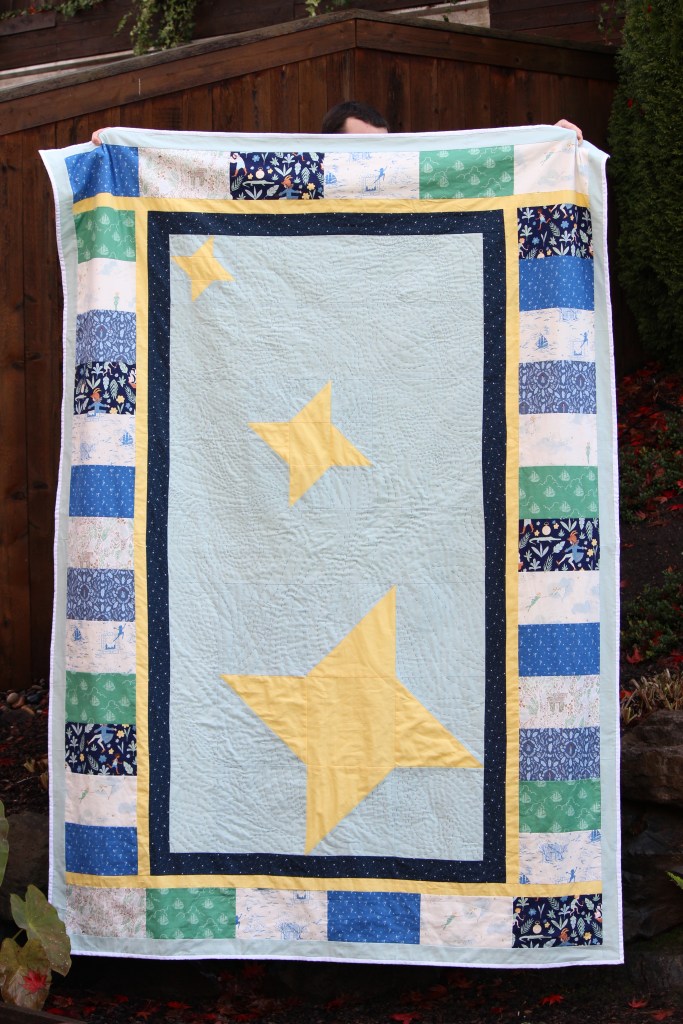
This was the original lap quilt I had in mind when I purchased my Peter Pan fabric. Having finished the center panel with the pieced boarders, I started working on the twin sized one (posted a while back). After coming up with the idea for pieced stars, I decided I should add some on this quilt to help tie the two together. The quilts don’t match, but they are complimentary.
I had this quilt top finished over a year ago, but it sat in a drawer while I thought of how I wanted to quilt it. Sometime this year, I discovered a new quilt shop in my area and since I was playing the “you can only work on projects that you’ve already started” game, I decided I might as well have it quilted there.
Since I had used up my original backing fabric on my other Peter Pan quilt, I had to get something else. The quilt shop had this wonderful, soft, fluffy blue fabric, so I went with that. I’m already excited about it, but I’m sure we will all be very happy with that decision when winter rolls around.
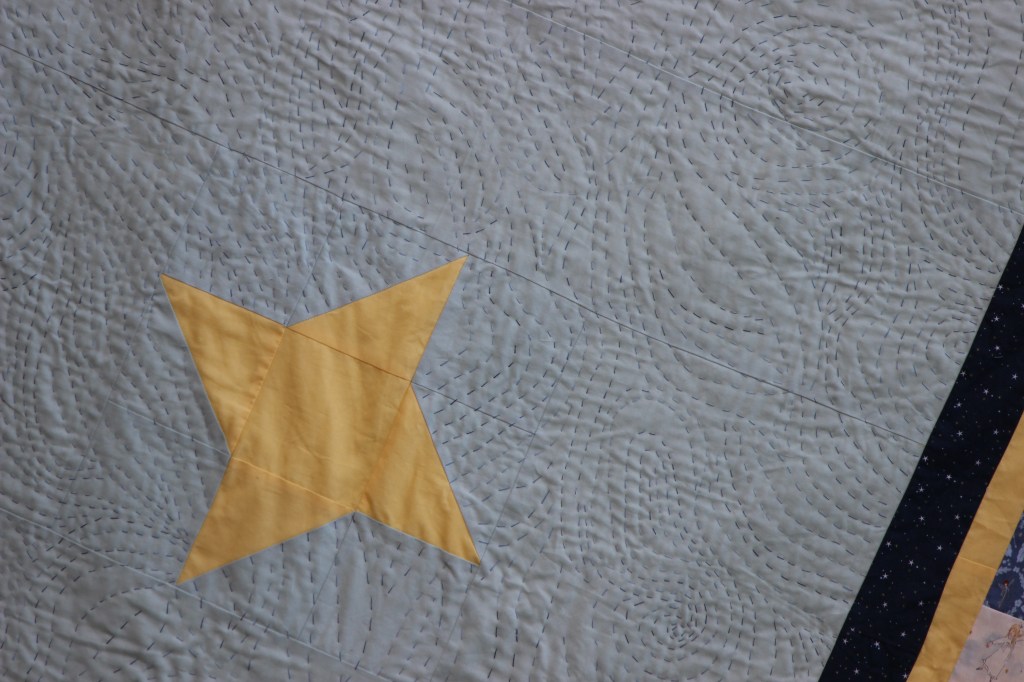
Super happy with the swirls and stars quilting pattern.
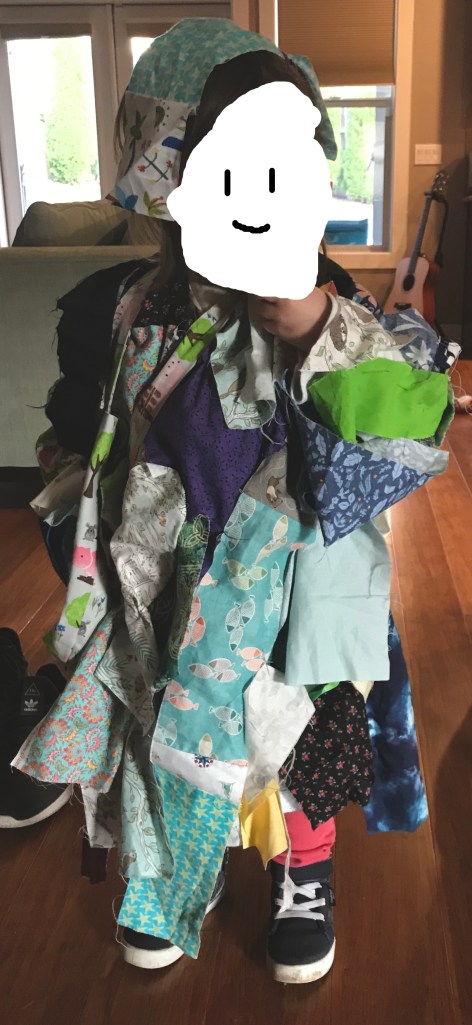
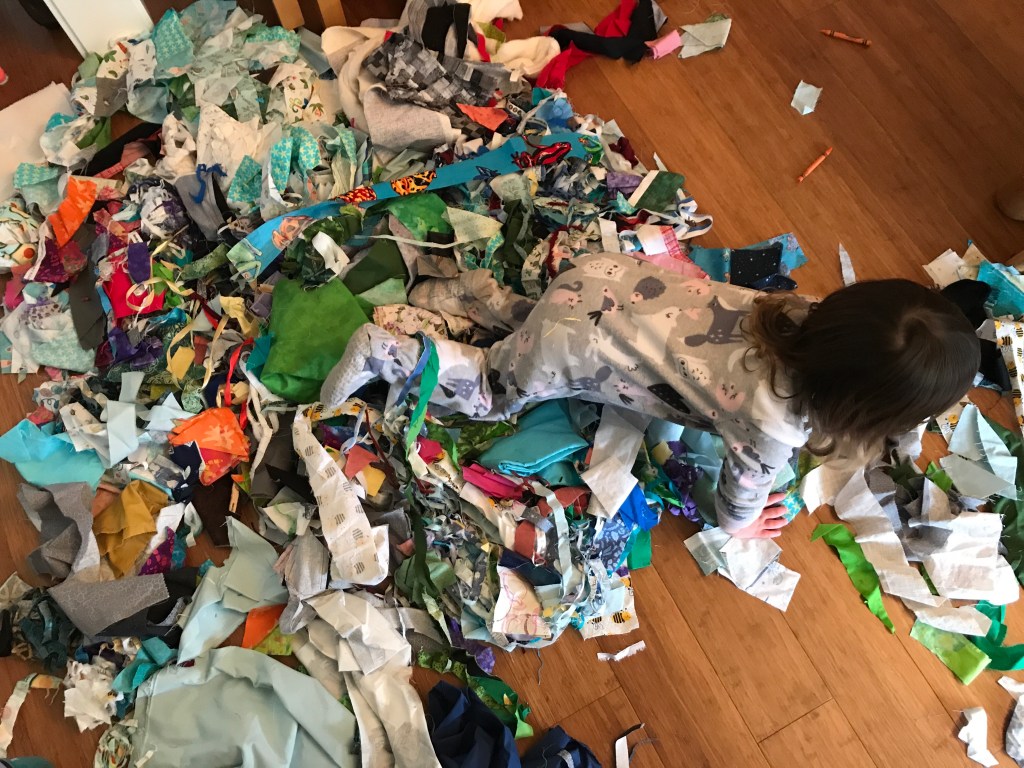
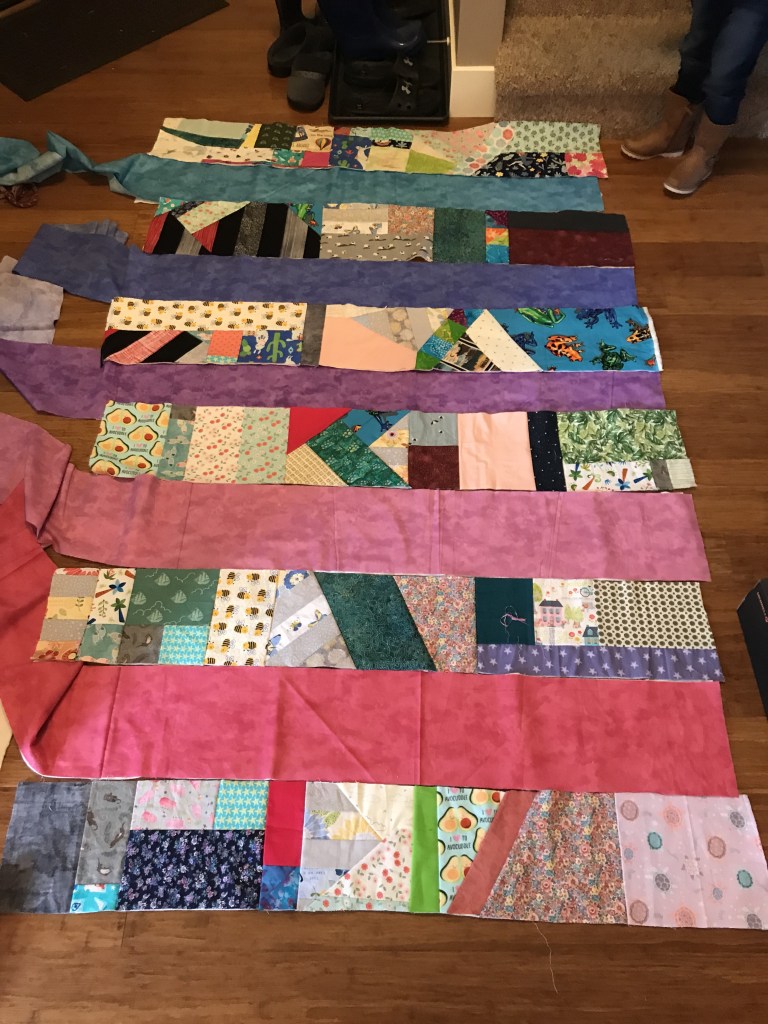
My daughter always wants to cut, pin, or tell me what fabric (or as she says, frabric) to use when I’m quilting. She has been very interested in my fabric scrap box ever since she discovered it at the age of 2, and shortly after asked me to make her a fabric monster costume.
She and I started this project months ago. We would pull it out and work on it, little by little, as long as she was interested and then I’d put it back away for a while. I cut out several strips of batting while she dug through the scraps. She would carefully select each piece and tell me which one was going to get sewn on next.
Initially, she was telling me where each piece was going to go, but that got a bit crazy, so we did a quilt as you go method with it instead as it was much faster.
After she said there were enough strips, I gave her a few options on how we could put it together. She asked for colored strips in between. I took her to the store to find backing. She choose a fuzzy, pink fabric that has a bubble wrap-like texture. Not something I would have chosen, but man oh man, is it soft. It’s the coziest quilt in the house.
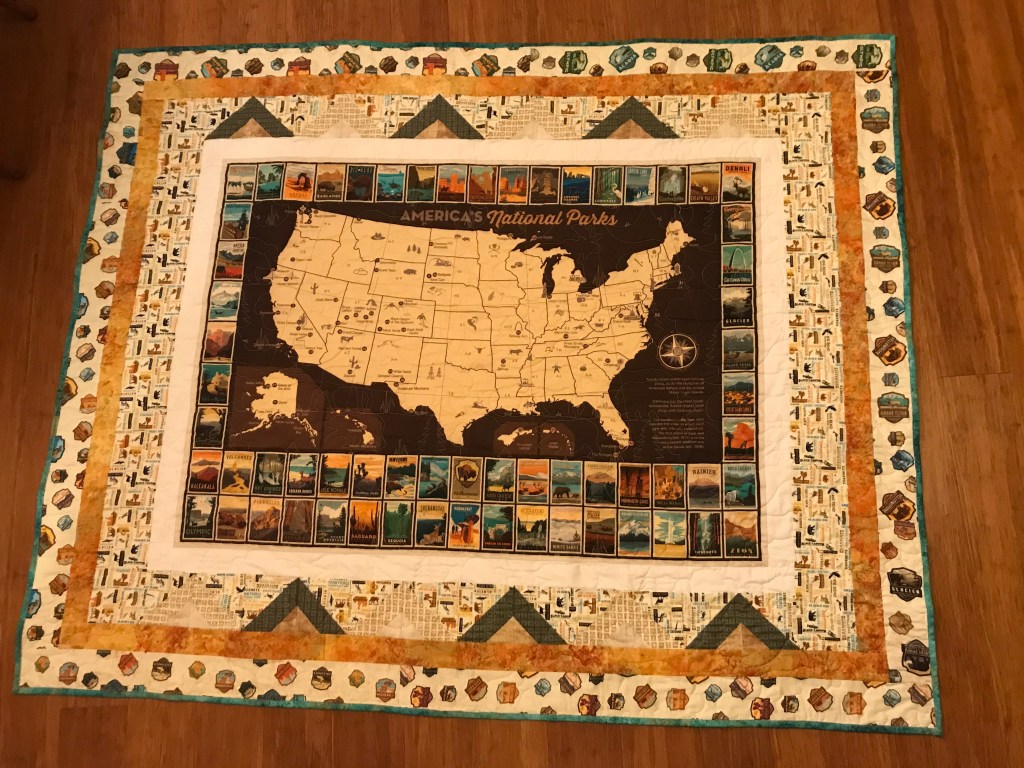
When I saw this fabric, I knew I had to make a quilt for a special someone. I have a family member who has made it their mission to visit all the state parks and I believe they finished their quest a year or two ago.
This one was pretty straight forward. I used the big panel piece in the center, added little “tents” on the top and bottom boarder since he camps a lot, and added two strips of color for a bit of pop. I was worried that the fabrics would look too brown so I used some leftover bits from my Ireland quilt for the yellow and blue bits. I was glad to see how well they worked out, and I was glad that I didn’t have to go back to the store to find colors to match.
I was so excited about this fabric that I bought a little of most of what they had before I really had a plan. In retrospect, I should have picked one to three that I really liked and then matched some plain colored fabrics with them. I felt like there were so many busy fabrics that when you looked at the project as a whole, it was difficult to see any of them. They all sort of blended together. It all worked out in the end though.
While I was working on this quilt, I discovered a new quilt shop in my area and decided to try their long arm services. I am so glad that I did because they had a quilting pattern that had pine trees, moose, and bears in it. It blends in, so it is hard to see, but once you notice it, the quilting design adds so much to the quilt design. I’m very happy with the way this quilt came together.
I took better photos of this quilt but I can’t seem to find them anywhere. I’ll keep looking. In the meantime, here is a bad cell phone photo to give you a general idea of the design.
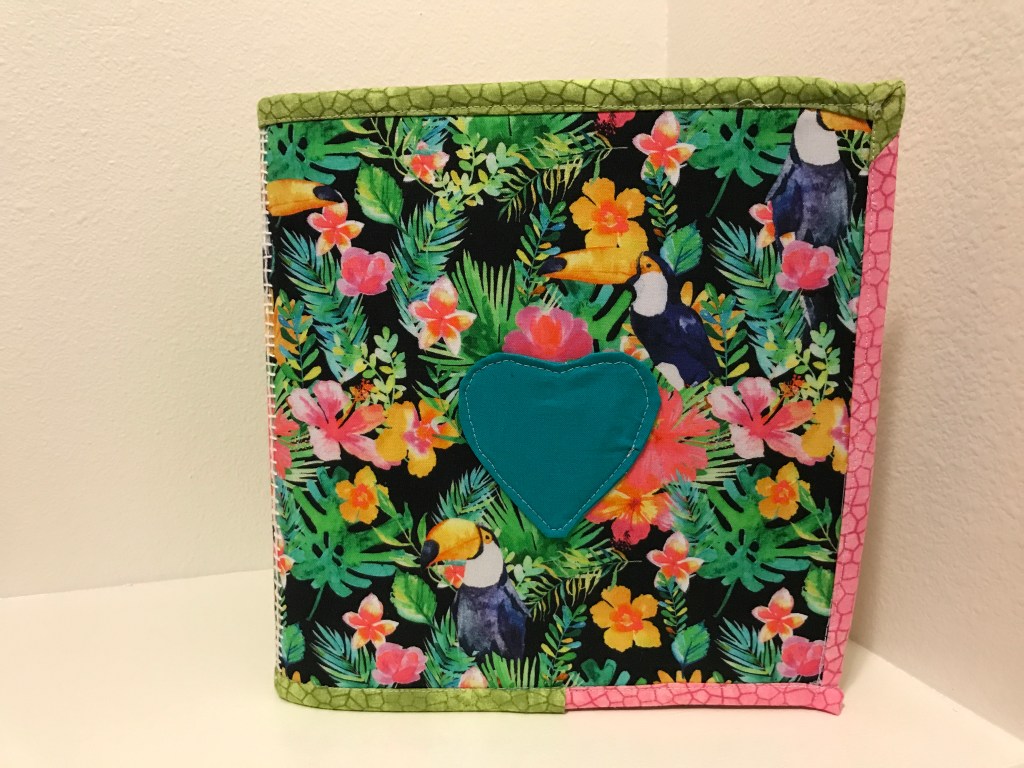
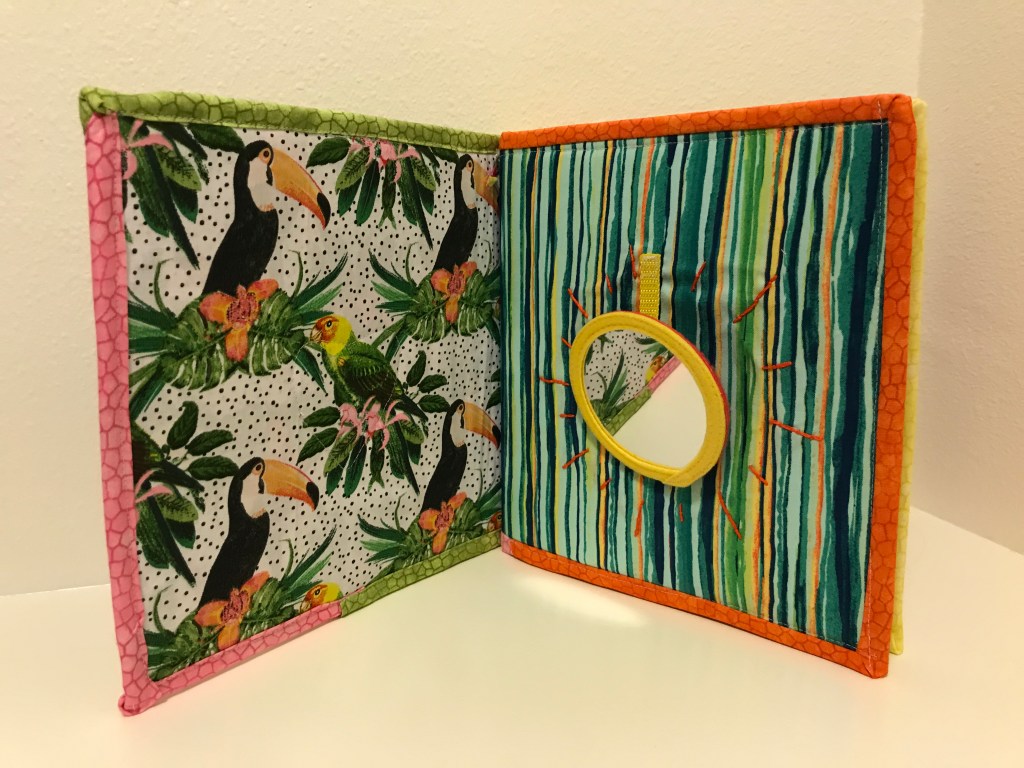
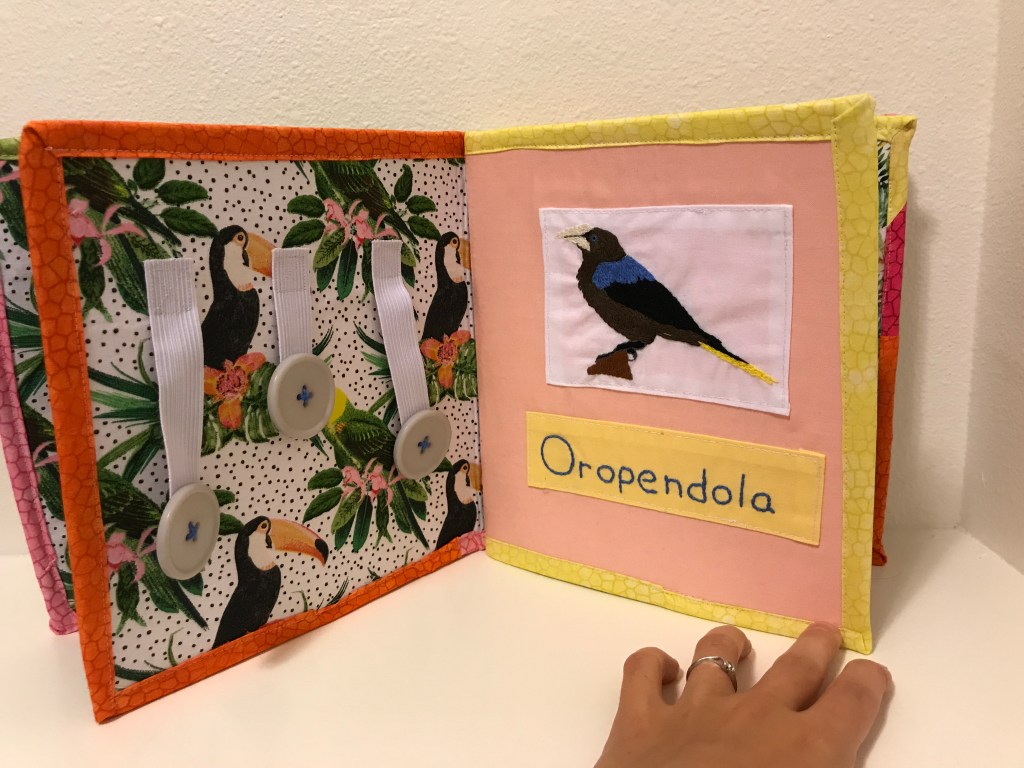
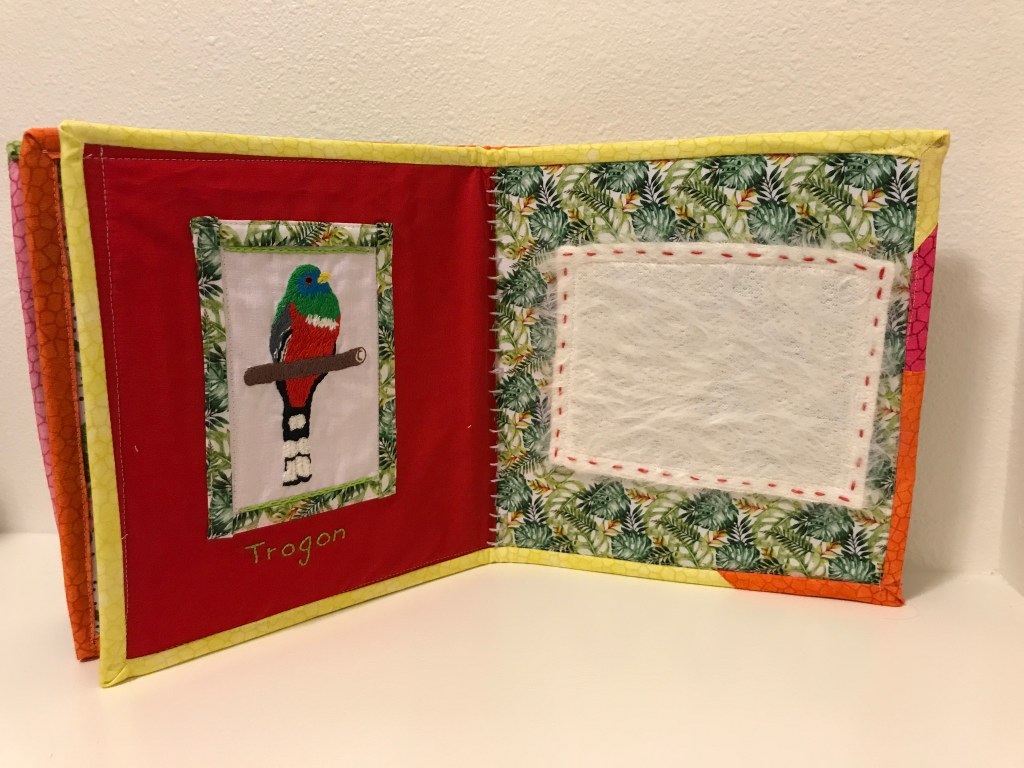
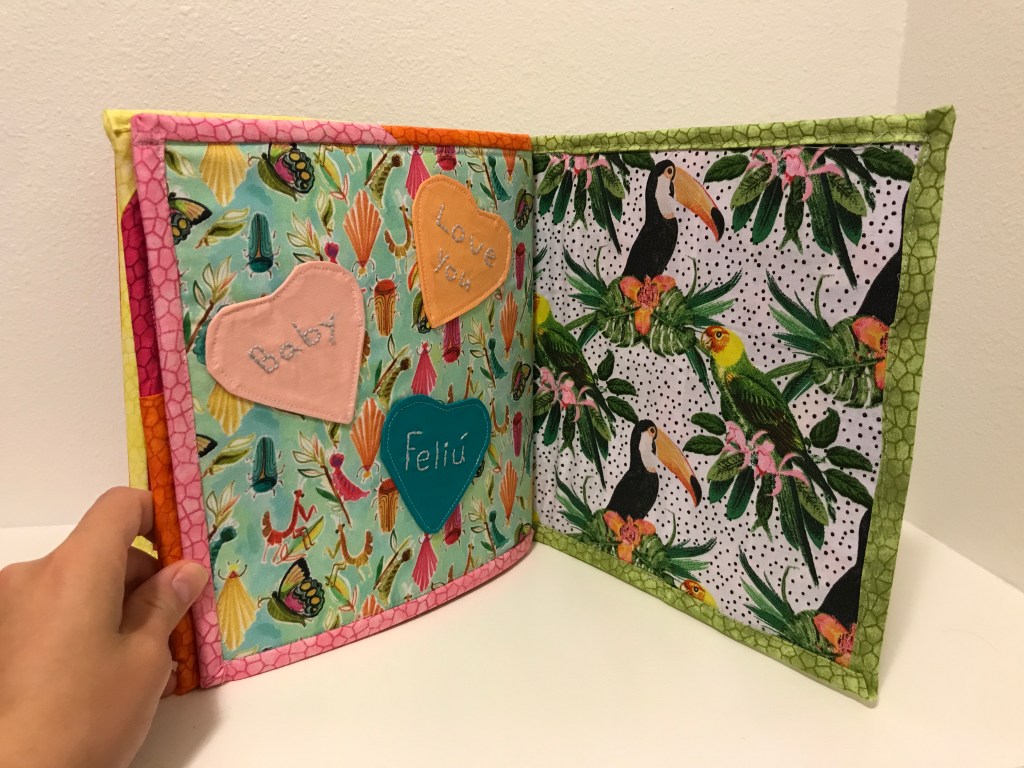
My Grandmother made my sisters and I busy books when we were little and I still have mine. It’s how I learned to tie a shoelace. I decided to give it a go for my new niece. Naturally, I didn’t use a pattern, or know what I was doing, and I had a tight deadline. I managed to pull it all together somehow and I quite like how it came together.
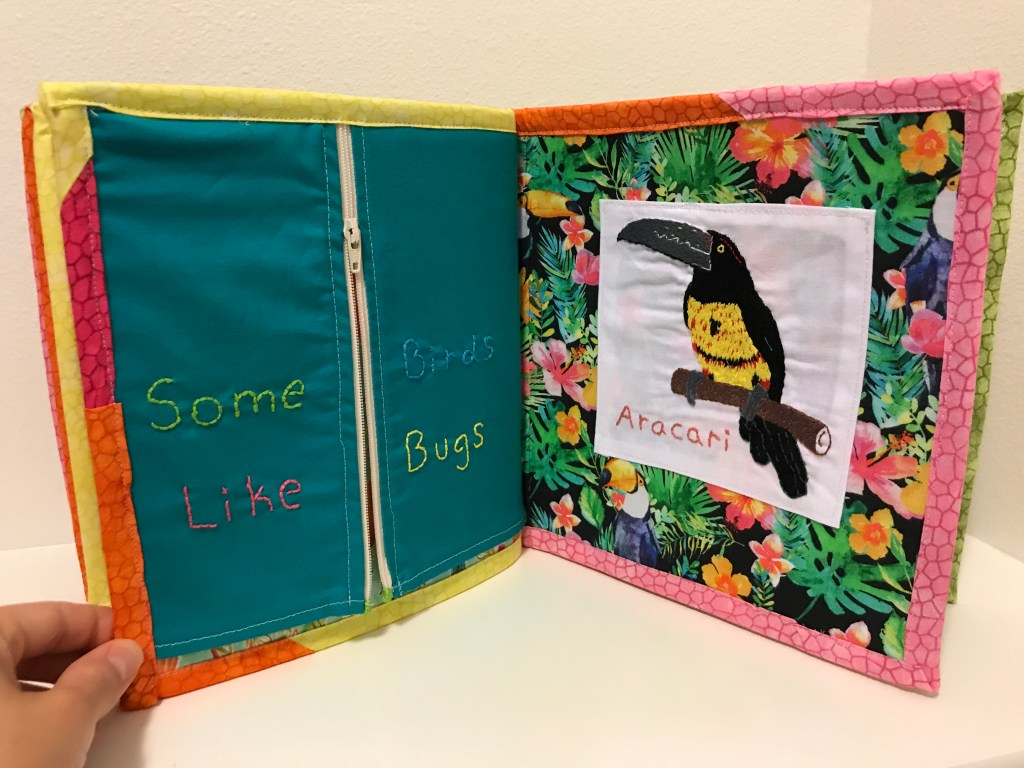
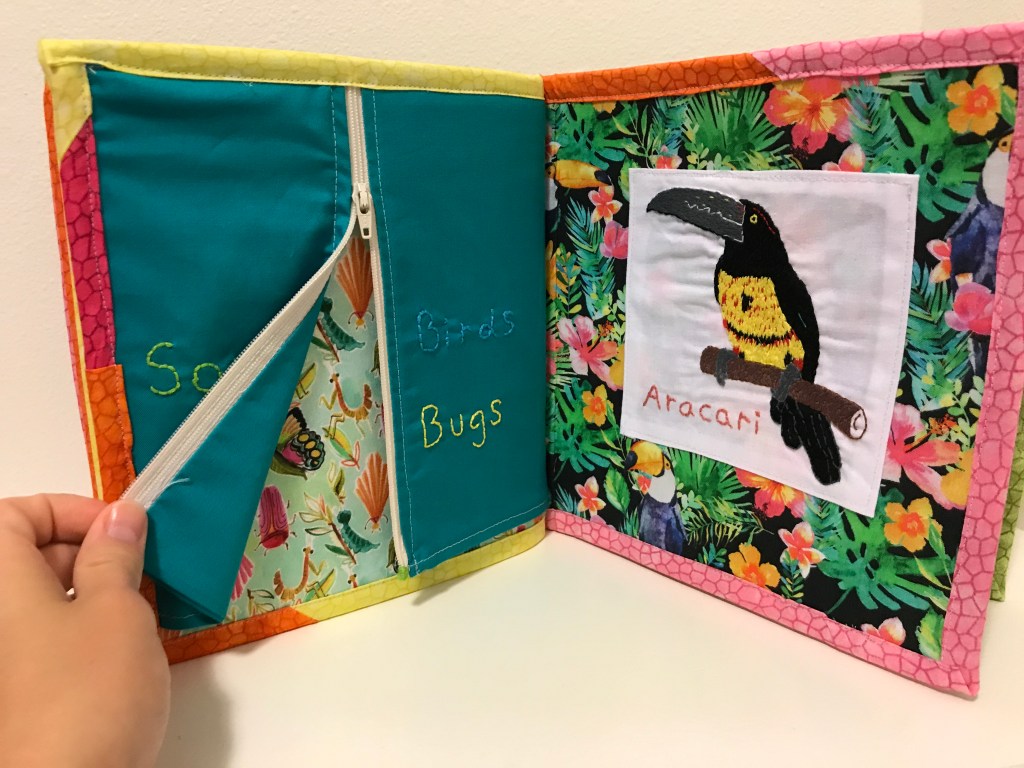
Initially, I thought I would do birds of Panama, A-Z, but when I realized I had a deadline, I knew I wasn’t going to have time to hand embroider all 26 birds. (Also, I realized that 26 pages in a busy book would be incredibly thick) I opted to use the ones I had already finished and then fill in holes as needed. To do so, I ran around the house looking for items that might be appropriate. I cut the mirror off of an old toy, took buttons, elastic, and a zipper from my sewing box, and ran to a store to find a strip of fabric that would be fun to play with but would be as baby proof as possible.
I had two choices with this project. 1. Cut corners and get it done on time, or 2. Be perfect and not get it done on time. I cut some corners here and there. Most notably, the pages didn’t line up especially well when I bound it, but oh well. Babies don’t care about perfection. They just want something to chew on.
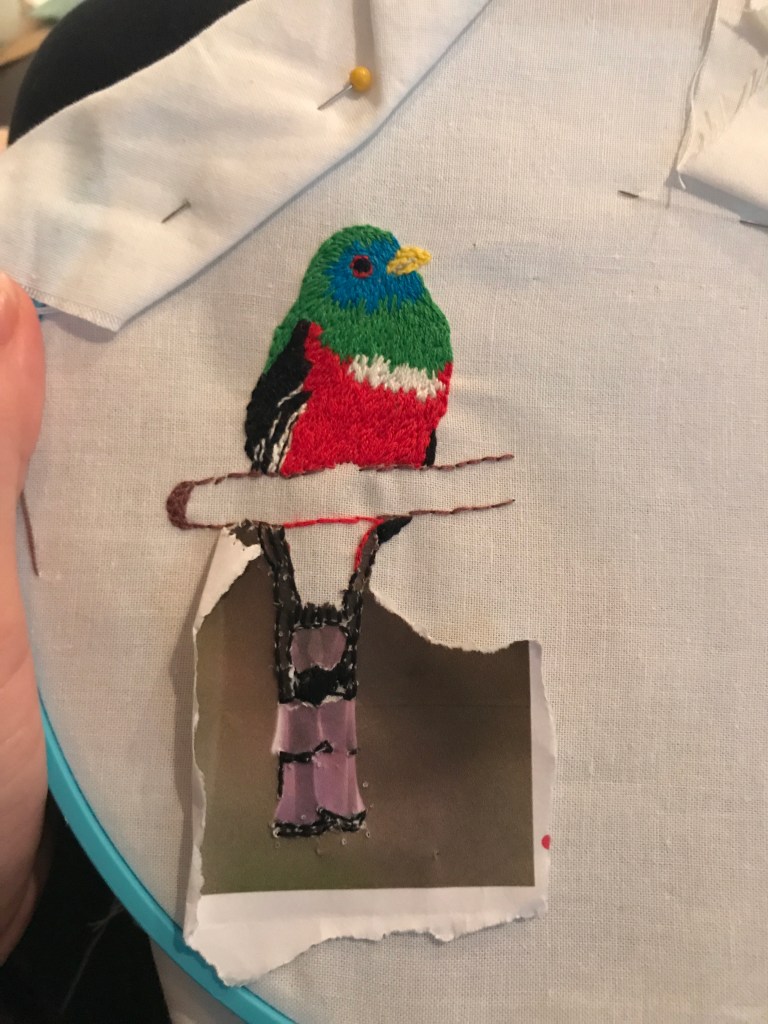
For anyone wondering: Sometimes I will draw something out if I want to do hand embroidery, but I have found that printing off a photograph can be really helpful. I stitch over the top and rip the paper out as I go. I generally take creative liberties with it as needed, but follow the general shape of the paper.
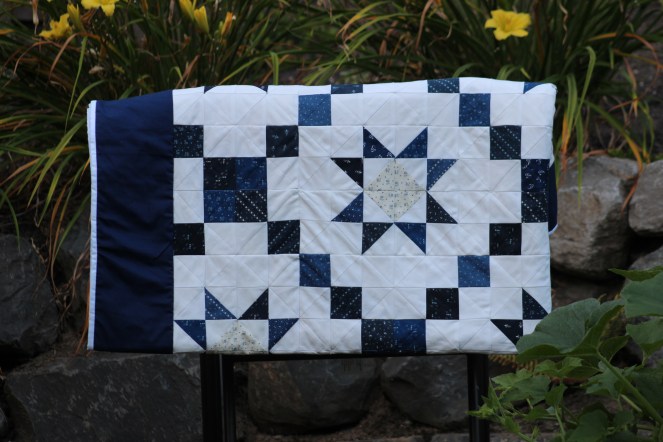
New Skill: Charm Pack Quilting/Replication Quilting
This quilt was commissioned by a friend for someones wedding. It was also my “pandemic project”. We were picking the fabric at a time where I was unable to go to the store and online stores were selling out FAST! Every time I found fabric that would work, it was sold out from under me and I had to start over. I liked the idea of using charms to save time (since I wanted to finish before the wedding) and I am so happy that I was able to finally find someone on Etsy who sold some I could use.
The tricky part for me was ordering white fabric. Finding good, actually white fabric in stores is hard enough. Shopping online made it impossible for me to know what I was actually ordering. The photos on the websites are often in poor lighting and don’t provide an accurate representation of the product. Thankfully, I ended up with good fabric.
With everyone home during the day, I took extra care to only work in small sections. This allowed me to work only during the kiddos naptime as well as the ability to maintain a tidy workspace. Everyone is happy when you put away your project after every session, especially when your workstation is the dining room table.
I would definitely recommend using charms to make a project go faster. I also feel like I had less warping since I wasn’t over interacting with the fabric.
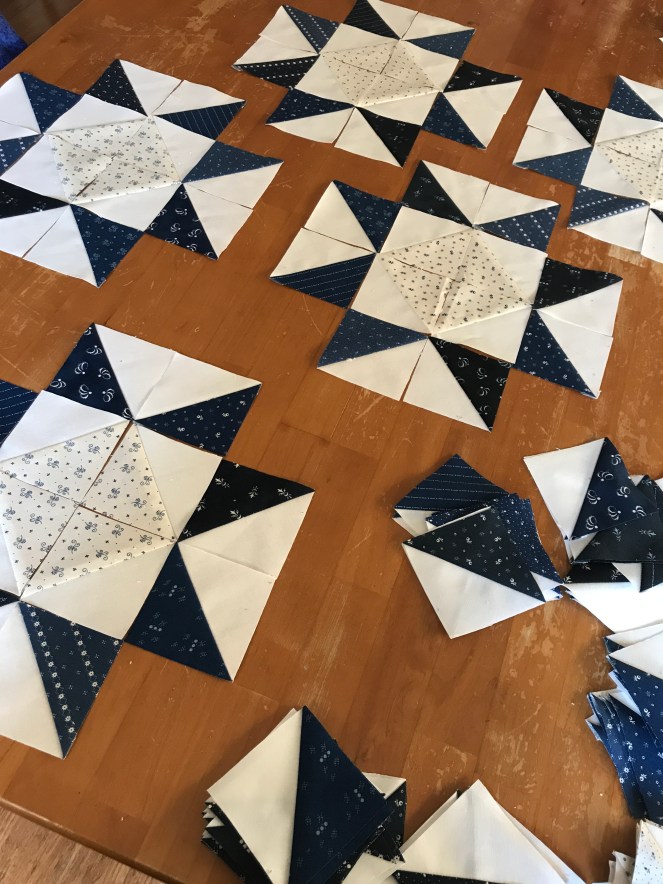
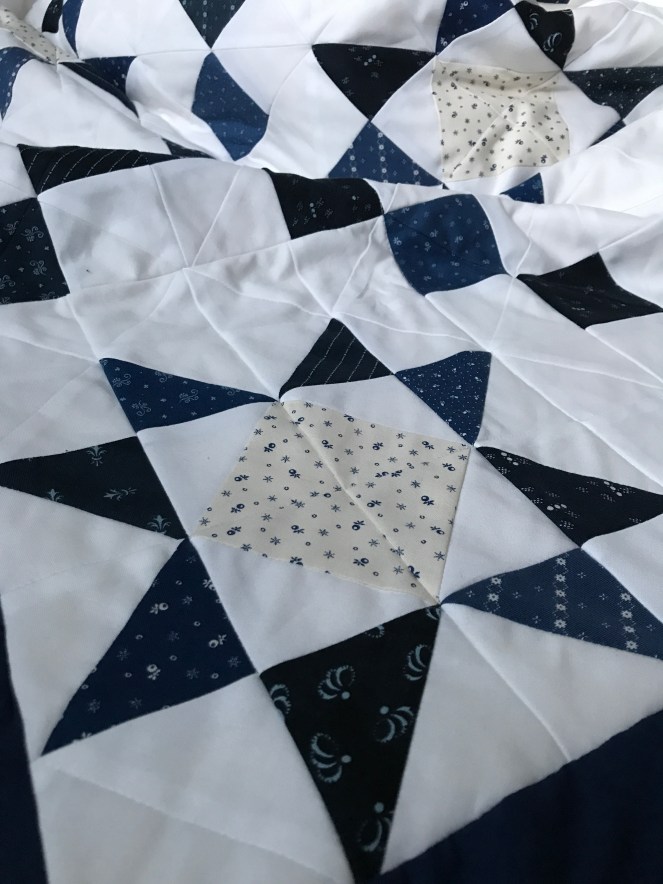
Disclaimer: I did not follow a pattern for this quilt, but I did base it off of a quilt that my friend found online and liked. It is essentially identical to the original one since my friend really liked it. You can find the original quilt here: http://quiltingdigest.com/crisp-blue-and-white-make-a-stunning-quilt/
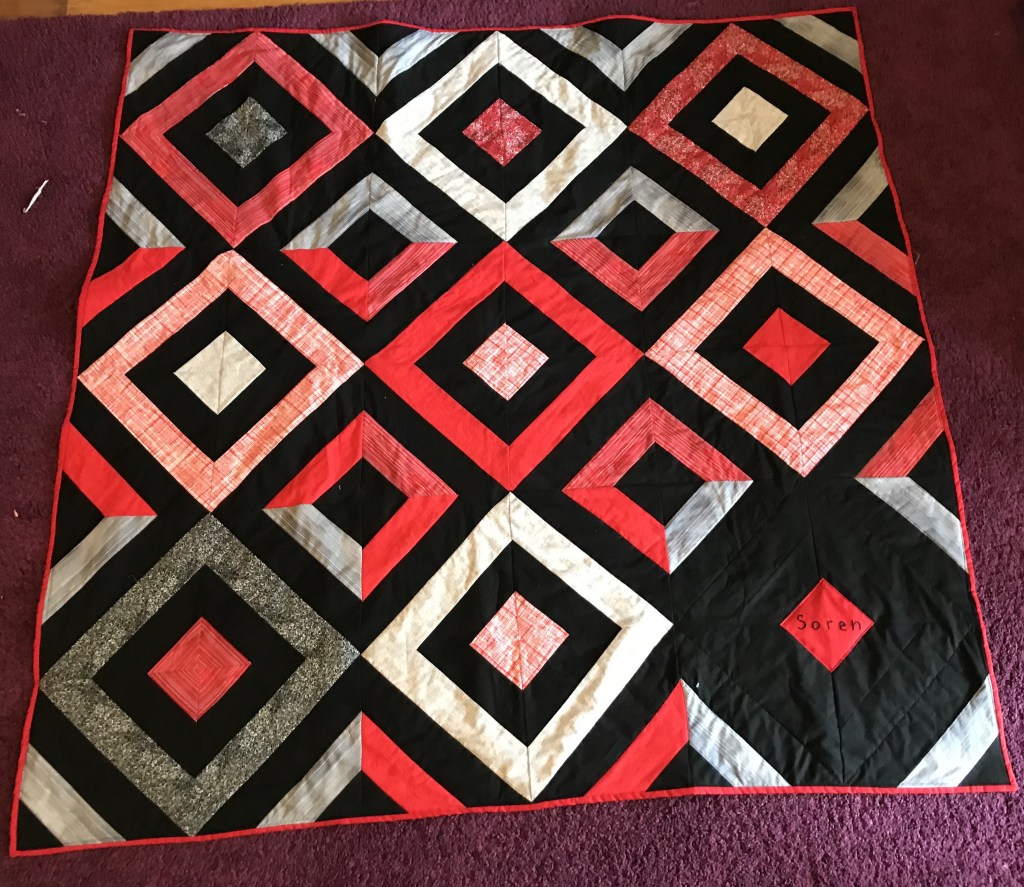
I had several ideas for this quilt, but I decided in the end that what I needed was a quick quilt that I could run some tests on. Using a pattern I had previously used for my black and red quilt, I began what ended up being a relatively simple journey. I expected more hiccups than I actually ended up having, and after my Ireland quilt, it was a nice, easy project to get myself back into the swing of things.
My top goals for this quilt were to quilt as I went along, actually quilt it, and wash the entire quilt upon completion. I always pre-wash my fabrics by hand before I start to make sure I don’t have any bleeding, but I’ve been hesitant to wash quilts that I’ve spent loads of time on (in case it ruins the whole thing).
I was going to write everything out here, but everything went so smoothly that I’ll just sum it up for you.
Long story short: Everything I tried worked. I completed my goals and didn’t end up ruining anything. The quilting was a lot of fun, and the washing and drying at the end was just fine.
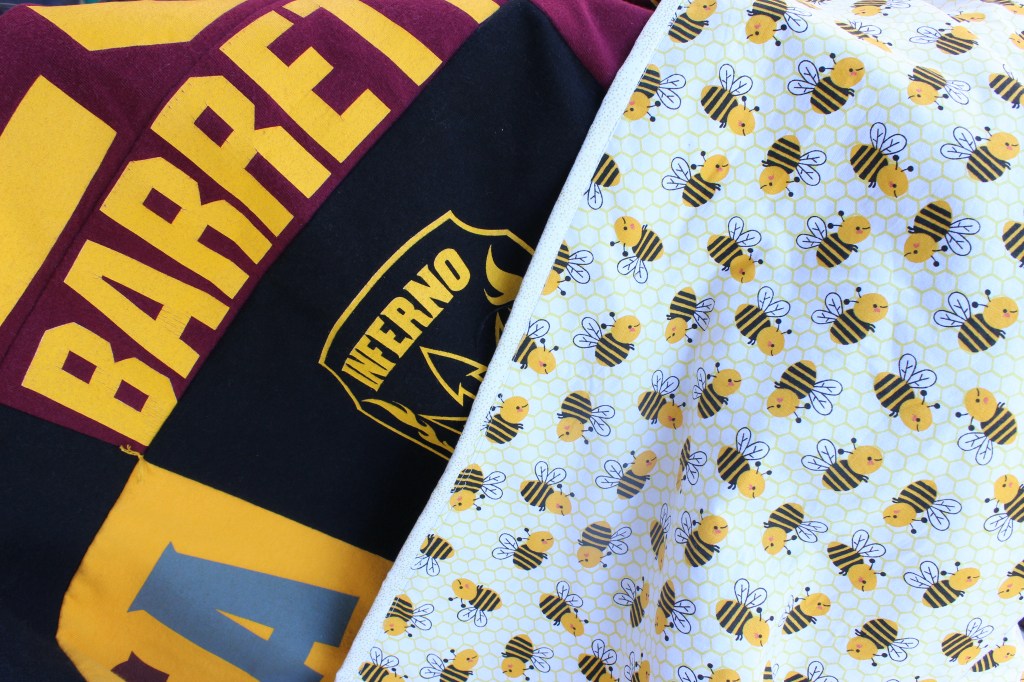
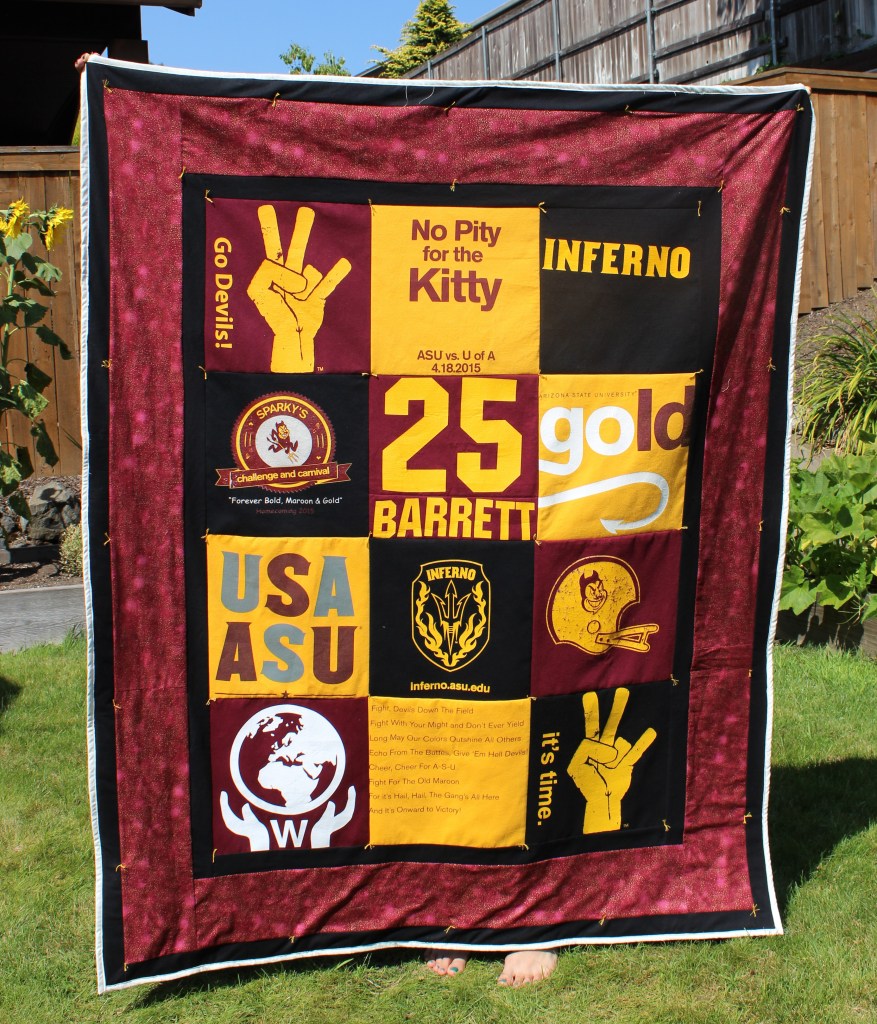
As a procrastinator, I always enjoy a good timed challenge. My sister brought some old college t-shirts with her when she visited and we only had a few days to get everything put together. We also wanted to do some sight seeing and adventuring while she was here so that gave us even less time. We were able to pull it off and have it put together just in time for her to take it home on the plane with her. We saved ourselves some time by making it a tie quilt instead of machine quilting it, and machine sewing on the binding.
The backing fabric might seem odd since ASU’s mascot is not bees, but when my sister was going to school they had frequent bee alerts (because they get giant swarms of bees there). This cute fabric gave the “memory” quilt more meaning than the shirts alone.
I had seen someone online use a light weight fusible stabilizer on the backs of the shirts to keep them from warping or stretching during the cutting and sewing process (since the t-shirts were not 100% cotton). It adds a few more steps, but it works like a charm. I don’t think I will ever make a t-shirt quilt again without using the stabilizer.
The colors in the photo below are way off because we had minimal time to get a photo before packing it up for the plane, but at least we got a photo.
New Skill: Modified accidental landscape quilting.
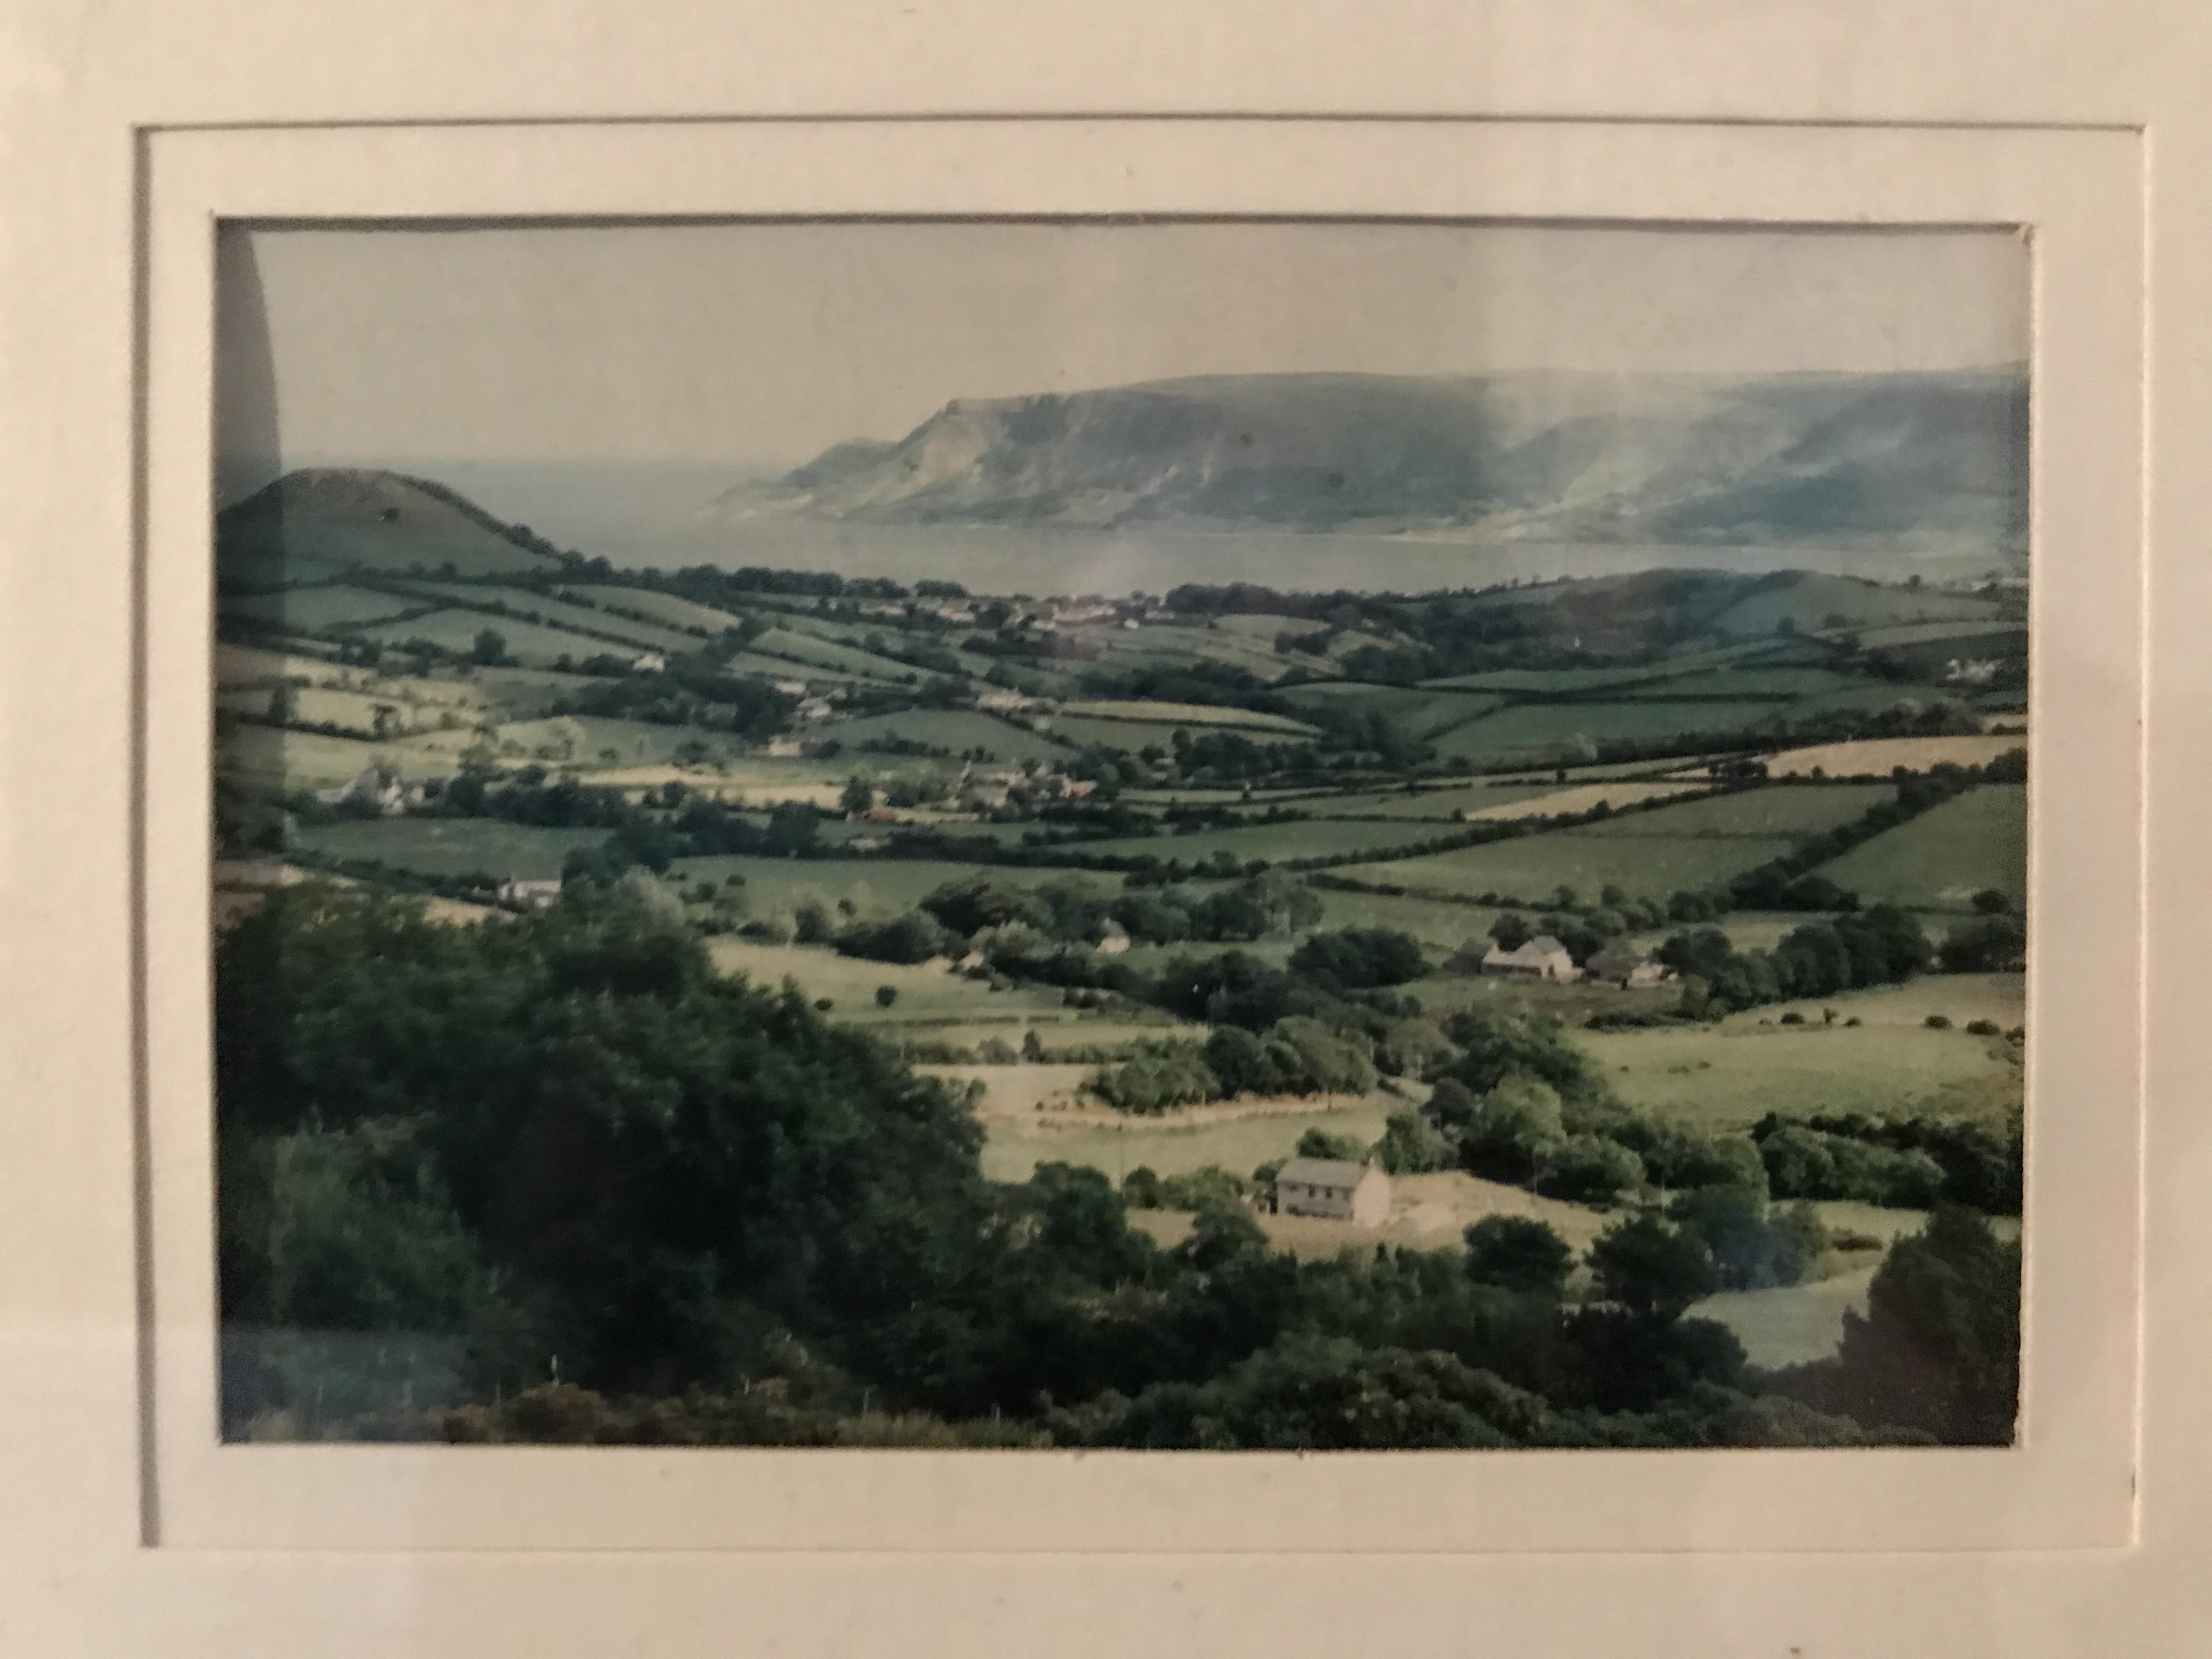
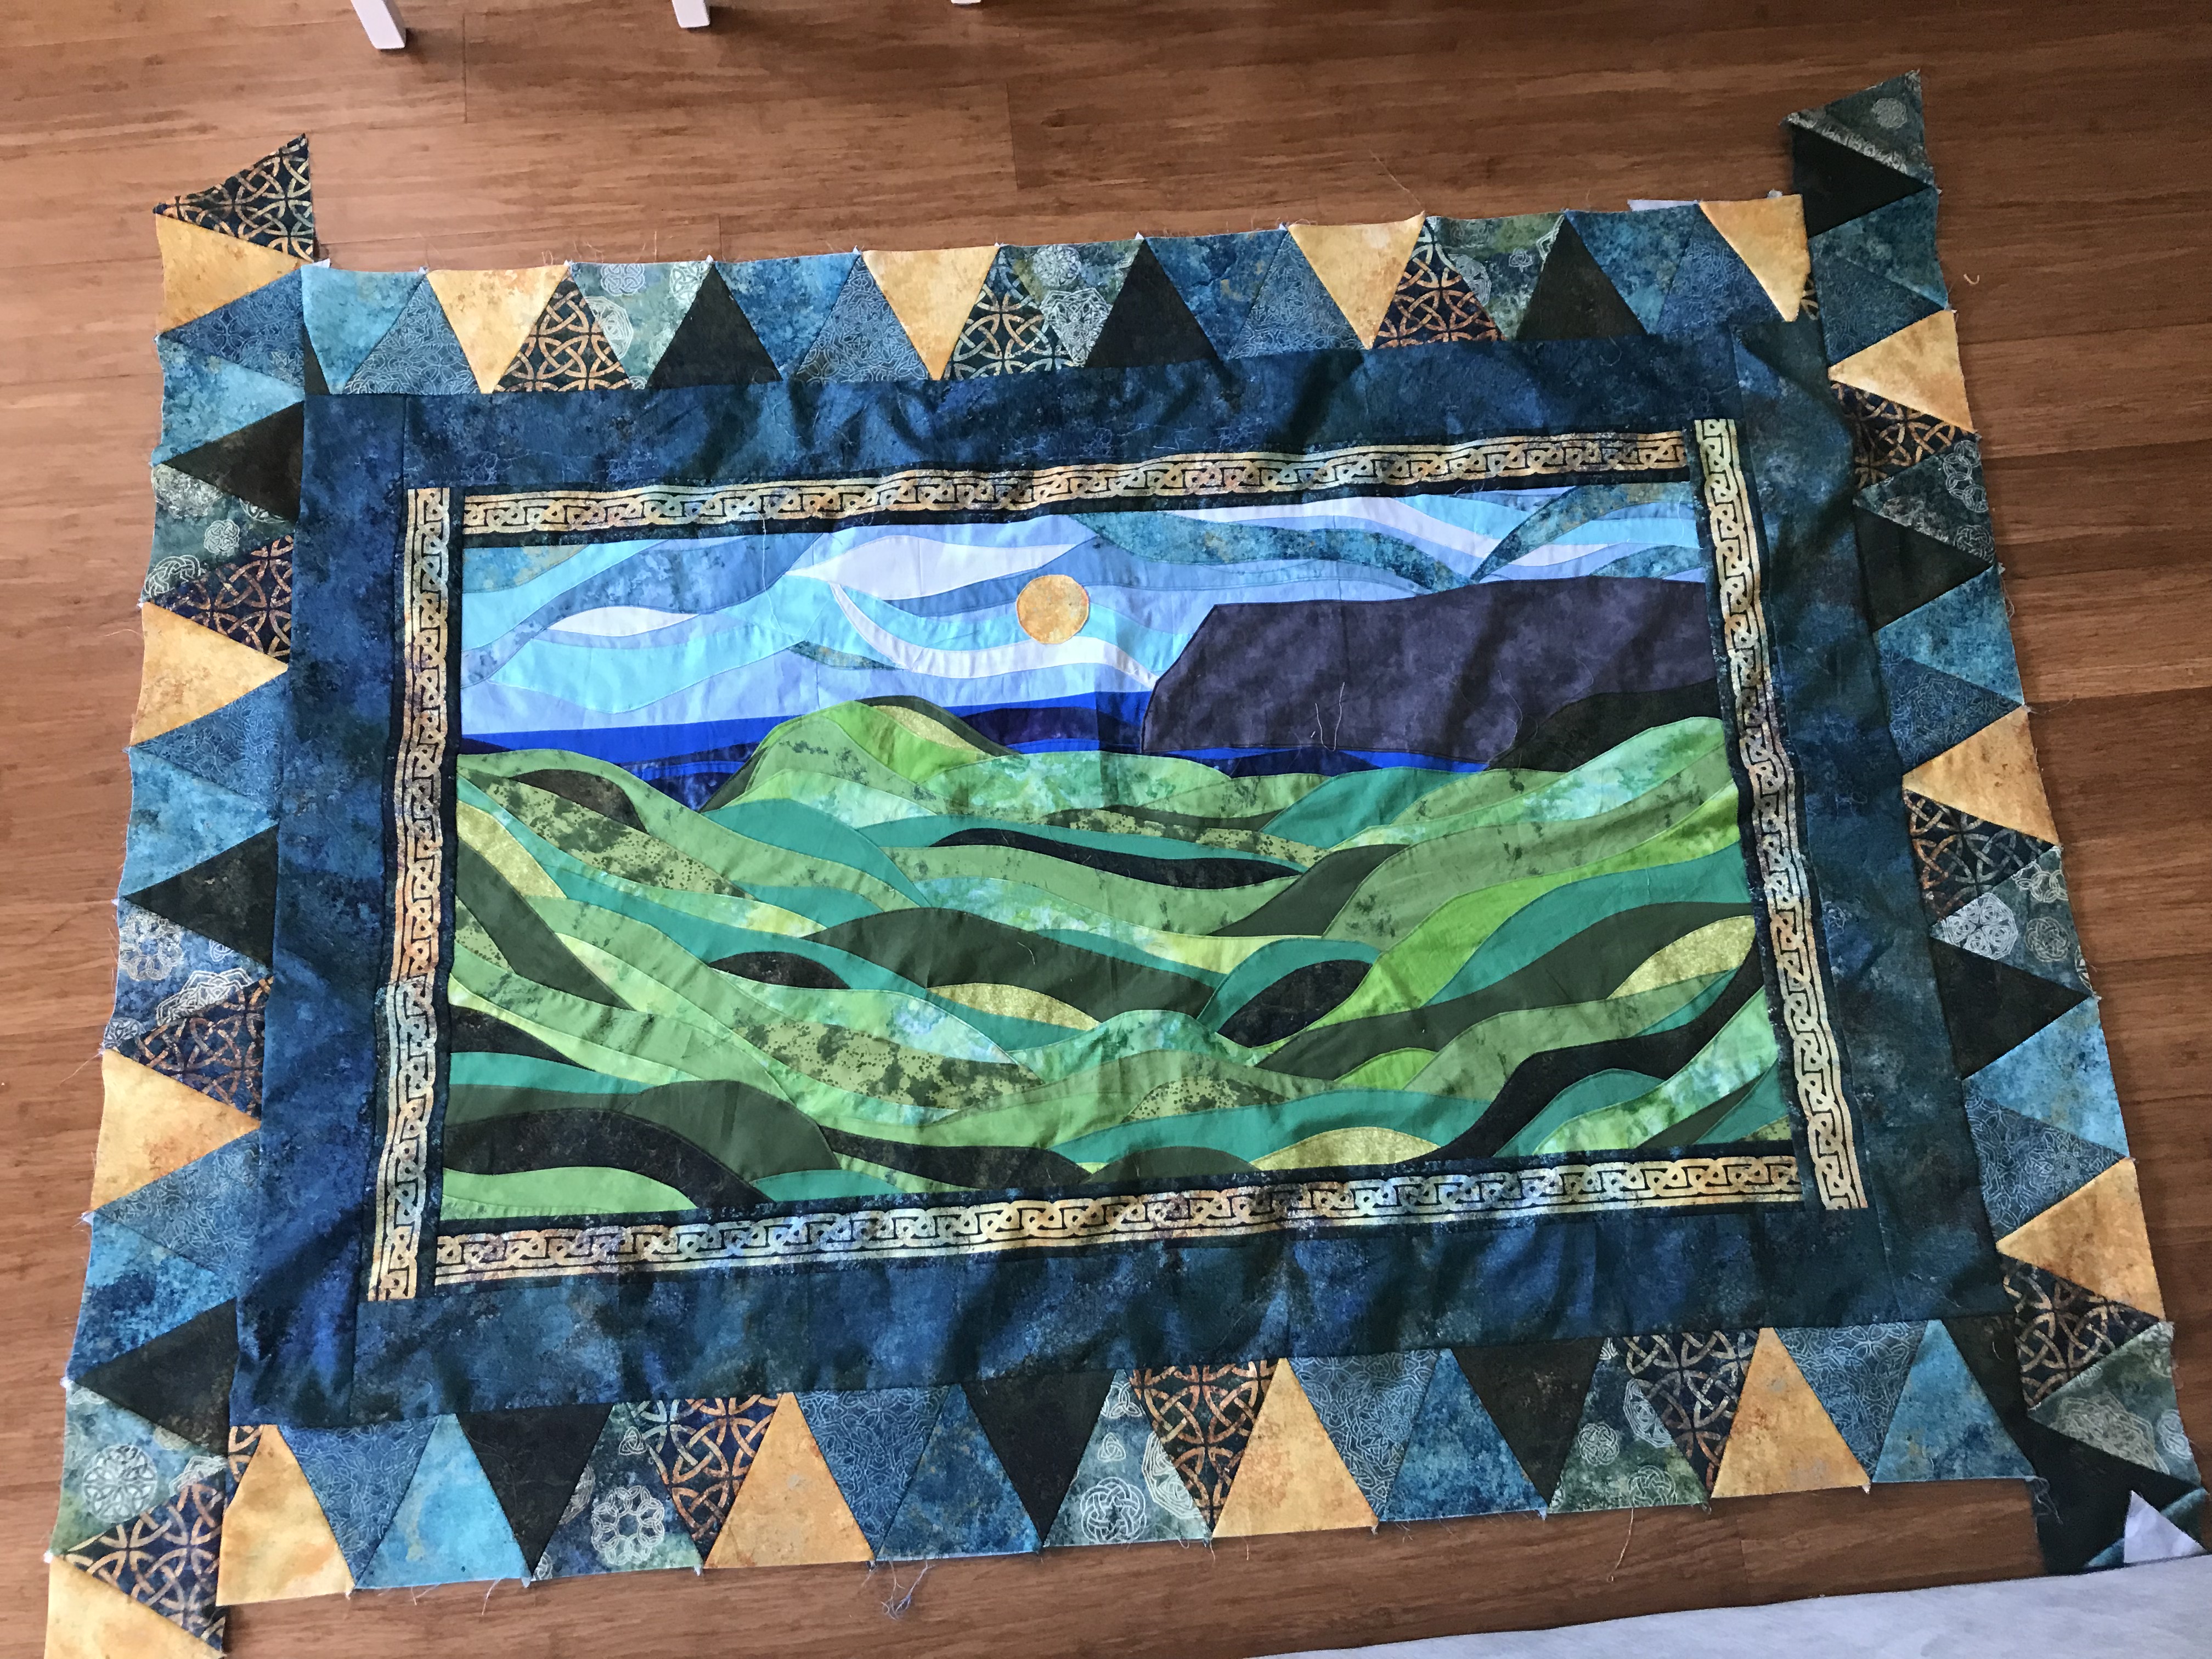
This quilt took more time to make than any of my other quilts have. The center panel of this quilt is based on a family member’s photograph of a place in Ireland called Cushendall, County Antrim. I was asked to make this for some family members who were having a baby. Even though I took some creative liberties with it, I hope they enjoy it.
I struggled a lot with tension problems in this quilt. Specifically within the center panel. So much so that I hadn’t even really considered what I was going to do with the rest of the quilt. Then I came across this stunning Celtic fabric in a small town quilting shop, and it all came together. The tension did get a little worse though because I had to go back and incorporate some of the new fabric into the already mostly finished center panel. Adding long strips as boarders seemed to fix the majority of the tension issues so I’m glad I went with that option.
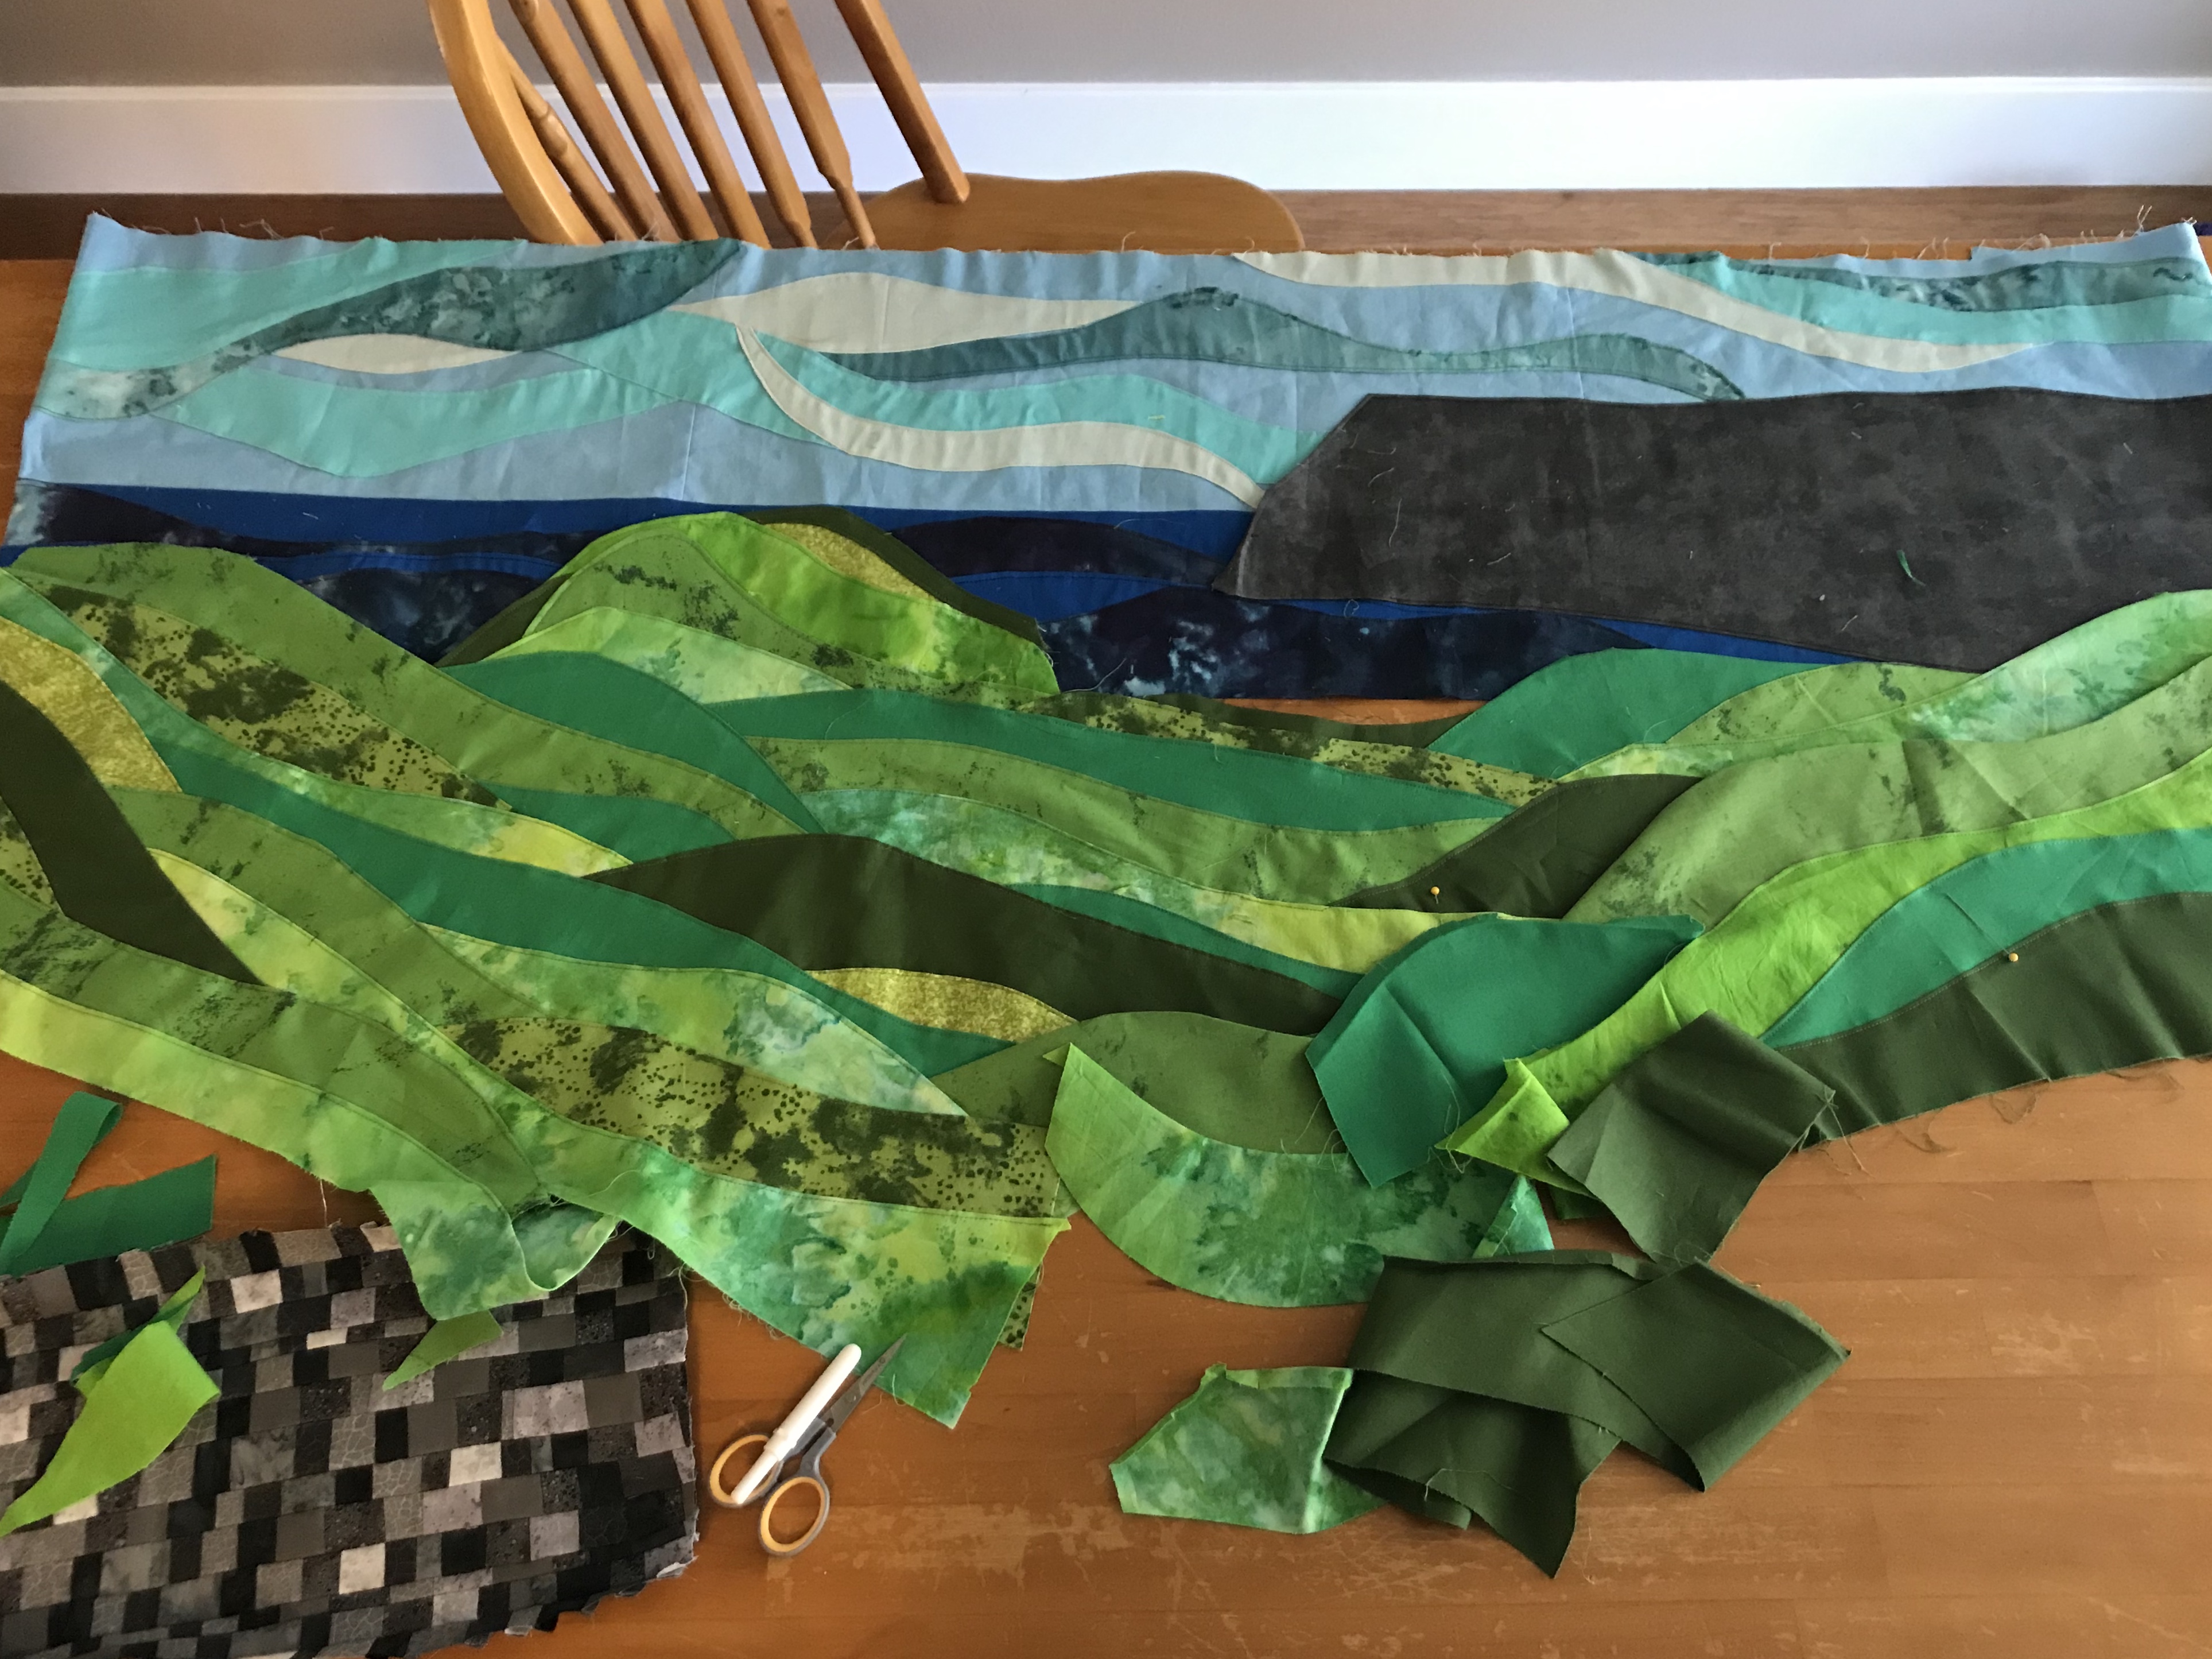
Aside from the photograph, I was inspired by a quilting technique called accidental landscaping or accidental landscape quilting. Since I couldn’t find anyone online who had done it as more than just a wall hanging or a decorative quilt, I had to figure it out as I went along.
My goal was to have no raw edges, to not use tulle (as they typically do with accidental landscaping), and to not have vertical seams in the rolling hills, ocean, or sky.
I know it’s just a quilt, but this quilt is so stunning. I generally don’t get to use beautiful fabrics because I’m often making quilts with childish themes so it was exciting to get to work with pretty fabrics. I have some leftover so maybe I’ll make a little something else as well.
Below is one of the two photos of Cushendall I used as the inspiration/template for this quilt. I’ve also included a photo of part of the craziness that was putting the rolling hills together.
Whew. This quilt was a crazy whirlwind. LET. ME. TELL. YOU.
I had spent a while trying to figure out what to get a young boy for his birthday and I decided, screw it, I’ll just make a quick quilt with my fabric stash. Quick and easy…yeah, sure.
The party is in a few days. I use some stashed fabrics and spend two evenings sewing. I realize that the layout isn’t working. I’ve tried everything but it looks terrible. It’s the worst quilt I’ve ever made. I can’t give it away. It’s late, I’m tired. Someone please burn it. I’ve wasted 2 days.
I decide to start from scratch. I buy everything I need and work ALL DAY following a pattern I found for a simple quilt. I’d be done but I make the mistake of attempting a quilt as you go (for the first time and really late at night) and it doesn’t work. I’ve ruined my backing fabric and batting.
Now it’s the morning of our wedding anniversary. I’ve been frantically working on the second quilt for 2 days and our house looks like a bomb went off in a fabric store. I scramble to finish sewing and do some damage control so we don’t come home to a crazy house. Quilt is still not done. I tell myself I won’t come home and sew after dinner, but I do, and I’m so tired that I can’t figure out how to machine sew a binding on (something I regularly do) so I give up.
The following day the party is at noon. I try to finish as quickly as possible. I’m about a half hour late to the party, but I made it and I’m happy to report that even though the one year old “helped” with the quilting (so it’s a bit bunched on the back) the birthday boy liked it.
This Peter Pan Quilt was a spontaneous addition. I originally had a lap sized blanket in mind for someone but every time I worked on it, my husband would ask if we were going to keep it because he thought the fabric was so fun. I ended up having enough fabric to make a second quilt that we could keep and ended up with this twin sized quilt.
I had been inspired by a friend to try my hand at hand quilting so I thought this would be a good time to try it out. It took me a while to figure out what I was doing, and I would often put it aside for weeks or months at a time whenever I had an excuse to (or when it felt daunting). Lucky for me, I was fortunate enough to have the “help” of a toddler who went ahead and cut several random stitches. This allowed me to put off finishing it for even longer because I wasn’t sure how I was going to fix that problem.
But here we are. It’s finished. Mistakes were made and lessons were learned. I will definitely hand quilt again, but my technique will differ greatly.
In a future post, I’ll show you the complimentary quilt I made that matches this one. I also made some pillow cases to go with them.
I did my hand quilting in meandering lines and swirls to emulate wind.
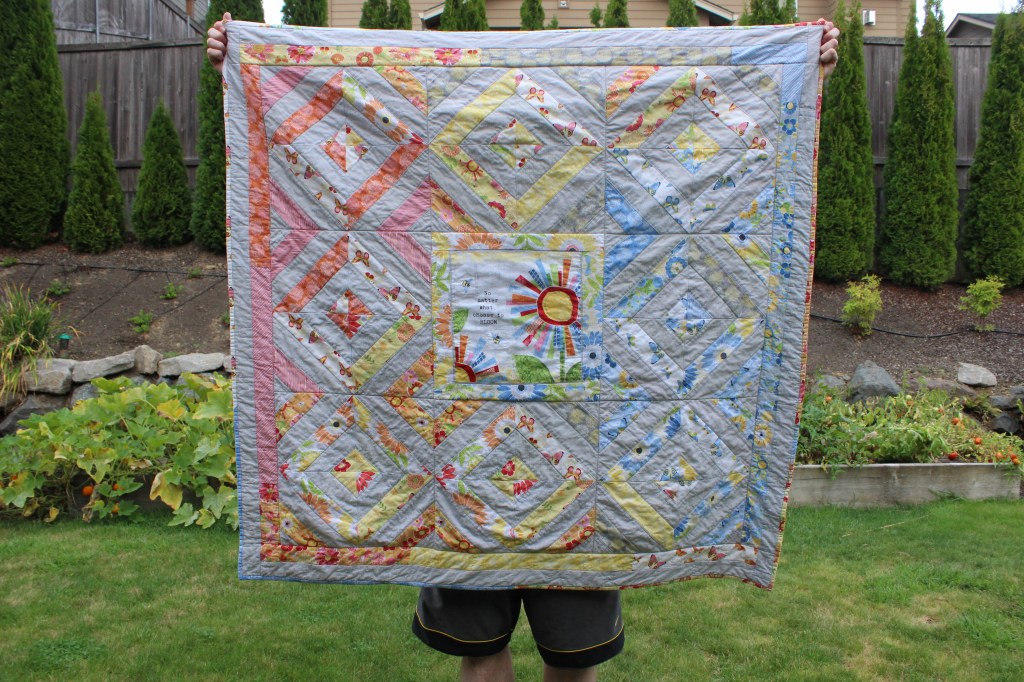
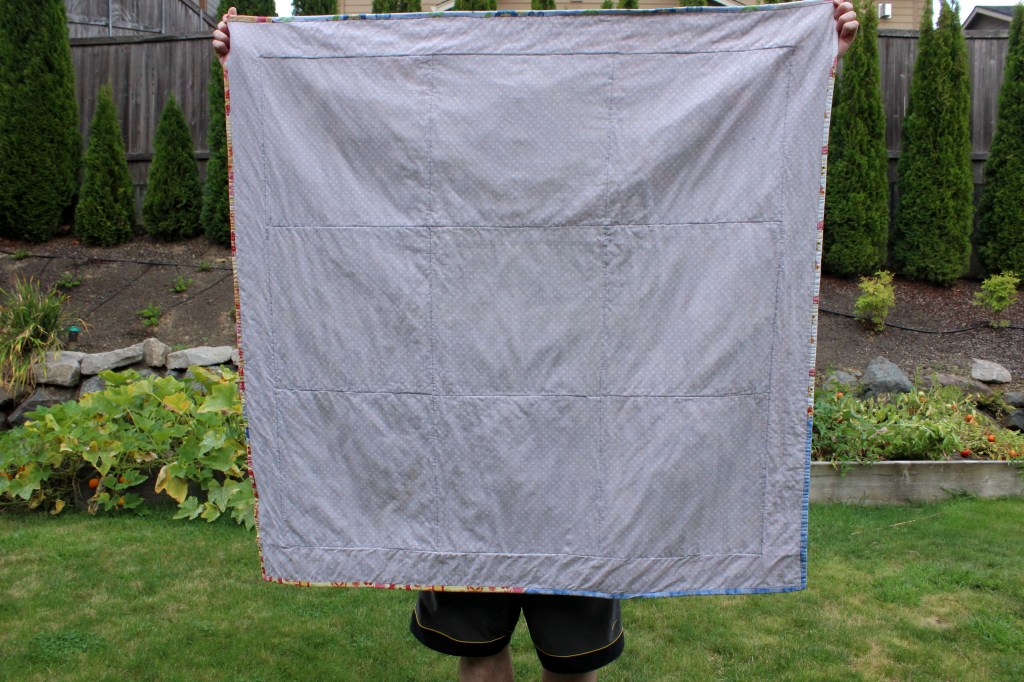
New Skill: Long arm service. (I know that’s not a skill, but it’s scary to hand over your finished quilt top to someone you don’t know so they can quilt it for you. )
This is the first quilt that I have had professionally quilted with a long arm. I liked the stiffness it gave the quilt and I hope that since this quilt went to a family that I don’t know, the extra stitches will keep the quilt in good condition for years to come.
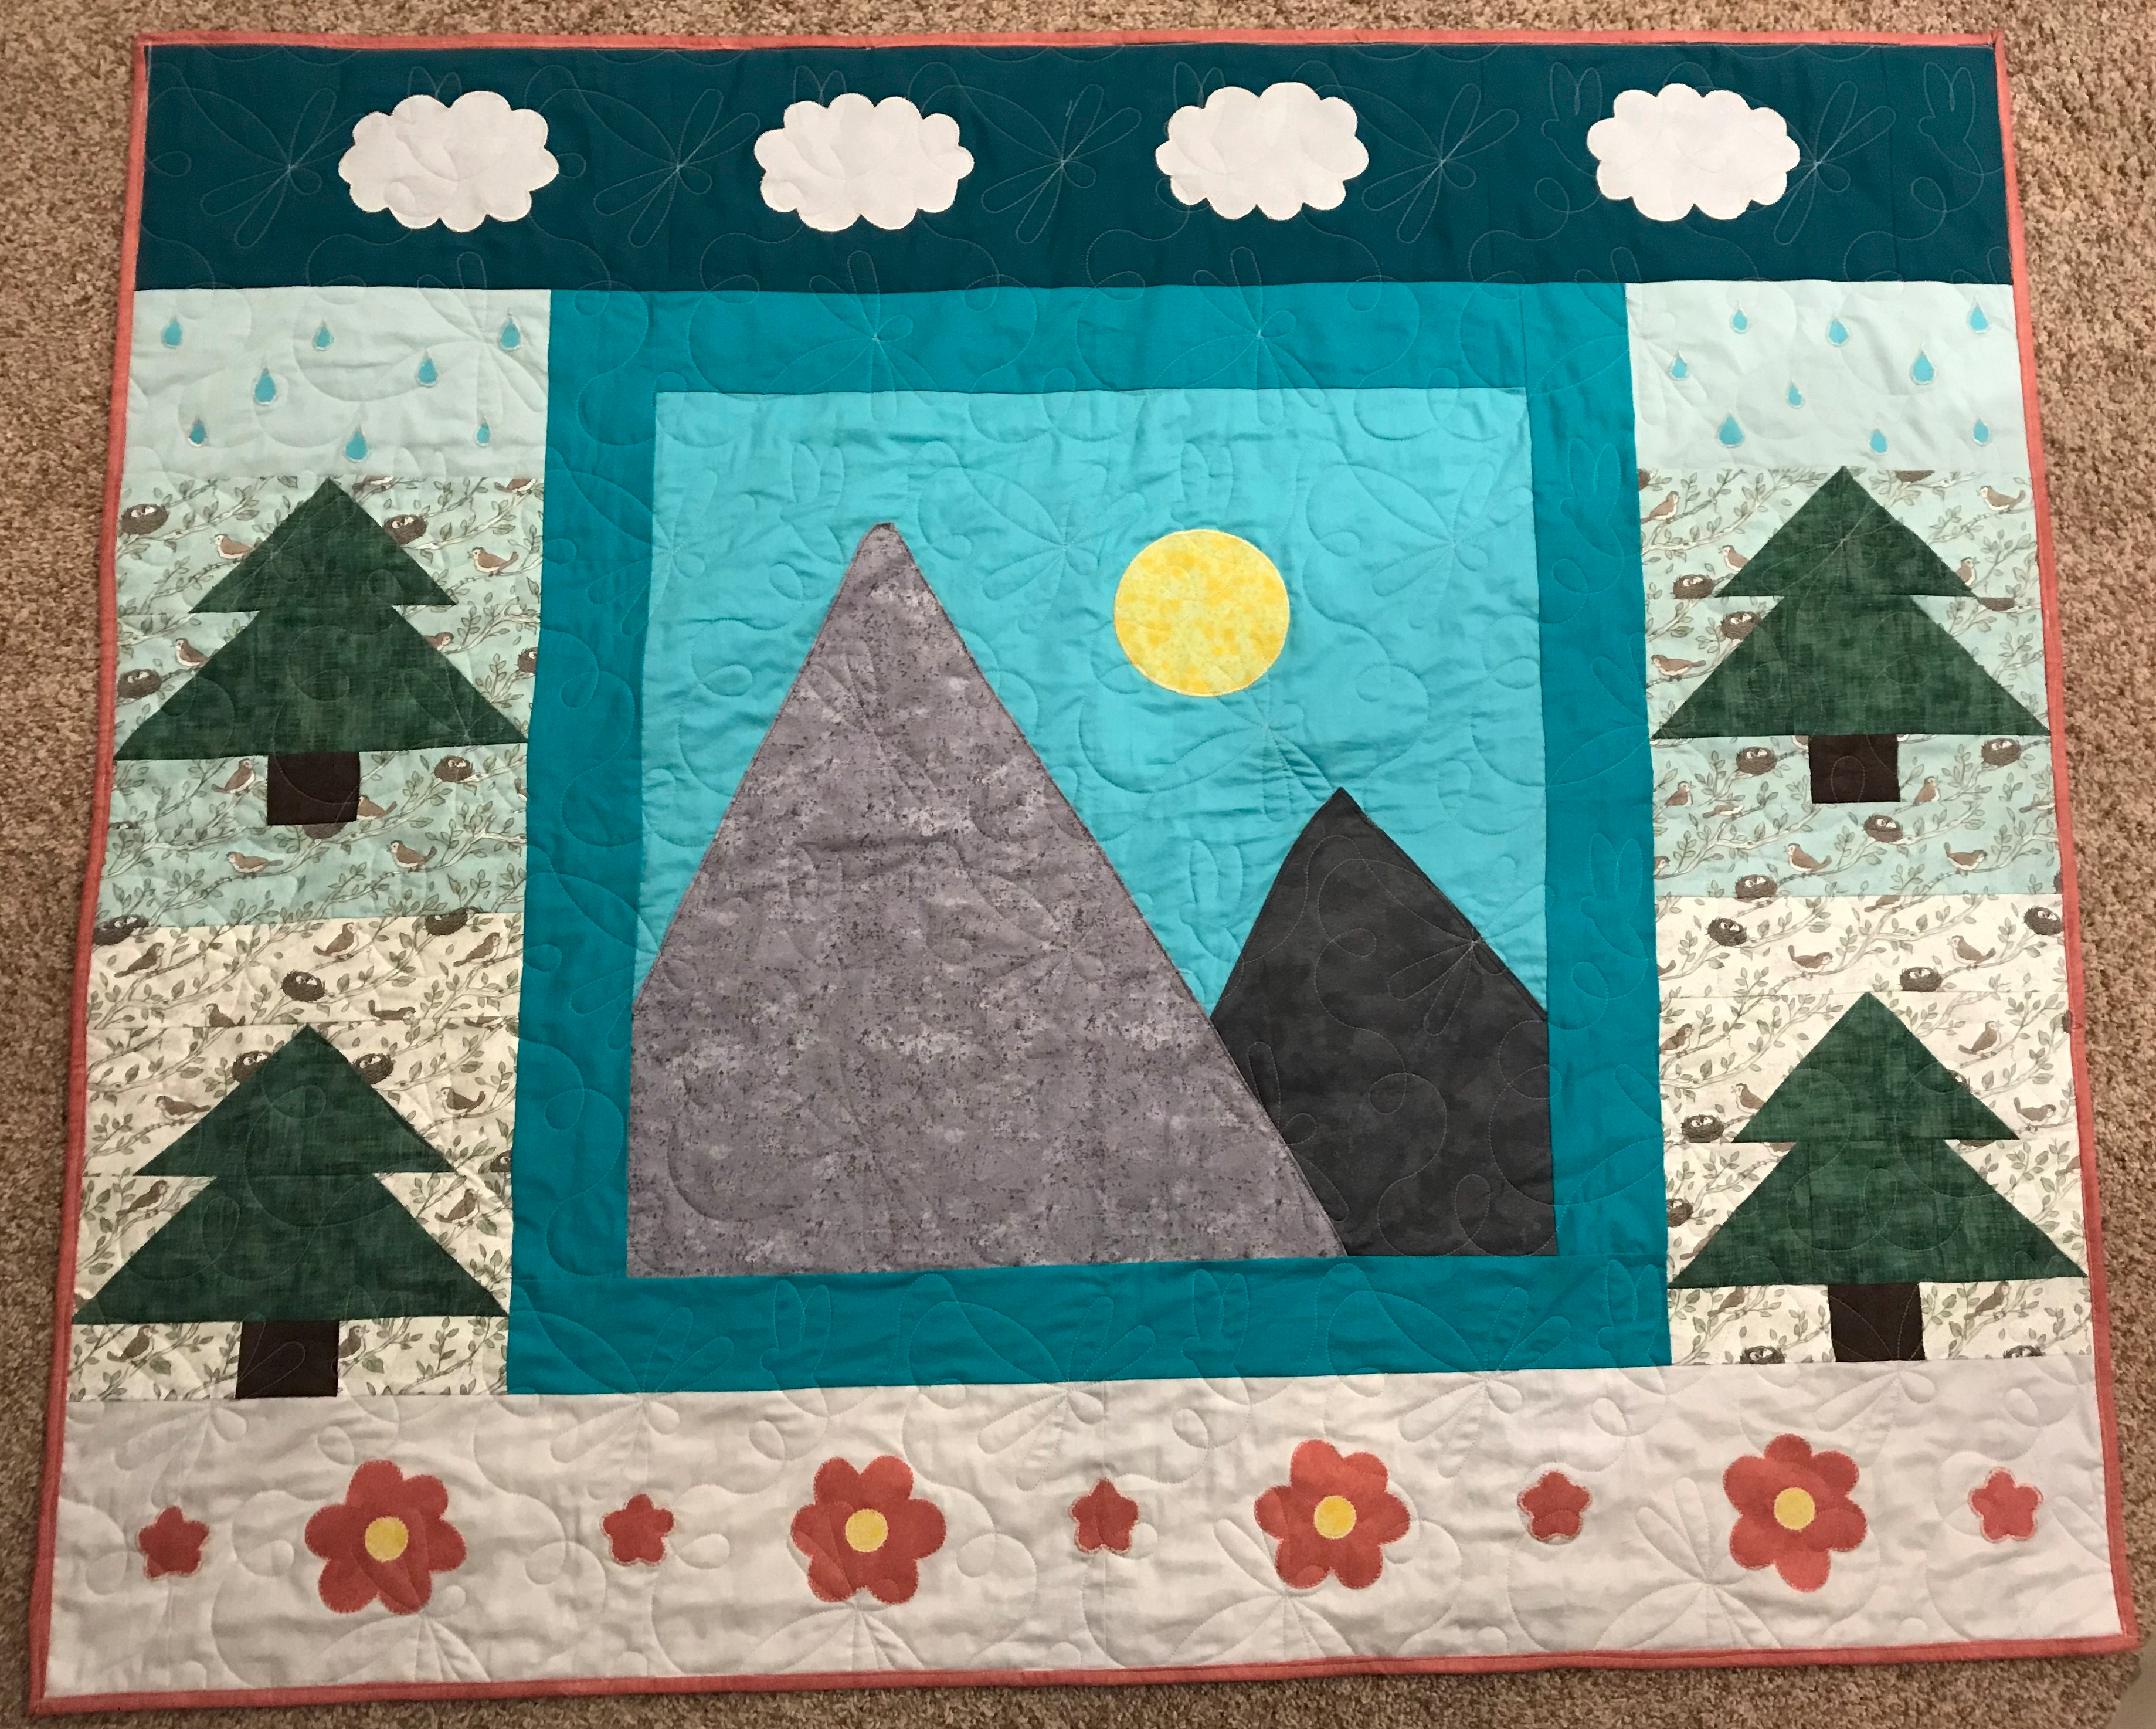
I designed the center panel to mimic my cartoon drawing style. In the future I would like to do more quilts this way (based off of drawings).
The flowers, raindrops, and clouds are as machine embroidered as I could get them. My current machine doesn’t like to do that. I’m hoping to get a new machine soon so I can have more freedom in my designs.
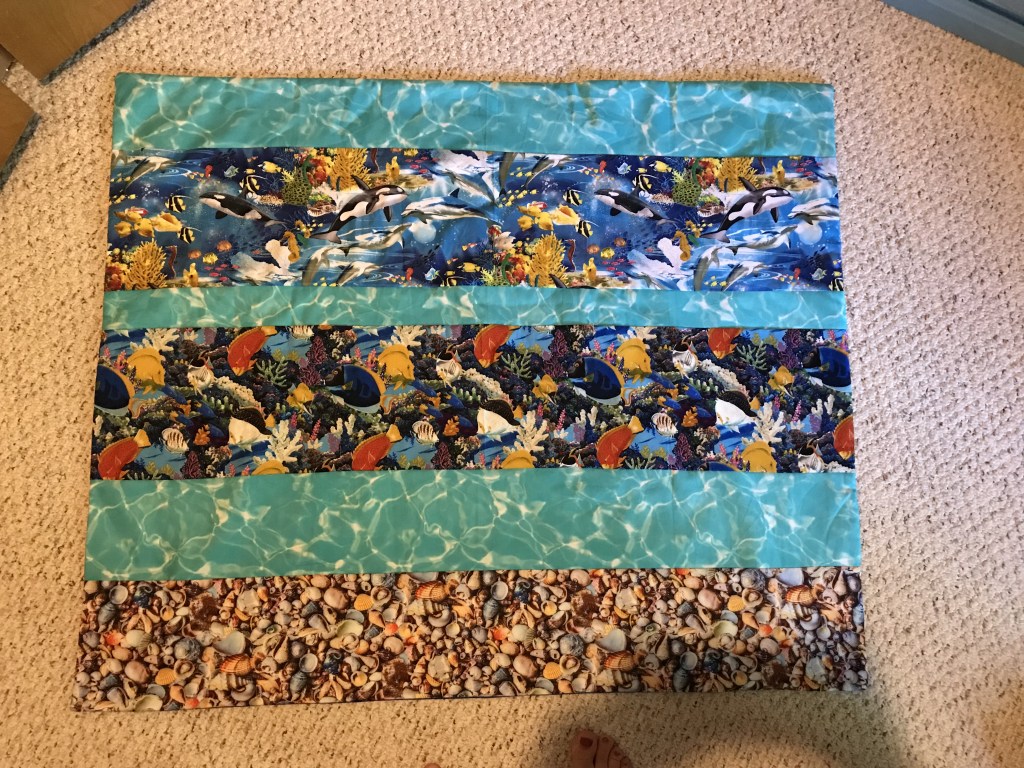
We were invited to a Baptism the day before the event. The baby needed a nap so we couldn’t go out and I didn’t know the people well at all so I didn’t even know what we would get them. My husband and I challenged ourselves to make a small quilt with some unused fabric from my California/Dutch quilt. The deal was, we put the baby down and only had until she woke up to finish it.
I do feel a bit bad sometimes because these are not fabrics I like very much and if I gave the quilt more than 30 seconds of thought, it could have been better, but I didn’t have other fabric and we were in a race against the baby clock (and anyone with kids knows that the baby clock alarm can go off literally any second).
Honestly, thought I’m not fond of the quilt, it was really fun to make and it gave my husband and I something to do together that day. A lot of people get a nice quilt and they don’t want to think about letting their drooling baby anywhere near it, so I hope I hope that the quality of this quilt allows the family to feel like they can really use it.
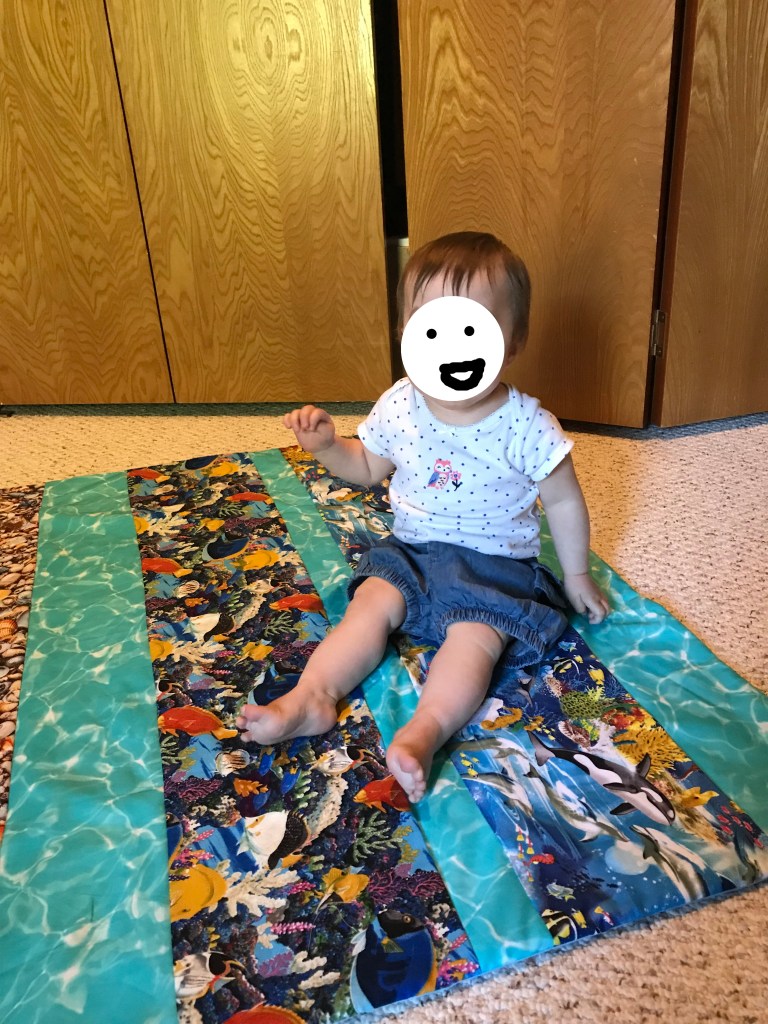
Given the title of the post, you have already learned that this project took 90 minutes. In the end, I think I still had to iron it or something after the baby woke up, but for all intents and purposes, it was complete. Speaking of complete…no quilt in our house is complete without it being baby approved, so naturally, we let the baby have a good crawl on it. Baby was all smiles and wouldn’t get off. That’s baby approved in my book.